Blog

  • How to Thaw Chicken Breast Safely: Fridge, Cold Water Microwave

    How to Thaw Chicken Breast Safely: Fridge, Cold Water Microwave

    The safest way to thaw chicken breast depends on how much time you have.

    The refrigerator is the easiest method when you can plan ahead. Cold-water thawing is faster for same-day cooking, and microwave thawing is the quickest option when you can cook the chicken immediately afterward.

    Avoid thawing chicken on the counter or in hot water.

    Safe Thawing Methods Compared

    MethodApprox. SpeedBest ForMain Rule
    RefrigeratorSlowPlanning aheadKeep chicken refrigerated
    Cold waterFasterSame-day cookingLeak-proof bag + cold water
    MicrowaveFastestImmediate cookingCook right away
    CounterAvoid—Do not thaw at room temperature
    Hot waterAvoid—Use cold water instead

    Why Safe Thawing Matters

    Raw chicken can contain harmful bacteria.

    The main concern with unsafe thawing is that the outside of the chicken can warm up while the center is still frozen.

    That is why controlled thawing methods are better than leaving chicken at room temperature.

    Safe thawing also helps make cooking more predictable because the chicken thaws more evenly.

    How to Thaw Chicken Breast in the Refrigerator

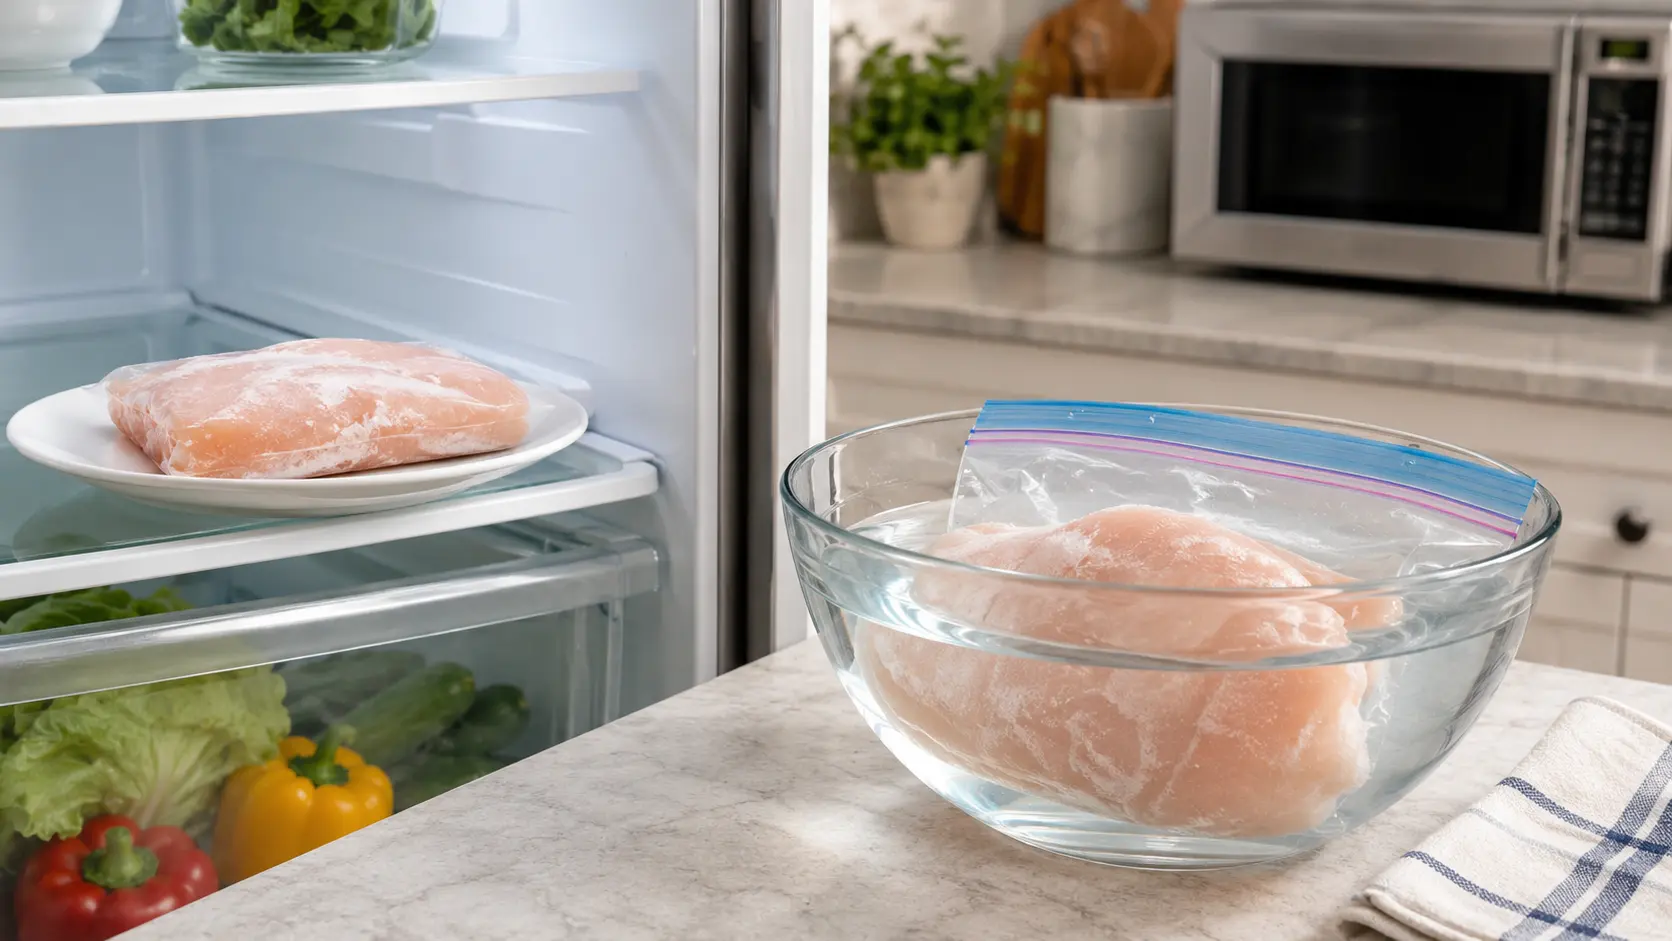
    Refrigerator thawing is the simplest method when you have enough time.

    1. Keep the chicken in its packaging or place it in a covered container.
    2. Put it on a plate or tray to catch any drips.
    3. Store it on a lower refrigerator shelf to reduce cross-contamination risk.
    4. Let it thaw gradually under refrigeration.

    Individual chicken breasts or a small package often need about a day to thaw, while larger packages can take longer.

    Exact timing depends on:

    • Package size
    • Breast thickness
    • Whether the pieces are frozen together
    • Refrigerator temperature

    How Long Does Chicken Breast Take to Thaw in the Fridge?

    A small package may thaw in roughly 24 hours.

    Large packages or tightly frozen-together breasts can take longer.

    Instead of relying only on time, check whether:

    • The chicken is flexible
    • The pieces separate easily
    • The thickest part no longer has a hard frozen center

    Chicken thawed in the refrigerator can generally remain refrigerated for another 1 to 2 days before cooking.

    How to Thaw Chicken Breast in Cold Water

    Cold-water thawing is useful when you need chicken the same day.

    1. Place the chicken in a leak-proof bag.
    2. Submerge the bag in cold water.
    3. Change the water about every 30 minutes.
    4. Continue until the chicken is fully thawed.
    5. Cook the chicken promptly after thawing.

    The leak-proof bag helps keep the chicken separated from the water and reduces contamination risk.

    How Long Does Chicken Take to Thaw in Cold Water?

    Timing depends on the size of the package and the thickness of the chicken.

    A small package of chicken breasts may thaw in around 1 hour or less, while larger packages may take longer.

    Check the chicken rather than relying on a single fixed time.

    The chicken should be flexible with no hard frozen center before cooking.

    How to Defrost Chicken Breast in the Microwave

    Microwave thawing is the fastest method.

    Use the microwave’s defrost setting if available.

    1. Place the chicken on a microwave-safe plate.
    2. Use the defrost setting or low power.
    3. Turn and separate pieces as they begin to thaw.
    4. Check frequently because some areas may start to warm or cook.
    5. Cook the chicken immediately after thawing.

    Microwave thawing can create warm spots, so it is important not to leave the chicken sitting afterward.

    Can You Thaw Chicken on the Counter?

    No.

    Do not thaw chicken breast at room temperature.

    The outside of the chicken can warm up while the inside remains frozen.

    This creates conditions where bacteria can multiply on the surface before the chicken is fully thawed.

    Use refrigerator, cold-water, or microwave thawing instead.

    Can You Thaw Chicken in Hot Water?

    Hot-water thawing is not recommended as a standard home method.

    Hot water can warm the outside of the chicken too quickly while the center remains frozen.

    It can also partially cook the surface, which makes later cooking less even.

    Use cold water instead.

    How Do You Know Chicken Is Fully Thawed?

    Chicken breast is usually fully thawed when:

    • It bends easily
    • The thickest part is no longer hard
    • The pieces separate without force
    • There are no solid ice crystals in the center

    If the center is still firm and frozen, it needs more thawing time unless you plan to cook it from frozen using a suitable method.

    How Long Can Thawed Chicken Stay in the Fridge?

    Chicken thawed in the refrigerator can generally remain refrigerated for 1 to 2 days before cooking.

    Keep it cold and contained to prevent drips from contacting other foods.

    Chicken thawed using the cold-water method should be cooked promptly.

    Chicken thawed in the microwave should be cooked immediately.

    Can You Refreeze Thawed Chicken Breast?

    It depends on how the chicken was thawed.

    Refrigerator-thawed chicken

    Raw chicken thawed in the refrigerator can generally be refrozen if it has been handled safely and kept cold.

    Quality may decline slightly after another freeze-thaw cycle.

    Cold-water thawed chicken

    Cook it before refreezing.

    Microwave-thawed chicken

    Cook it immediately, then refreeze the cooked chicken if needed.

    Do You Have to Thaw Chicken Before Cooking?

    No, not always.

    Chicken breast can be cooked directly from frozen using suitable methods, although it will take longer.

    For more detail, see:

    Can You Cook Chicken Breast From Frozen?

    Thawing first is still useful when you want:

    • More even cooking
    • Better browning
    • Easier seasoning
    • Easier pounding or butterflying
    • More predictable cooking time

    Food-Safety Checklist After Thawing

    After handling raw chicken:

    • Wash your hands with soap and water
    • Keep raw chicken separate from ready-to-eat foods
    • Clean utensils and surfaces that touched raw chicken
    • Do not rinse raw poultry
    • Cook the chicken until the thickest part reaches 165°F (74°C)

    For more detail, see:

    Chicken Breast Internal Temperature

    and

    How Long to Cook Chicken Breast

    Frequently Asked Questions

    What is the safest way to thaw chicken breast?

    Refrigerator thawing is the easiest and most controlled method when you have enough time.

    What is the fastest safe way to defrost chicken?

    Microwave thawing is the fastest, but the chicken should be cooked immediately afterward.

    Cold-water thawing is a good faster option when you do not want to use the microwave.

    How long does chicken breast take to thaw in the fridge?

    A small package often needs about a day, while larger packages may take longer.

    How long does chicken take to thaw in cold water?

    A small package may thaw in about an hour or less, but larger or thicker packages take longer.

    Can you thaw chicken on the counter?

    No. Use the refrigerator, cold water, or microwave instead.

    Can you thaw chicken in hot water?

    Hot-water thawing is not recommended. Use cold water.

    Can you defrost chicken in the microwave?

    Yes, but cook it immediately afterward.

    How long can thawed chicken stay in the fridge?

    Chicken thawed in the refrigerator can generally stay refrigerated for 1 to 2 days before cooking.

    Can you refreeze thawed chicken breast?

    Raw chicken thawed in the refrigerator can generally be refrozen if it was handled safely. Chicken thawed in cold water or the microwave should be cooked before refreezing.

    Do you have to thaw chicken before cooking?

    No. Some methods allow chicken breast to be cooked directly from frozen.

    How do you know chicken is completely thawed?

    The thickest part should be flexible with no hard frozen center.

    Final Takeaway

    The three practical safe thawing methods are:

    1. Refrigerator for planning ahead
    2. Cold water for faster same-day thawing
    3. Microwave when you will cook immediately

    Avoid countertop and hot-water thawing.

    After thawing, handle raw chicken carefully and cook the thickest part to 165°F (74°C).
  • Can You Cook Chicken Breast From Frozen? Safe Methods Timing

    Can You Cook Chicken Breast From Frozen? Safe Methods Timing

    Yes, you can cook chicken breast directly from frozen with suitable cooking methods. The main differences are that frozen chicken takes longer to cook, browns less easily at first, and can cook less evenly if the pieces are very thick or frozen together.

    The most important rule is simple: cook the chicken until the thickest part reaches 165°F (74°C), verified with a food thermometer.

    Is It Safe to Cook Chicken Breast From Frozen?

    Yes, chicken breast can be cooked from frozen if you use a method that heats it safely and evenly.

    Freezing does not make raw chicken sterile. Bacteria can still be present, so the chicken still needs to reach a safe internal temperature during cooking.

    Use a food thermometer and check the thickest part of the breast.

    Do not rely only on:

    • Cooking time
    • Color
    • Clear juices
    • Exterior browning

    Frozen vs. Thawed Chicken: What Changes?

    Frozen chicken usually takes longer to cook than thawed chicken.

    Other differences include:

    • Seasoning may not stick well at first
    • Browning can be slower
    • Thick pieces can cook less evenly
    • Frozen-together pieces should be separated when possible
    • Cooking time becomes more variable

    A general rule is to expect roughly 50% more cooking time than for thawed chicken, but this is only an estimate.

    For detailed timing guidance, see:

    How Long to Cook Chicken Breast

    Best Methods for Cooking Frozen Chicken Breast

    MethodCook From Frozen?Main Note
    OvenYesReliable for whole breasts; allow extra time
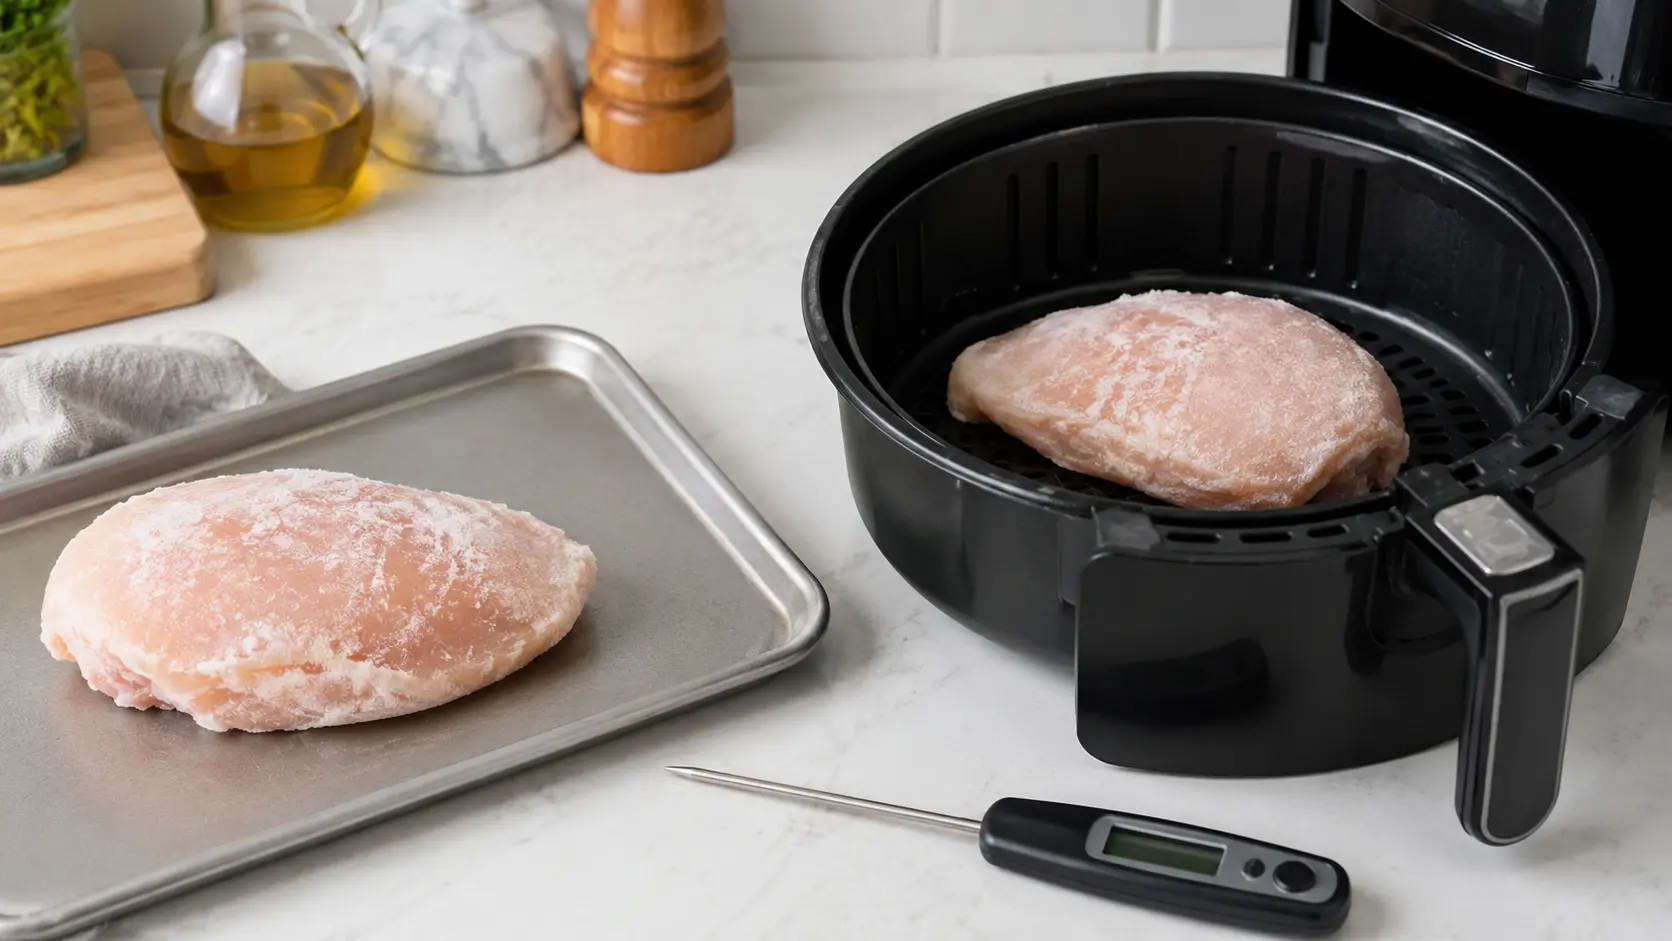
    Air fryerOften yesBest when pieces are separate
    Instant PotYesUseful for thick frozen breasts
    StovetopPossibleEasier with thinner or smaller pieces
    PoachingPossibleUse gentle heat and verify center temperature
    GrillLess idealThick frozen breasts may cook unevenly
    Slow cookerAvoidThaw first before slow cooking

    How to Bake Frozen Chicken Breast

    The oven is one of the easiest ways to cook frozen chicken breast.

    A practical approach:

    1. Preheat the oven.
    2. Place frozen chicken breasts in a baking dish or on a sheet pan.
    3. Separate pieces if they are stuck together.
    4. Add a small amount of oil if desired.
    5. Season once the surface has softened enough for seasoning to stick.
    6. Continue cooking until the thickest part reaches 165°F (74°C).

    Frozen chicken may take roughly 50% longer than thawed chicken, depending on thickness and oven temperature.

    Do not use time alone to determine doneness.

    How to Air Fry Frozen Chicken Breast

    Air fryers can work well for frozen chicken breast, especially when the pieces are frozen separately.

    For best results:

    • Avoid stacking frozen breasts
    • Leave space for air circulation
    • Check earlier if the breasts are thin
    • Turn or flip if your air fryer benefits from it
    • Verify doneness with a thermometer

    Cooking time varies by breast size and air-fryer model.

    How to Cook Frozen Chicken Breast in an Instant Pot

    Pressure cooking is a convenient option for frozen chicken breast.

    Add the amount of liquid required by your pressure cooker and arrange the frozen breasts so they can cook as evenly as possible.

    Thick breasts may need more pressure-cooking time than small ones.

    Remember that total time includes:

    • Time to come to pressure
    • Programmed cook time
    • Pressure release

    Do not treat one exact time as universal.

    Check the thickest part of the chicken after cooking and make sure it has reached 165°F (74°C).

    Can You Cook Frozen Chicken Breast on the Stove?

    Yes, but whole thick frozen breasts are harder to cook evenly on the stovetop.

    A gentler approach works better than trying to sear the outside aggressively from the start.

    You can:

    • Use moderate heat
    • Add a small amount of liquid
    • Cover the pan
    • Turn the chicken as needed
    • Finish cooking until the center reaches 165°F

    For very thick frozen breasts, another method such as baking or pressure cooking may be easier to control.

    Can You Boil or Poach Frozen Chicken Breast?

    Yes.

    Poaching frozen chicken breast in gently simmering liquid can work, although it will take longer than poaching thawed chicken.

    Avoid an aggressive rolling boil if you want a better texture.

    Check the thickest part with a food thermometer before serving.

    Can You Grill Frozen Chicken Breast?

    You can, but it is usually not the best option for thick frozen chicken breasts.

    The outside may cook or char before the center has heated through.

    For better control and more even cooking, thawing chicken before grilling is usually preferable.

    If you do grill from frozen, use careful heat management and verify the center temperature.

    Can You Put Frozen Chicken Breast in a Slow Cooker?

    It is better to thaw chicken before putting it in a slow cooker.

    Slow cookers heat food gradually, and starting with frozen poultry can make safe heat-up times harder to control.

    For slow-cooker recipes, thaw the chicken safely first.

    How Much Longer Does Frozen Chicken Take?

    A common rule of thumb is to allow about 50% more cooking time for frozen chicken than for thawed chicken.

    For example:

    If thawed chicken normally takes 20 minutes, frozen chicken may take around 30 minutes.

    But this is only a starting estimate.

    Actual timing depends on:

    • Breast thickness
    • Weight
    • Cooking method
    • Oven or appliance performance
    • Whether pieces are frozen together
    • Starting temperature

    Always use a food thermometer as the final check.

    How Do You Know Frozen Chicken Is Fully Cooked?

    Insert a food thermometer into the thickest part of the breast.

    The chicken should reach 165°F (74°C).

    Check more than one area if the breast is very large or irregularly shaped.

    For more detail, see:

    Chicken Breast Internal Temperature

    Visual signs can be useful, but they should not replace temperature verification.

    How to Keep Frozen Chicken Breast From Drying Out

    Frozen chicken can dry out if you cook it far past doneness while waiting for the center to heat through.

    To reduce that risk:

    • Use a method suited to frozen chicken
    • Avoid excessively high heat
    • Check temperature before you think it is done
    • Avoid cooking far beyond 165°F
    • Rest the chicken briefly before slicing
    • Use sauce or cooking liquid where appropriate

    For more detail, see:

    How to Keep Chicken Breast Juicy

    How to Season Frozen Chicken Breast

    Seasoning a frozen surface can be difficult because spices may not stick well.

    A simple option is:

    1. Start cooking the chicken.
    2. Wait until the outer surface has thawed and softened.
    3. Add oil or seasoning.
    4. Continue cooking.

    For pressure cooking or poaching, you can also use flavorful cooking liquid, herbs, spices, or aromatics from the beginning.

    Do not partially cook chicken, remove it for a long marinade, and then return it to finish cooking.

    Should You Thaw Chicken Breast First?

    You do not always need to thaw chicken before cooking.

    Cooking from frozen is useful when you are short on time.

    However, thawing first often gives you:

    • Better seasoning
    • Better browning
    • More even cooking
    • More predictable cooking time
    • Easier pounding or butterflying

    For methods such as grilling and slow cooking, thawing first is generally the better choice.

    Frequently Asked Questions

    Can you cook chicken breast straight from frozen?

    Yes, with suitable methods such as baking, pressure cooking, air frying, or careful stovetop cooking.

    Is it safe to bake frozen chicken breast?

    Yes. Cook until the thickest part reaches 165°F (74°C).

    How much longer does frozen chicken take?

    A useful starting estimate is roughly 50% longer than thawed chicken, but thickness and method matter.

    Can you air fry frozen chicken breast?

    Yes, especially when the breasts are frozen separately rather than stuck together.

    Can you cook frozen chicken breast in an Instant Pot?

    Yes. Pressure cooking is a practical method for frozen chicken breast.

    Can you pan-fry frozen chicken breast?

    It is possible, but thick frozen breasts are harder to cook evenly. Gentle covered cooking is easier to control than aggressive searing.

    Can you boil frozen chicken breast?

    Yes. Gentle poaching is usually preferable to hard boiling for texture.

    Can you grill frozen chicken breast?

    Possible, but not ideal for thick breasts because the exterior can overcook before the center is ready.

    Can you slow cook frozen chicken breast?

    It is better to thaw chicken first before slow cooking.

    Do you need to thaw chicken before cooking?

    Not for every method. Oven baking, air frying, pressure cooking, and some stovetop methods can work from frozen.

    How do you know frozen chicken is done?

    Check the thickest part with a food thermometer and confirm 165°F (74°C).

    Final Takeaway

    Chicken breast can be cooked from frozen, but the method matters.

    For the easiest results:

    1. Choose a method suited to frozen chicken
    2. Allow extra cooking time
    3. Separate frozen pieces when possible
    4. Do not rely only on appearance or time
    5. Verify the thickest part reaches 165°F (74°C)

    Cooking from frozen is convenient, but thawing first can still give better browning, seasoning, and control for some methods.

  • How to Tenderize Chicken Breast: 6 Methods and When to Use Each

    How to Tenderize Chicken Breast: 6 Methods and When to Use Each

    Tenderizing chicken breast is not one single technique. Different methods solve different problems: pounding helps chicken cook evenly, brining improves moisture retention, baking soda changes surface texture, dairy marinades can soften the exterior, and slicing against the grain improves perceived tenderness.

    The best method depends on what you are cooking and how much time you have.

    Why Chicken Breast Can Feel Tough

    Chicken breast is lean and can become tough when:

    • It is overcooked
    • The breast is very uneven in thickness
    • High heat is used for too long
    • It is sliced with the grain
    • The cooking method does not match the size of the chicken

    Tenderizing methods can help, but none of them can fully compensate for severe overcooking.

    Tenderizing Methods Compared

    MethodBest ForTime NeededMain Effect
    PoundingCutlets, stovetop, grillingMinutesMore even cooking
    BriningGeneral cooking30 min–hoursMoisture retention and seasoning
    Baking soda / velvetingStir-friesShortSofter surface texture
    Yogurt / buttermilkMarinadesHoursGentle texture change + flavor
    Acidic marinadeFlavor-forward dishesShort/moderateSurface texture change
    Slicing against the grainFinished chickenImmediateEasier chewing / perceived tenderness

    1. Pound Chicken Breast to an Even Thickness

    Pounding is useful when one end of the chicken breast is much thicker than the other.

    Place the chicken between sheets of parchment or plastic wrap and gently pound the thickest area until the breast is more even.

    For many quick-cooking methods, around 1/2 to 3/4 inch thick works well.

    Pounding mainly improves even cooking. It can also slightly alter the meat structure, but its biggest benefit is preventing the thin end from drying out before the thick end is done.

    This method works well for:

    • Cutlets
    • Pan-searing
    • Grilling
    • Schnitzel-style dishes
    • Chicken sandwiches

    2. Brine Chicken Breast

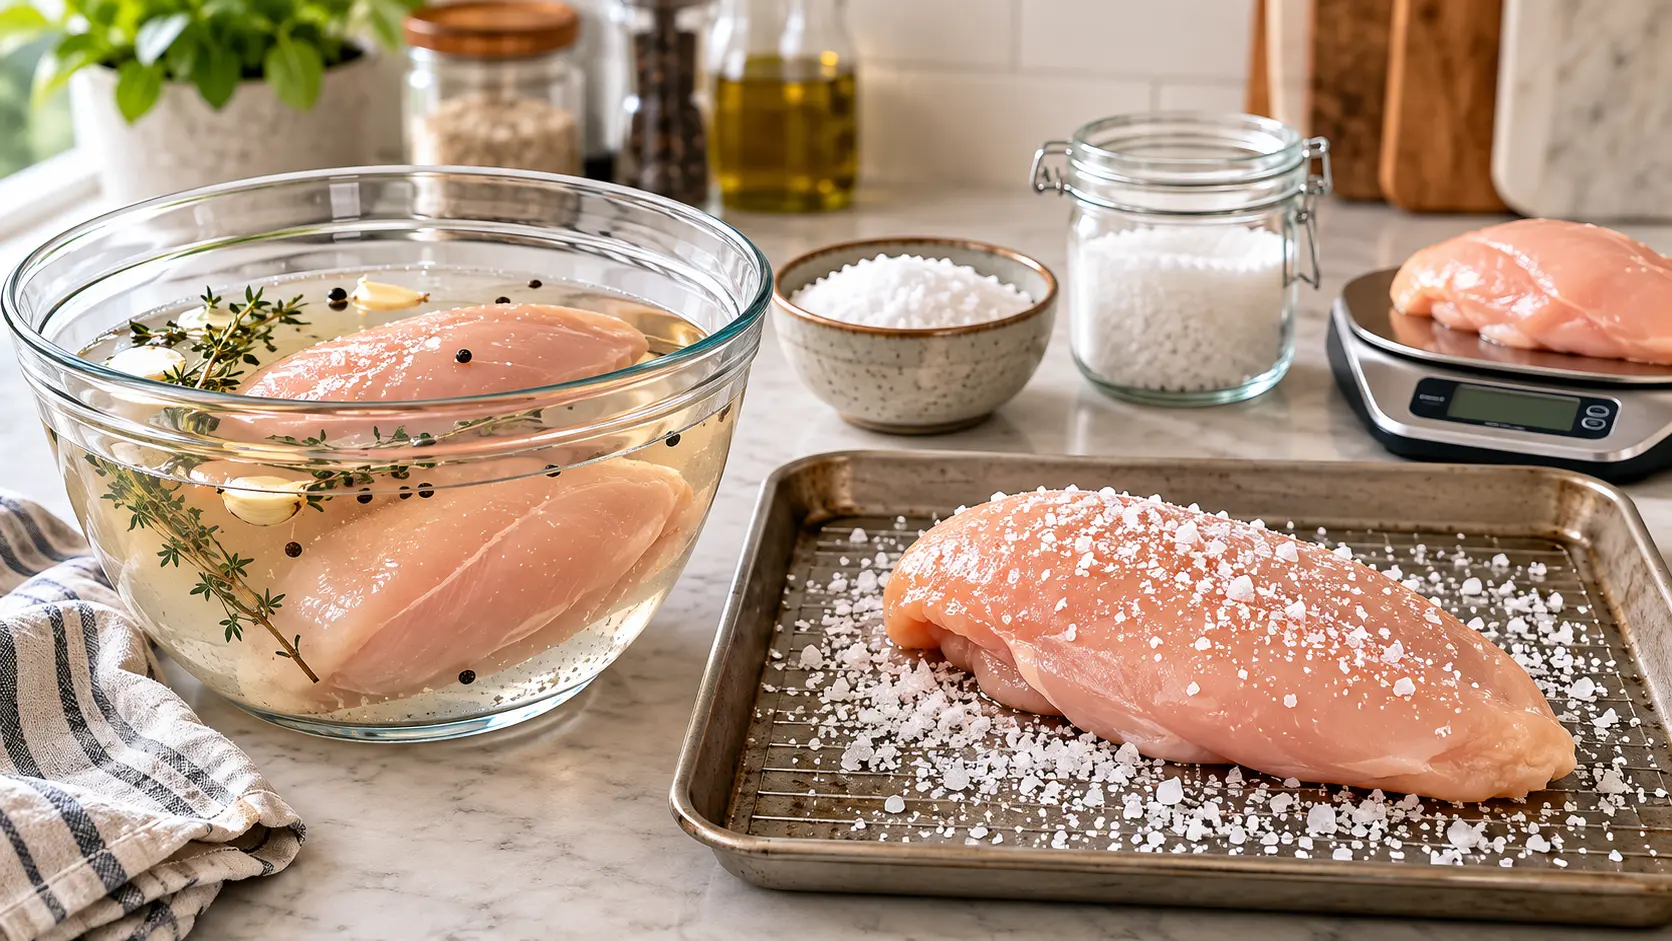
    Brining uses salt to help season the chicken and improve moisture retention during cooking.

    A wet brine uses salt dissolved in water, while a dry brine applies salt directly to the chicken.

    Brining can make chicken feel more tender and juicy, but it does not make chicken impossible to overcook.

    For a full guide, see:

    How to Brine Chicken Breast

    Keep chicken refrigerated during brining and follow appropriate timing for the salt concentration you use.

    3. Use Baking Soda for Velveting

    Baking soda is commonly used in some stir-fry preparations because it raises the pH on the surface of the chicken.

    This can reduce how tightly surface proteins contract during quick cooking, giving sliced chicken a softer texture.

    A small amount is enough.

    A practical approach is:

    1. Slice the chicken into thin pieces.
    2. Use a small amount of baking soda.
    3. Let it sit briefly, typically around 15–20 minutes.
    4. Remove excess baking soda carefully according to your recipe method.
    5. Pat dry as needed before cooking.

    Avoid long contact times or heavy amounts because baking soda can affect flavor and texture.

    This technique is best for:

    • Stir-fries
    • Noodle dishes
    • Quick wok cooking
    • Thin chicken strips

    It is less useful for whole chicken breasts.

    4. Use Yogurt or Buttermilk Marinades

    Yogurt and buttermilk contain mild acids that can change proteins near the surface of the chicken.

    They are useful when you want both flavor and a gentler texture.

    Keep the chicken refrigerated while marinating.

    Several hours can work well, but longer is not automatically better. Follow the recipe and avoid unnecessary extended marinating.

    This method works well for:

    • Grilled chicken
    • Baked chicken
    • Spiced chicken
    • Skewers

    5. Use Acidic Marinades Carefully

    Ingredients such as:

    • Lemon juice
    • Lime juice
    • Vinegar

    can affect the surface proteins of chicken.

    Acidic marinades are useful mainly for flavor and a limited surface texture change.

    Too much acid or too much time can make the outside of the chicken unpleasantly soft, chalky, or mushy.

    For strong acidic marinades, shorter marinating periods are usually easier to control.

    Acid does not deeply tenderize the center of a thick chicken breast.

    6. Slice Against the Grain

    Slicing against the grain does not change how much moisture is inside the chicken.

    Instead, it shortens the muscle fibers, making each bite easier to chew.

    Look for the direction the fibers run through the cooked breast, then cut across them rather than parallel to them.

    This is especially useful for:

    • Grilled chicken
    • Roasted chicken
    • Salads
    • Sandwiches
    • Meal prep

    Don’t Overcook the Chicken

    Avoiding overcooking is one of the most important parts of tender chicken.

    Cooking time should only tell you when to start checking doneness.

    For more detail, see:

    How Long to Cook Chicken Breast

    Check the thickest part of the chicken with a food thermometer and cook chicken breast to 165°F (74°C).

    For more detail, see:

    Chicken Breast Internal Temperature

    Even the best tenderizing method cannot fully prevent dryness if chicken is cooked far beyond its safe doneness point.

    Tenderizing vs. Keeping Chicken Juicy

    Tenderness and juiciness are related, but they are not exactly the same thing.

    For example:

    • Pounding improves even cooking
    • Brining helps moisture retention
    • Baking soda changes surface texture
    • Slicing against the grain changes how tender the meat feels
    • Proper temperature control helps prevent dryness

    For a broader guide, see:

    How to Keep Chicken Breast Juicy

    Best Tenderizing Method by Cooking Style

    Stir-fry

    Use baking soda velveting for thinly sliced chicken.

    Pan-seared chicken

    Use pounding to create even thickness.

    Grilled chicken

    Use pounding or brining, depending on the recipe.

    Baked chicken

    Use brining and even thickness for more predictable cooking.

    Meal prep

    Use brining plus careful temperature control, then reheat gently.

    Can You Combine Tenderizing Methods?

    Yes, but more is not always better.

    Simple combinations usually make the most sense.

    Examples:

    • Pound + brine
    • Brine + slice against the grain
    • Yogurt marinade + even thickness

    Avoid stacking multiple aggressive techniques such as strong acid, long marination, and baking soda unless the recipe is specifically designed for it.

    Common Mistakes When Tenderizing Chicken Breast

    Pounding too aggressively

    Flatten gradually instead of smashing the meat very thin.

    Leaving chicken in acidic marinade too long

    Strong acid can damage the surface texture.

    Using too much baking soda

    A small amount is enough.

    Assuming brining prevents overcooking

    Brining helps moisture retention, but temperature control still matters.

    Cutting with the grain

    Long fibers can make cooked chicken feel tougher.

    Ignoring thickness

    Uneven breasts cook unevenly.

    Frequently Asked Questions

    What is the best way to tenderize chicken breast?

    It depends on the dish. Pounding works well for cutlets, brining for general cooking, and baking soda velveting for stir-fries.

    Can you tenderize chicken without a mallet?

    Yes. You can use the bottom of a heavy skillet or rolling pin, or butterfly the breast to make it thinner and more even.

    Does baking soda tenderize chicken?

    Yes. Baking soda raises the surface pH and can make thin chicken pieces softer during quick cooking.

    How long should baking soda stay on chicken?

    A short contact time, often around 15–20 minutes, is practical for thin sliced chicken. Follow the specific recipe you are using.

    Does brining tenderize chicken breast?

    Brining can improve moisture retention and can make the finished chicken feel more tender.

    Does yogurt tenderize chicken?

    Yogurt contains mild acidity that can affect surface proteins and improve texture while adding flavor.

    Does lemon juice tenderize chicken?

    Lemon juice can change surface texture, but too much or too long can make the exterior unpleasant.

    Can you tenderize chicken too long?

    Yes. Long exposure to strong acids or other tenderizing treatments can damage texture.

    Why is my chicken breast still tough?

    Common causes include overcooking, uneven thickness, aggressive heat, and slicing with the grain.

    Should you slice chicken against the grain?

    Yes. Slicing across the muscle fibers generally makes cooked chicken easier to chew.

    Final Takeaway

    The best way to tenderize chicken breast depends on your cooking method.

    Use:

    1. Pounding for even cooking
    2. Brining for moisture retention
    3. Baking soda for stir-fry texture
    4. Yogurt or buttermilk for mild tenderizing and flavor
    5. Acidic marinades carefully and briefly
    6. Slicing against the grain for better eating texture

    Most importantly, avoid overcooking and verify doneness at 165°F (74°C).

  • How to Brine Chicken Breast: Wet Brine, Dry Brine, Ratios Timing

    How to Brine Chicken Breast: Wet Brine, Dry Brine, Ratios Timing

    Brining chicken breast is a simple way to improve seasoning and help the meat retain moisture during cooking. The two main methods are wet brining, which uses salt dissolved in water, and dry brining, which applies salt directly to the chicken.

    The most important variables are salt concentration, brining time, chicken size, and refrigeration. Longer is not always better.

    What Does Brining Do to Chicken Breast?

    Salt changes the way muscle proteins behave during cooking.

    When chicken is brined, salt can help the meat retain more moisture as it cooks and season it more evenly below the surface.

    Brining can also improve tenderness, but it does not make chicken impossible to overcook.

    Brining is only one part of keeping chicken breast moist; thickness, heat control, internal temperature, resting, and reheating also matter. See our guide on How to Keep Chicken Breast Juicy for the full process.

    You still need to control cooking time and verify doneness with a food thermometer.

    Wet Brine vs. Dry Brine

    MethodWhat It UsesBest ForMain Advantage
    Wet brineSalt dissolved in waterQuick, forgiving prepAdds seasoning and moisture
    Dry brineSalt applied directlyBetter surface drying and browningDeep seasoning with less mess

    Both methods can work well. The better choice depends on how much time you have and how you plan to cook the chicken.

    Basic Wet Brine Ratio

    For the most consistent results, it is better to measure salt by weight rather than by volume.

    A practical starting point is a brine around 5% salt by weight relative to the water.

    For example:

    • 1,000 g water
    • 50 g salt

    This is only a starting point. Brine strength and brining time work together, so stronger brines generally need shorter soaking times.

    Salt volume can vary a lot depending on whether you use table salt, Diamond Crystal kosher salt, Morton kosher salt, or another brand. That is why weight is more reliable than tablespoons or cups.

    How to Wet Brine Chicken Breast

    1. Measure the water and salt.
    2. Dissolve the salt completely.
    3. If you warmed any of the water to dissolve the salt, cool the brine completely before adding chicken.
    4. Place the chicken breast in the brine.
    5. Make sure the chicken is fully submerged.
    6. Cover and refrigerate.
    7. Remove the chicken after the appropriate brining time.
    8. Let excess brine drip off and pat the chicken dry with paper towels.
    9. Cook using your preferred method.

    Always brine raw chicken in the refrigerator, not at room temperature.

    How Long to Brine Chicken Breast

    Brining time depends on the size of the chicken breast and the strength of the brine.

    As a practical guide for a moderate wet brine:

    • Thin or small breasts: about 30 minutes to 1 hour
    • Average breasts: about 1 to 2 hours
    • Thick or large breasts: about 2 to 4 hours

    These ranges are not universal. A stronger brine can season chicken faster, while a weaker brine can be used for longer periods.

    If you are unsure, a shorter brining time is usually easier to control.

    Can You Brine Chicken Breast Overnight?

    Yes, but overnight wet brining is usually unnecessary for boneless chicken breasts unless the brine is relatively weak.

    A strong brine combined with a long soaking time can make chicken too salty and may give it an unpleasant texture.

    Dry brining is often better suited to longer refrigerator rest times.

    If you plan to brine overnight, use a lower salt concentration and keep the chicken refrigerated the entire time.

    How to Dry Brine Chicken Breast

    Dry brining is simpler because it does not require water.

    1. Pat the chicken dry.
    2. Season the surface evenly with salt.
    3. Place the chicken on a plate, tray, or rack.
    4. Refrigerate it.
    5. Cook after the desired resting time.

    Dry brining helps season the meat and allows the surface to dry, which can improve browning.

    For boneless chicken breast, a few hours in the refrigerator can be enough to make a noticeable difference.

    How Much Salt Should You Use for a Dry Brine?

    A practical starting point is roughly 0.75% to 1% salt by weight relative to the chicken.

    For example, for 500 g of chicken breast:

    • 0.75% = about 3.75 g salt
    • 1% = about 5 g salt

    Using weight is more reliable than teaspoons because different salts have different crystal sizes and densities.

    If you already use salty seasoning blends or sauces, use less salt in the dry brine.

    Should You Rinse Chicken After Brining?

    No. Rinsing raw chicken is not recommended because splashing water can spread bacteria around the sink and nearby surfaces.

    After wet brining:

    • Remove the chicken from the brine
    • Let excess liquid drip off
    • Pat it dry with paper towels

    Then continue with your recipe.

    For dry-brined chicken, there is normally no need to rinse. If the surface looks too heavily salted, adjust the amount of salt next time rather than rinsing the raw chicken.

    Should You Add Sugar to Chicken Brine?

    Sugar is optional.

    It is not required for brining to work.

    Sugar can:

    • Add mild sweetness
    • Balance salty flavor
    • Encourage faster browning

    Because sugar can brown quickly, be careful with very high-heat methods such as grilling or pan-searing.

    Can You Add Herbs, Garlic, Spices, or Citrus?

    Yes.

    Common additions include:

    • Garlic
    • Peppercorns
    • Bay leaves
    • Rosemary
    • Thyme
    • Citrus peel
    • Spices

    These ingredients mainly contribute flavor.

    Do not assume every aromatic will penetrate deeply into the center of the chicken. Salt is the most important ingredient in the brining process.

    Brining Chicken Breast for Grilling

    Brining can be useful for grilled chicken breast because grilling exposes the surface to strong heat.

    After wet brining, pat the chicken thoroughly dry before grilling.

    Dry surfaces brown better and are less likely to steam.

    Because the chicken is already salted, use less additional salt in your seasoning.

    Brining Chicken Breast for Baking

    Wet-brined or dry-brined chicken can both work well in the oven.

    For wet-brined chicken:

    • Pat it dry first
    • Season carefully
    • Avoid adding too much extra salt

    For dry-brined chicken, the surface is often already well seasoned and ready for other herbs or spices.

    Brining Chicken Breast for Pan-Searing

    For pan-searing, surface dryness is especially important.

    After wet brining, pat the chicken dry very well before adding it to the skillet.

    A dry surface helps browning and reduces splattering.

    Brining Chicken Breast for the Air Fryer

    Brining can also work well with an air fryer.

    Again, dry the surface well after wet brining.

    Because air fryers cook quickly, check the chicken early and verify doneness with a thermometer.

    Brining Does Not Change the Safe Internal Temperature

    Brining affects seasoning and moisture retention, but it does not change the food-safety target.

    Cook chicken breast until the thickest part reaches 165°F (74°C).

    Do not rely only on appearance or cooking time.

    For more detail, see:

    Chicken Breast Internal Temperature

    and

    How Long to Cook Chicken Breast

    Brining vs. Marinating

    Brining and marinating are related but not identical.

    Brining

    The main purpose is salt-based seasoning and moisture retention.

    A wet brine usually contains:

    • Water
    • Salt
    • Optional sugar or aromatics

    A dry brine uses salt directly on the meat.

    Marinating

    A marinade is mainly used to add flavor.

    It may contain:

    • Oil
    • Acid
    • Herbs
    • Spices
    • Garlic
    • Other flavorings

    Some marinades contain enough salt to have a brining effect, so there can be overlap between the two techniques.

    Should You Season Chicken Again After Brining?

    Usually, yes, but use less salt.

    After brining, you can still add:

    • Black pepper
    • Garlic powder
    • Paprika
    • Herbs
    • Other salt-free or low-salt seasonings

    Taste balance matters. Because brined chicken already contains salt, heavy additional salting can make it too salty.

    Common Brining Mistakes

    Using too much salt

    A very strong brine can make chicken overly salty.

    Brining too long

    Long brining times can change the texture and make the chicken taste too salty.

    Brining at room temperature

    Always keep raw chicken refrigerated while brining.

    Rinsing raw chicken

    Avoid rinsing because splashing can spread bacteria.

    Adding lots of salt after brining

    Remember that the chicken has already absorbed salt.

    Cooking without checking temperature

    Brining does not replace thermometer use.

    Frequently Asked Questions

    How long should you brine chicken breast?

    For a moderate wet brine, about 30 minutes to 4 hours is a useful range depending on thickness and brine strength.

    Can you brine chicken breast overnight?

    Yes, but use a weaker brine. Strong wet brines are usually better for shorter soaking times.

    What is the best salt-to-water ratio for chicken brine?

    A practical starting point is around 5% salt by weight relative to the water.

    Can you brine chicken breast too long?

    Yes. Over-brining can make chicken too salty and can negatively affect texture.

    Do you rinse chicken after brining?

    No. Remove it from the brine and pat it dry instead.

    Should you pat chicken dry after brining?

    Yes, especially before grilling, baking, pan-searing, or air frying.

    Can you dry brine chicken breast?

    Yes. Dry brining is an effective way to season chicken and improve surface browning.

    Is sugar necessary in chicken brine?

    No. Sugar is optional and is mainly used for flavor and browning.

    Can you brine frozen chicken breast?

    It is better to thaw chicken safely before brining so the salt can contact the meat evenly and the brining time is easier to control.

    Does brining make chicken breast more tender?

    It can improve tenderness and moisture retention by changing how muscle proteins behave during cooking.

    Should you season chicken again after brining?

    Yes, but reduce or avoid extra salt and focus on herbs and spices.

    Final Takeaway

    Brining chicken breast works best when you control four things:

    1. Salt concentration
    2. Brining time
    3. Refrigeration
    4. Cooking temperature

    Use weight-based measurements when possible, keep raw chicken refrigerated, do not rinse it after brining, and cook the thickest part to 165°F (74°C).
  • How to Keep Chicken Breast Juicy: 8 Practical Tips That Work

    How to Keep Chicken Breast Juicy: 8 Practical Tips That Work

    Keeping chicken breast juicy comes down to controlling thickness, seasoning, heat, internal temperature, resting, and reheating. Because chicken breast is lean, it can dry out quickly if it cooks unevenly or stays on the heat too long. These practical techniques help reduce moisture loss without relying on guesswork.

    Why Chicken Breast Dries Out

    Chicken breast contains less fat than darker cuts such as thighs and drumsticks, so it has less built-in protection against drying out.

    As chicken cooks, its proteins tighten and push out moisture. The longer the meat is exposed to heat, especially after it is fully cooked, the more moisture it can lose.

    Dry chicken is usually caused by one or more of these problems:

    • Uneven thickness
    • Overcooking
    • Excessively aggressive heat
    • Skipping basic prep
    • Poor reheating

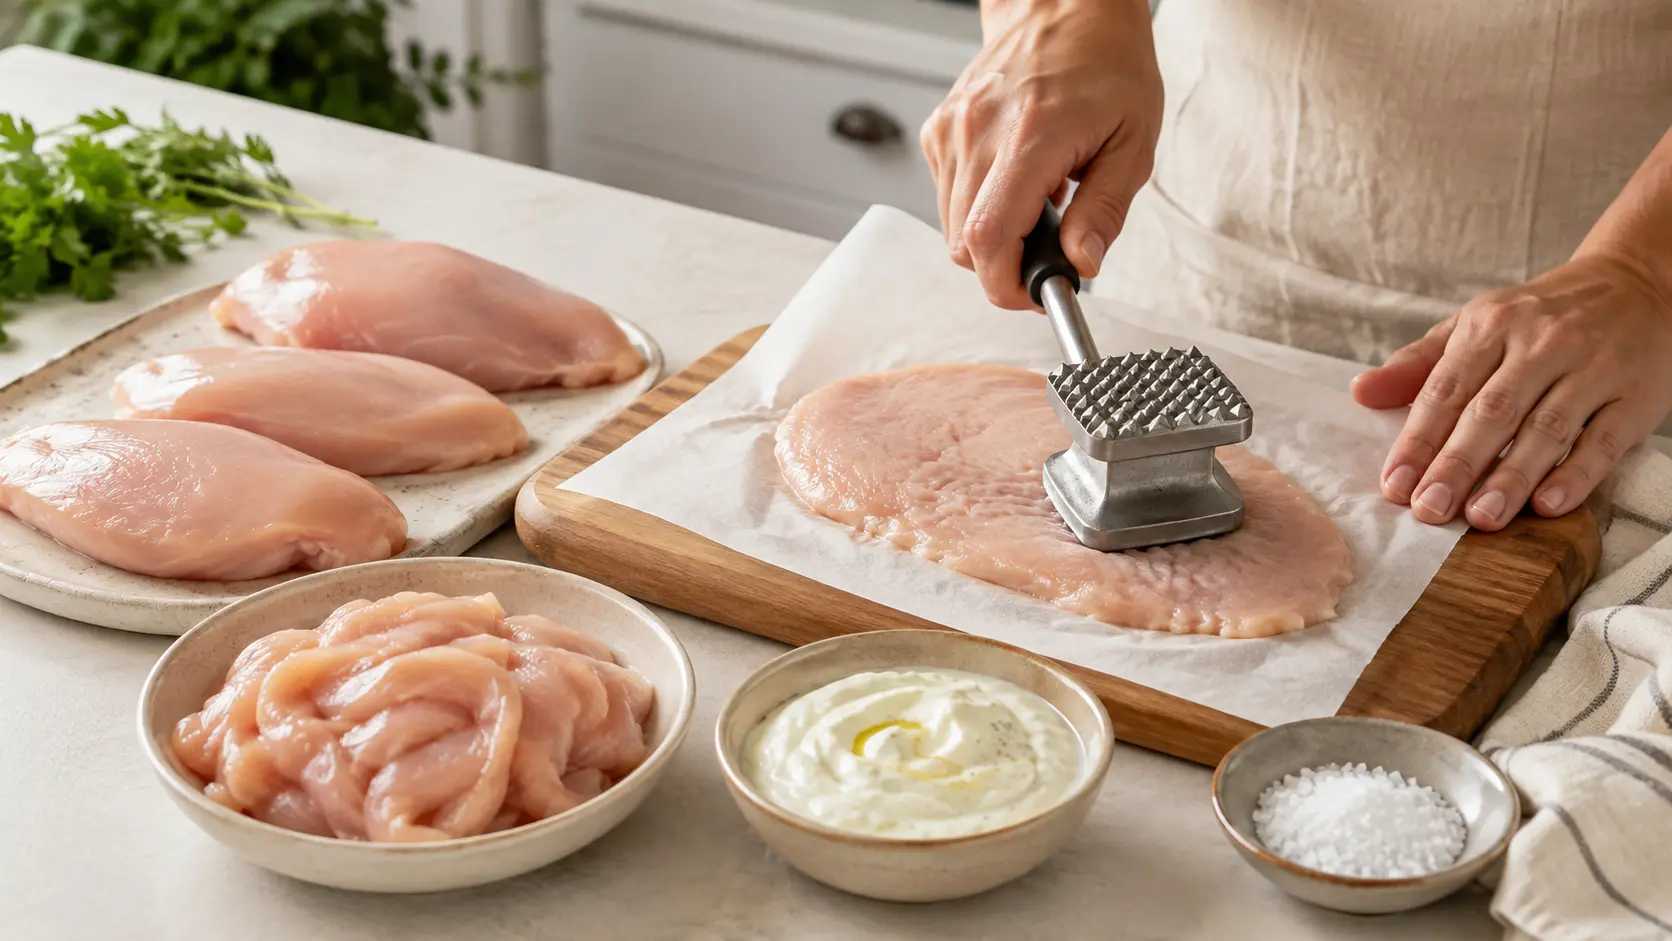
    1. Pound Chicken to an Even Thickness

    Chicken breasts are naturally thicker at one end than the other. If you cook them without adjusting the thickness, the thin end can dry out before the thickest part is fully cooked.

    Pounding the breast to a more even thickness helps it cook at a similar rate from edge to center.

    For many quick cooking methods, a thickness of about 1/2 to 3/4 inch works well.

    Another option is to butterfly very large chicken breasts before cooking.

    Even thickness does not guarantee perfectly juicy chicken, but it makes cooking much more predictable.

    2. Salt or Brine Before Cooking

    Salt can improve both flavor and moisture retention.

    Dry brining

    Dry brining simply means salting the chicken in advance and letting it rest in the refrigerator.

    Salt initially draws a small amount of moisture to the surface. Over time, that moisture dissolves the salt and some of it is reabsorbed into the meat.

    The salt also affects muscle proteins in ways that can help the meat retain more moisture during cooking.

    Wet brining

    Wet brining involves soaking chicken in a salt-and-water solution.

    It can also help chicken stay moist, but it requires more preparation and should be done under refrigeration.

    Both dry and wet brining can be useful, but they are not substitutes for proper cooking temperature control.

    3. Don’t Rely on Marinade Alone

    Marinades are useful for adding flavor, but they do not automatically prevent chicken breast from drying out.

    Many marinades contain oil, salt, herbs, spices, citrus, or vinegar. These ingredients mainly affect flavor and the surface of the meat.

    Acidic marinades can change texture if chicken sits in them for too long.

    For juicy chicken, marinade works best as one part of the process, not as the only technique.

    Even thickness, proper heat, and avoiding overcooking matter more.

    4. Use the Right Heat for the Cooking Method

    Different methods need different heat levels.

    Baking

    Moderate to moderately high oven temperatures, often around 375–425°F, can cook chicken breast efficiently without requiring extremely long cooking times.

    Stovetop

    For pan-searing, start with enough heat to brown the surface, then adjust the heat if needed so the center can finish without burning the outside.

    Grilling

    Medium-high heat works well for many chicken breasts, especially when the pieces are relatively even in thickness.

    Thicker breasts may benefit from moving between direct and indirect heat.

    Air fryer

    Air fryers cook quickly because hot air circulates around the food. Check chicken early because small or thin breasts can overcook quickly.

    The exact cooking time depends on thickness, equipment, and starting temperature.

    5. Don’t Overcook Chicken Breast

    Overcooking is one of the most common reasons chicken breast becomes dry.

    Cooking time is useful for estimating when to start checking the chicken, but it should not be treated as proof of doneness.

    Two chicken breasts can take different amounts of time even if they weigh the same, especially if their thicknesses are different.

    For detailed timing guidance, see:

    How Long to Cook Chicken Breast

    6. Check the Thickest Part With a Food Thermometer

    The safest way to verify doneness is with a food thermometer.

    Insert the thermometer into the thickest part of the chicken breast.

    Cook chicken breast until the thickest part reaches 165°F (74°C).

    Do not rely only on:

    • Cooking time
    • Exterior browning
    • Clear juices
    • Meat color

    Chicken can sometimes remain slightly pink even when safely cooked, while chicken that looks fully white can still require temperature verification.

    For more detail, see:

    Chicken Breast Internal Temperature

    Resting after cooking can improve quality, but do not rely on carryover cooking to bring undercooked chicken to a safe temperature.

    7. Rest Chicken Before Slicing

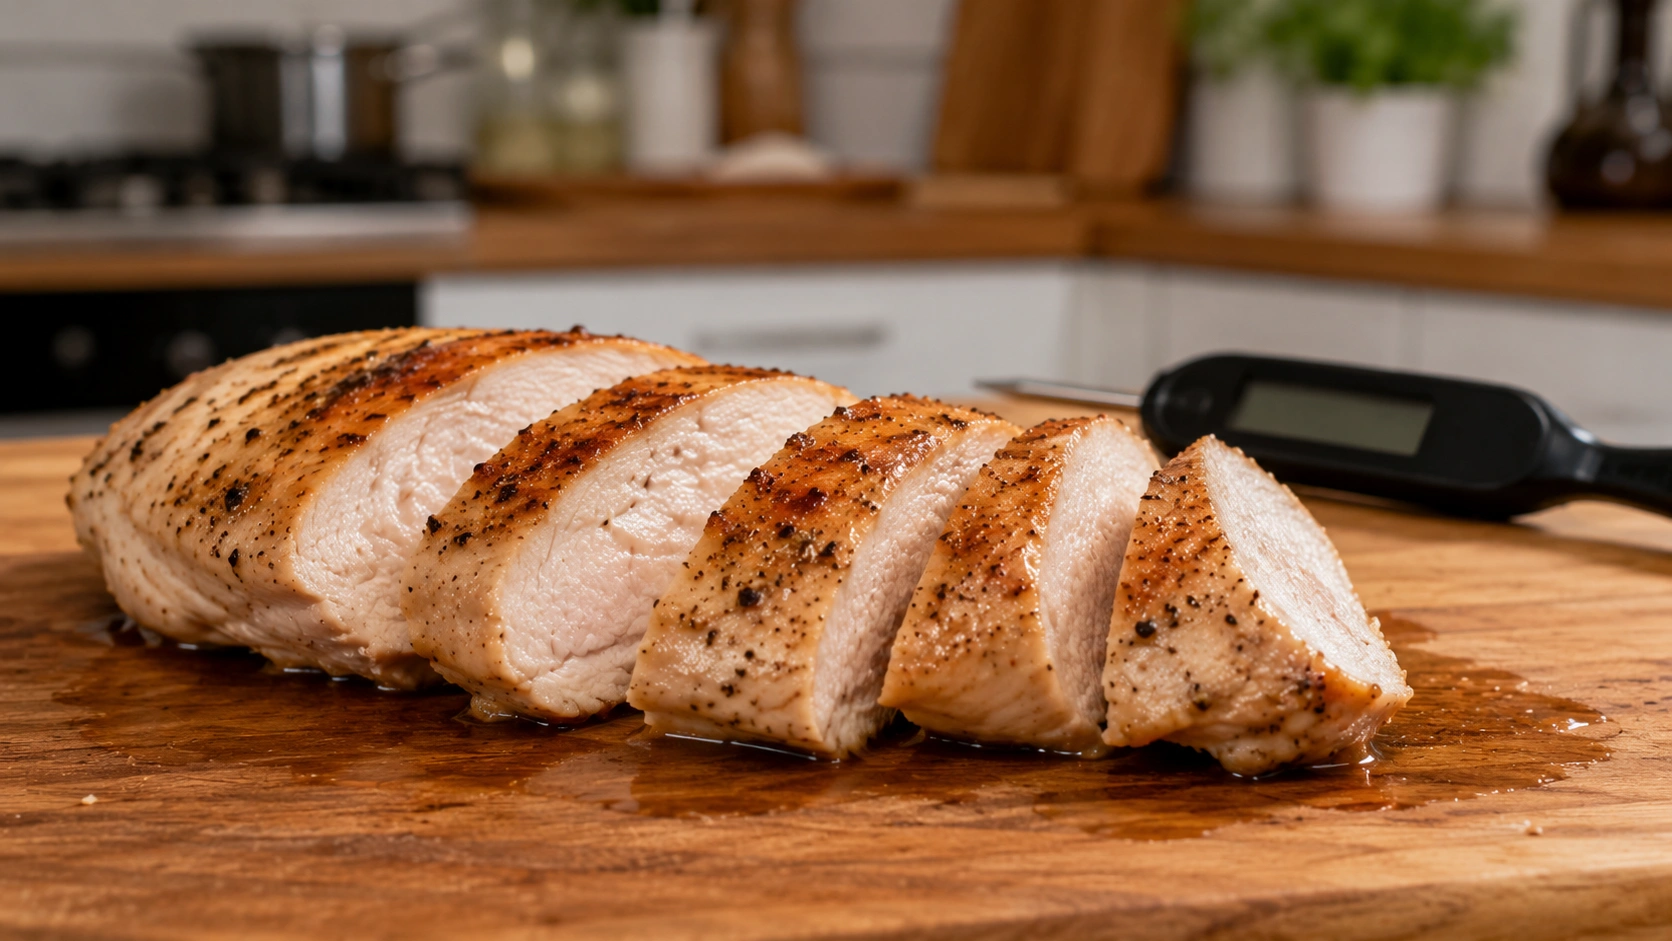
    Once the chicken has reached a safe internal temperature, remove it from the heat and let it rest for several minutes before slicing.

    Resting can help reduce the amount of moisture that runs out immediately when the chicken is cut.

    A rest of roughly 5 to 10 minutes is practical for many chicken breasts, depending on size and thickness.

    Resting is a quality step, not a substitute for safe cooking.

    8. Slice Against the Grain

    The grain refers to the direction the muscle fibers run through the meat.

    Slicing across those fibers shortens them, which can make chicken feel more tender when you chew it.

    This does not add moisture back into the meat, but it can improve the perceived tenderness of the finished chicken.

    Use a sharp knife and slice only after the chicken has rested.

    How to Keep Chicken Breast Juicy for Meal Prep

    Meal-prep chicken can dry out twice: once during the initial cooking and again during reheating.

    To reduce that problem:

    • Avoid overcooking it the first time
    • Refrigerate cooked chicken promptly
    • Store it in an airtight container
    • Keep a small amount of cooking juice or sauce with it when appropriate
    • Reheat only the portion you need
    • Use gentler reheating methods

    Cooked chicken should generally be refrigerated within 2 hours of cooking, or within 1 hour if the surrounding temperature is above 90°F.

    Properly refrigerated cooked chicken is generally best used within 3 to 4 days.

    How to Reheat Chicken Breast Without Drying It Out

    Gentler reheating methods help reduce additional moisture loss.

    Oven

    Place chicken in an oven-safe dish with a small splash of broth or water.

    Cover it and warm it gently.

    Stovetop

    For sliced chicken, use a covered skillet over low to medium-low heat with a small amount of liquid if needed.

    Microwave

    Use shorter heating intervals rather than one long burst.

    Covering the chicken and adding a small amount of moisture can help.

    When reheating leftovers, heat the chicken thoroughly to 165°F.

    Common Mistakes That Make Chicken Breast Dry

    Cooking breasts of very different thicknesses together

    Thin pieces can overcook while thick pieces are still cooking.

    Guessing doneness from time alone

    Cooking time is only an estimate.

    Using very high heat for too long

    Strong heat can brown the outside quickly while the center still needs time to cook.

    Cutting immediately after cooking

    Allow the chicken to rest for several minutes first.

    Assuming marinade guarantees moisture

    Marinade adds flavor but cannot prevent overcooking.

    Reheating repeatedly

    Each heating cycle can cause additional moisture loss.

    Frequently Asked Questions

    Why is my chicken breast always dry?

    The most common causes are overcooking and uneven thickness. Use a thermometer and make the breast more uniform before cooking.

    How do restaurants keep chicken breast juicy?

    Common techniques include even portioning, salting or brining, careful temperature control, and avoiding unnecessary overcooking.

    Does brining make chicken breast juicier?

    Brining can help chicken retain moisture during cooking and also improves seasoning.

    Does marinating chicken keep it moist?

    A marinade can contribute flavor and sometimes affect texture, but it does not guarantee juicy chicken.

    Should you cover chicken breast while baking?

    It depends on the recipe and desired surface texture. Covering can reduce surface drying, while uncovered cooking can promote browning.

    Is it better to cook chicken breast fast or slow?

    There is no single best speed. The right approach depends on thickness and method. The goal is to cook the center safely without exposing the meat to more heat than necessary.

    How do you keep chicken breast moist in the oven?

    Use even-sized pieces, avoid overcooking, check the thickest part with a thermometer, and rest the chicken before slicing.

    How do you keep grilled chicken breast juicy?

    Even thickness, controlled grill heat, and careful temperature checking are the most important steps.

    How do you keep chicken breast juicy for meal prep?

    Avoid overcooking it initially, store it properly, and reheat gently with a little moisture when needed.

    Should chicken breast rest before slicing?

    Yes. Resting for several minutes can help reduce moisture loss when the chicken is cut.

    Final Takeaway

    Juicy chicken breast is not the result of one trick.

    The most reliable process is:

    1. Make the chicken an even thickness
    2. Salt or brine when appropriate
    3. Use suitable heat
    4. Avoid unnecessary overcooking
    5. Check the thickest part with a thermometer
    6. Reach 165°F (74°C)
    7. Rest before slicing
    8. Reheat gently

    When these steps work together, chicken breast is much easier to cook consistently without becoming dry or tough.

  • How Long to Cook Chicken Breast: Times by Method and Thickness

    How Long to Cook Chicken Breast: Times by Method and Thickness

    Chicken breast cooking time depends on its thickness, cooking method, and whether it starts fresh, thawed, or frozen. The times below are practical estimates, but cooking time alone cannot confirm doneness. Always check the thickest part of the chicken with a food thermometer and cook poultry to 165°F (74°C).

    Quick Chicken Breast Cooking Times Chart

    MethodThickness / SizeHeat / TemperatureApprox. Time
    Baking1-inch breast375–400°F20–25 minutes
    Baking1.5-inch breast375–400°F25–30 minutes
    Pan-searing1/2-inch, poundedMedium-high4–5 minutes per side
    Pan-searing1-inch breastMedium7–8 minutes per side
    Grilling1-inch breastMedium-high, about 400–450°F10–14 minutes total
    Grilling1.5-inch breastMedium-high, about 400–450°F14–18 minutes total
    Air fryerSmall to medium breast375–400°FAbout 8–14 minutes
    PoachingAverage boneless breastGentle simmerAbout 10–15 minutes after liquid reaches a gentle simmer
    Instant PotFresh boneless breastHigh pressureAbout 8–10 minutes, plus pressure release
    Instant PotFrozen boneless breastHigh pressureAbout 10–15 minutes, depending on thickness

    Important: These times are estimates, not doneness guarantees. Equipment, breast size, starting temperature, and thickness can all change the actual cooking time.

    How Thickness Changes Cooking Time

    Thickness is one of the biggest factors affecting how long chicken breast takes to cook.

    A thin breast cooks much faster than a thick one because heat reaches the center more quickly. Thick chicken breasts can develop dry edges before the center is fully cooked if the thickness is very uneven.

    For more even cooking, pound the breast to a consistent thickness before cooking. A thickness of roughly 1/2 to 3/4 inch is useful for many stovetop and quick-cooking methods.

    Very large chicken breasts can also be butterflied or cut into smaller pieces to help them cook more evenly.

    How Long to Bake Chicken Breast

    Baking time depends heavily on thickness and oven temperature.

    As a general guide:

    • At 350°F, chicken breast usually cooks more slowly and may need roughly 25–35 minutes depending on thickness.
    • At 375°F, many average boneless breasts take around 20–30 minutes.
    • At 400°F, an average 1-inch breast may take around 20–25 minutes.
    • At 425°F, thinner or average breasts may cook in roughly 18–22 minutes.
    • Always check the internal temperature rather than relying on oven time alone.

    A dedicated baked chicken breast guide can go deeper into seasoning, oven setup, browning, and moisture retention.

    How Long to Cook Chicken Breast on the Stove

    Thin or evenly pounded chicken breasts are easiest to cook on the stovetop.

    A breast around 1/2 inch thick may take about 4–5 minutes per side over medium-high heat.

    A breast closer to 1 inch thick may need roughly 7–8 minutes per side, usually with the heat reduced slightly after browning.

    Pan temperature, skillet material, and breast thickness can all affect the timing.

    How Long to Grill Chicken Breast

    For boneless, skinless chicken breasts, medium-high grill heat works well.

    An average breast around 1 inch thick often takes about 10–14 minutes total, turning during cooking.

    A thicker breast around 1.5 inches may need closer to 14–18 minutes.

    Two-zone grilling can help with thick breasts: brown them over direct heat, then move them to indirect heat to finish more gently.

    Do not remove chicken early and rely on carryover cooking to make it safe. Confirm that the thickest part has reached 165°F (74°C) before removing it from the grill.

    How Long to Air Fry Chicken Breast

    Air fryer cooking time varies by breast size and thickness.

    A rough guide:

    • Small breasts: about 7–10 minutes
    • Medium breasts: about 10–12 minutes
    • Large breasts: about 12–16 minutes

    Many air fryers cook chicken breast well around 375–400°F.


    Because air fryer models vary, check early and confirm doneness with a thermometer.

    How Long to Poach Chicken Breast

    For poaching, place chicken in liquid and bring it to a gentle simmer rather than a hard boil.

    Average boneless chicken breasts often need around 10–15 minutes once the liquid is gently simmering, but thick pieces may take longer.

    Check the center with a thermometer before serving.

    How Long to Cook Chicken Breast in the Instant Pot

    Pressure-cooking time depends on whether the chicken is fresh or frozen and how thick the pieces are.

    Fresh boneless breasts often need roughly 8–10 minutes at high pressure.

    Frozen breasts may need around 10–15 minutes, depending on thickness and whether they are frozen together or separately.

    Remember that total time is longer than the programmed cook time because the cooker also needs time to build and release pressure.

    How Long to Cook Chicken Breast From Frozen

    Chicken can be cooked from frozen using suitable methods such as the oven or stovetop, although it generally takes longer than thawed chicken.

    A common guideline is to allow roughly 50% more cooking time than you would for thawed chicken.

    For example, if a thawed breast normally takes around 20 minutes in the oven, a frozen one may need closer to 30 minutes.

    Avoid relying on cooking time alone. Check the thickest part and make sure it reaches 165°F (74°C).

    Cooking Time vs. Internal Temperature

    Cooking time tells you approximately when to start checking the chicken.

    Internal temperature tells you whether it is actually done.

    Chicken breasts of the same weight can still cook at different speeds because of differences in thickness, starting temperature, cookware, oven calibration, grill heat, and appliance performance.

    For the safest and most reliable result,Chicken Breast Internal Temperature insert a food thermometer into the thickest part of the breast and confirm a temperature of 165°F (74°C).

    Your existing internal-temperature guide should be the main internal link from this section.

    Should You Rest Chicken Breast After Cooking?

    Yes. Resting is useful for texture and moisture retention.

    Once chicken has reached a safe internal temperature, remove it from the heat and let it rest for several minutes before slicing.

    Resting can help reduce moisture loss when the meat is cut.

    It should be treated as a quality step, not as a substitute for reaching a safe cooking temperature.

    Frequently Asked Questions

    How long does chicken breast take to cook?

    Most boneless chicken breasts take somewhere between about 10 and 30 minutes, depending on thickness and cooking method.

    How long do thin chicken breasts take?

    Thin or pounded chicken breasts can cook in under 10 minutes on the stovetop and often cook faster in the oven or air fryer than full-thickness breasts.

    How long do thick chicken breasts take?

    Thick breasts can take 25–30 minutes or longer in the oven and usually need more careful heat management on the grill or stovetop.

    How long do you bake chicken breast at 350°F?

    A typical boneless chicken breast may need around 25–35 minutes, depending on thickness.

    How long do you bake chicken breast at 375°F?

    Many average boneless breasts take roughly 20–30 minutes.

    How long do you bake chicken breast at 400°F?

    A roughly 1-inch-thick breast often takes around 20–25 minutes.

    How long do you bake chicken breast at 425°F?

    Average boneless breasts may take roughly 18–22 minutes, though thick pieces can need longer.

    Does boneless chicken cook faster than bone-in chicken?

    Usually, yes. Bone-in pieces generally take longer because they are often larger and heat moves through them differently.

    Does frozen chicken breast take longer to cook?

    Yes. Frozen chicken generally needs more cooking time than thawed chicken.

    Can you tell when chicken is done by time alone?

    No. Cooking times are only estimates. Use a food thermometer and check the thickest part for 165°F (74°C).

    Final Takeaway

    There is no single universal cooking time for chicken breast. Thickness, cooking method, starting temperature, and equipment all matter.

    Use cooking-time ranges to know when to start checking, then confirm doneness with a food thermometer. For poultry, the practical consumer target is 165°F (74°C) in the thickest part.

  • Chicken Breast Internal Temperature: When Is It Safe and Done?

    Chicken Breast Internal Temperature: When Is It Safe and Done?

    Cooking chicken breast safely comes down to one reliable check: internal temperature. Appearance and cooking time can be useful clues, but a food thermometer gives you the clearest way to confirm doneness. This guide explains the safe temperature for chicken breast, where to place the thermometer, and how to avoid overcooking while getting reliable results.

    When you get these principles right, you can cook chicken breast with more confidence while improving both texture and consistency.

    The Golden Rule: USDA Safe Minimum Temperature

    The United States Department of Agriculture (USDA) recommends a safe minimum internal temperature of 165°F (74°C) for poultry. This applies whether you’re cooking a whole bird, individual pieces such as chicken breasts, or ground poultry.

    Raw chicken can contain harmful bacteria such as Salmonella and Campylobacter. Cooking chicken breast to the recommended internal temperature helps reduce the risk from harmful foodborne bacteria when proper food-safety practices are followed.

    Looking at the chicken or relying only on cooking time is not enough to confirm doneness. A properly functioning food thermometer gives you a more reliable way to check that the thickest part of the chicken has reached the recommended temperature.

    Mastering Your Meat Thermometer for Accuracy

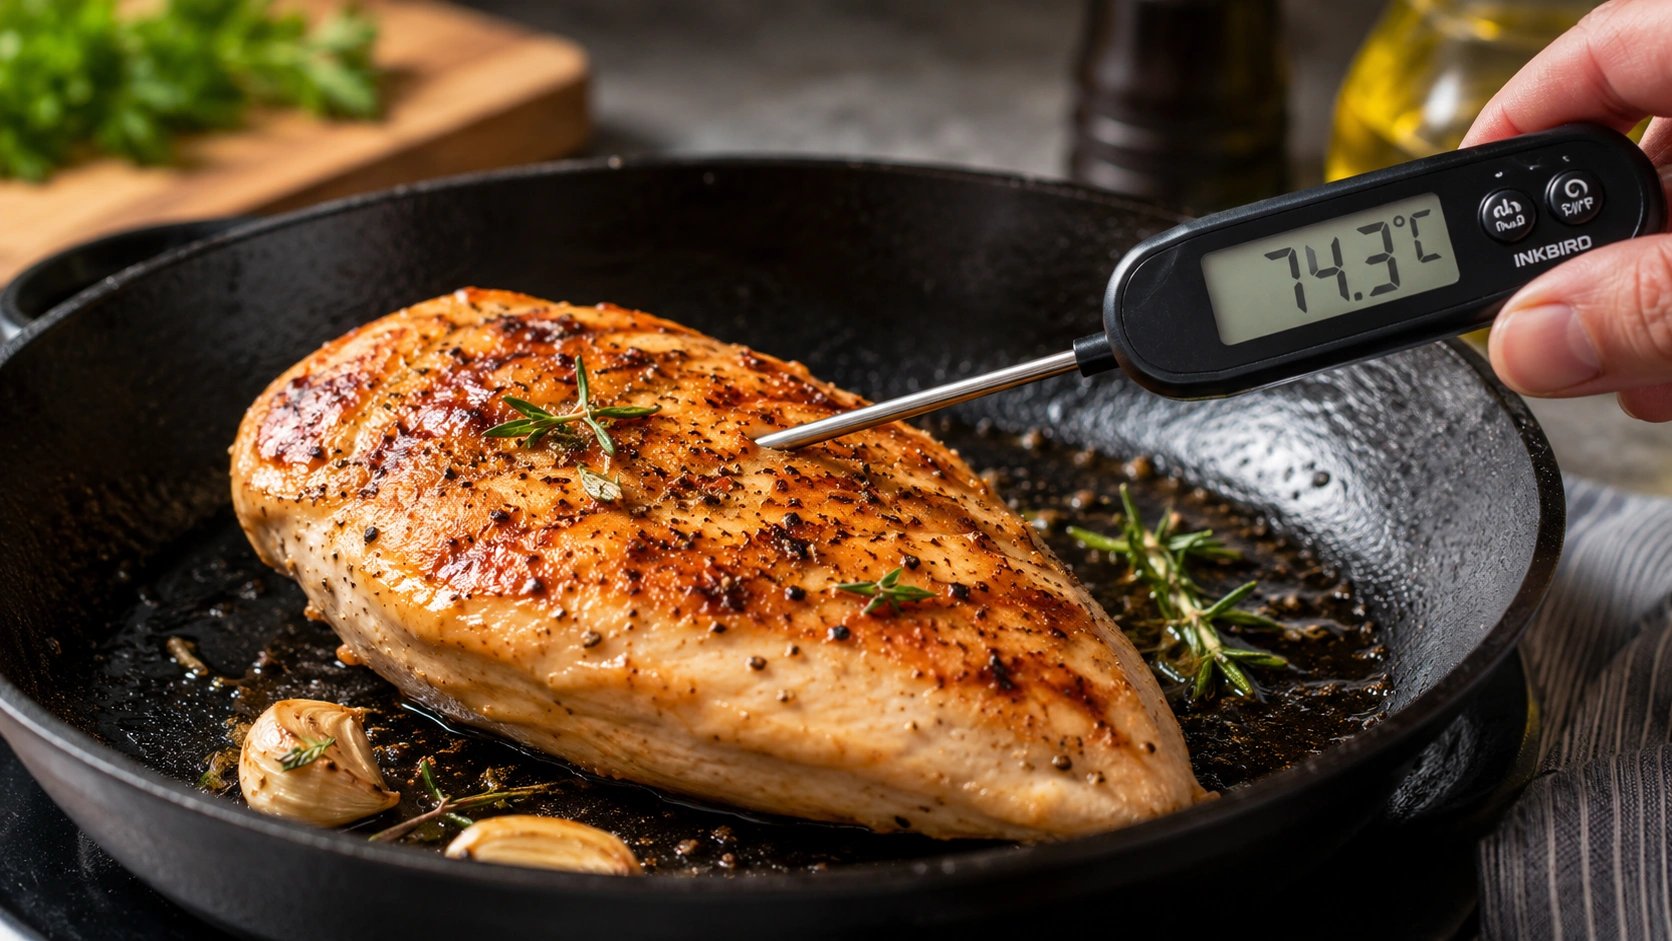
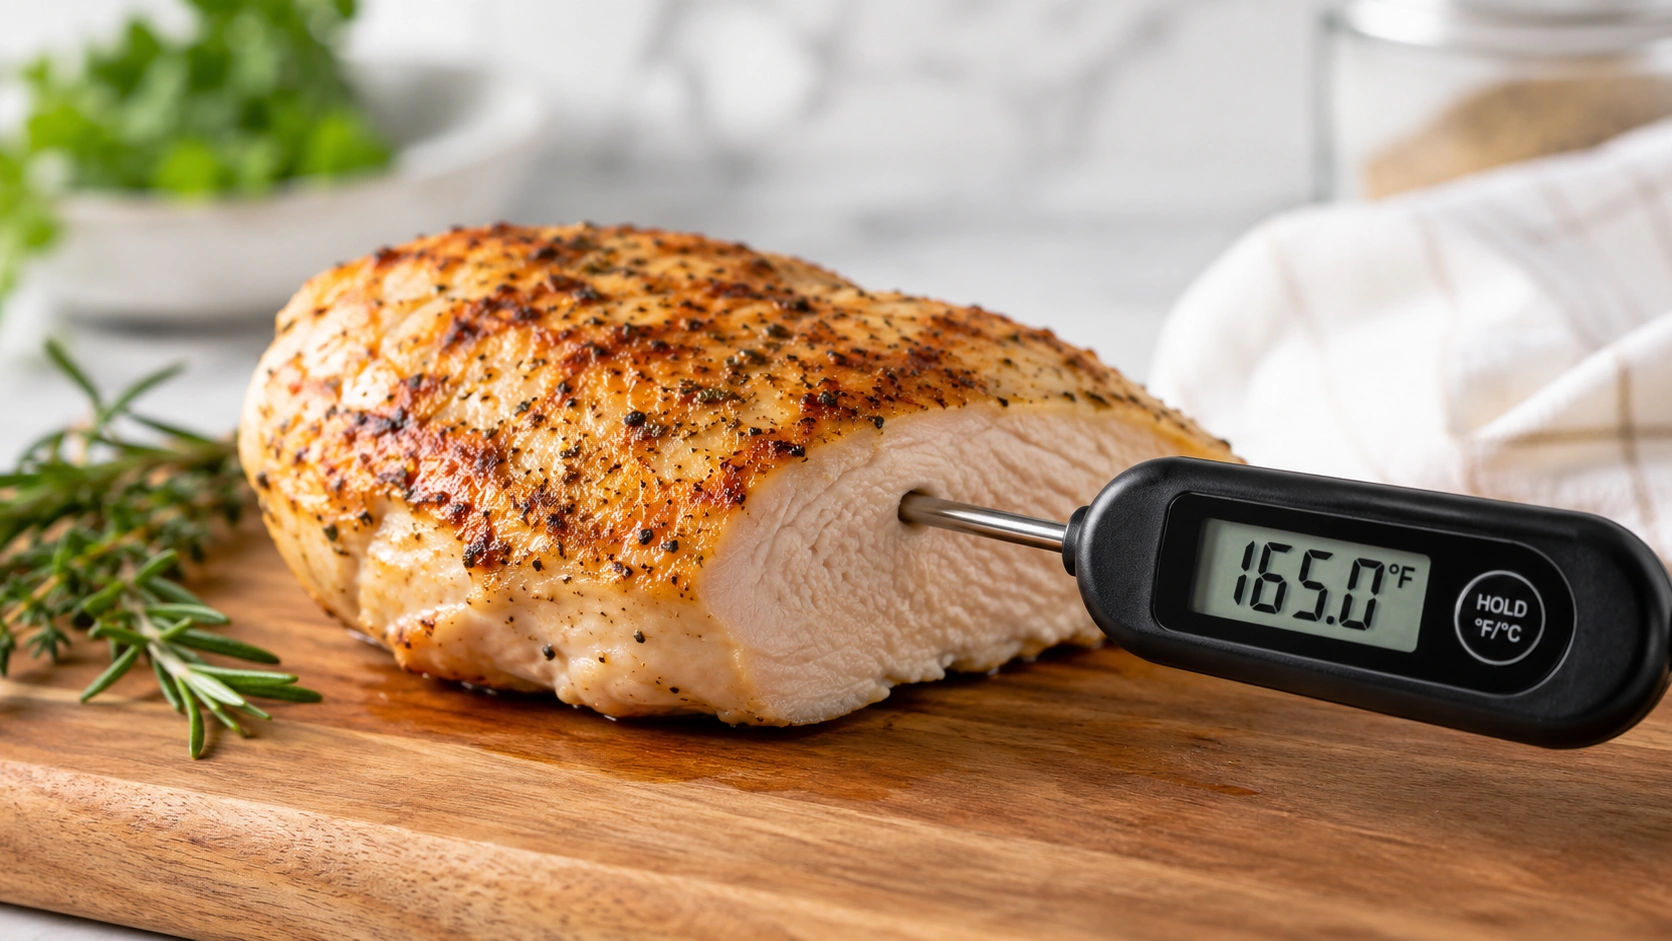
    When checking chicken breast, insert the thermometer probe into the thickest part of the meat, positioning the tip near the center. Avoid touching bone, if present, because it can affect the reading.

    An instant-read digital thermometer works particularly well for chicken breast because it provides a reading quickly. This allows you to check the temperature without keeping the oven door open or leaving the chicken over direct heat longer than necessary.

    Check your thermometer periodically to make sure it is reading accurately. One common method is the ice-water test: fill a glass with plenty of ice, add cold water, stir, and insert the probe without touching the sides or bottom. The reading should be close to 32°F (0°C). Follow the manufacturer’s instructions if calibration is needed.

    Beyond Color and Time: True Doneness Indicators

    Color alone is not a reliable way to determine whether chicken is safely cooked. Chicken can sometimes retain a pink color even after reaching the recommended internal temperature, while chicken that appears fully cooked may still be unsafe if it has not reached the proper temperature.

    Cooking time is also only a guideline. Breast thickness, starting temperature, cooking method, and the actual temperature of your oven, grill, or pan can all affect how quickly chicken cooks.

    The thermometer should therefore be your primary tool for confirming doneness.

    Carryover Cooking: What Happens After Chicken Leaves the Heat

    Carryover cooking means that chicken can continue to warm slightly after it is removed from the heat. The amount of temperature rise is not fixed; it can vary depending on the size and thickness of the chicken breast, the cooking method, and how hot the exterior is when cooking stops.

    For straightforward home food-safety guidance, use a food thermometer to verify that the thickest part of the chicken breast reaches 165°F (74°C). Do not rely on carryover cooking alone to bring undercooked chicken up to a safe temperature.

    Resting the chicken for a few minutes before slicing can still be useful because it gives the meat time to settle and may help reduce moisture loss when it is cut. Resting should be treated as a quality step, not as a substitute for confirming the final internal temperature with a thermometer.

    How to Keep Chicken Breast Juicy

    Chicken breasts are often thicker on one end than the other. That uneven shape can cause the thinner portion to overcook before the thickest part reaches the recommended internal temperature.

    Pounding the chicken breast to a more even thickness can help it cook more consistently. If you need a detailed walkthrough, see How to Pound Chicken Breast Evenly.

    To avoid overcooking, start checking the chicken’s temperature before you expect it to be finished. Insert an instant-read thermometer into the thickest part of the breast and confirm that it reaches 165°F (74°C). Once it reaches that temperature, remove the chicken from the heat and let it rest briefly before slicing.

    Brining can also help chicken retain moisture and improve seasoning. For a complete guide, see How to Brine Chicken Breast.

    Marinades can add flavor as well, although their effect on texture depends on the ingredients and how long the chicken is marinated.

    Chicken Breast Internal Temperature FAQs

    Is slightly pink chicken breast safe?

    Color alone cannot tell you whether chicken is safe. Chicken can sometimes remain slightly pink after cooking, while chicken that looks fully white may still be undercooked. The most reliable way to confirm doneness is to use a food thermometer and check that the thickest part has reached 165°F (74°C).

    Does thickness or cooking method change the target temperature?

    No. The recommended safe minimum internal temperature remains 165°F (74°C). Thickness and cooking method affect how long the chicken takes to reach that temperature, not the final target itself.

    How do I check chicken breast cooked from frozen?

    Chicken breast can be cooked from frozen using appropriate cooking methods, although it will generally take longer than thawed chicken. Check the thickest part with a food thermometer and confirm that it reaches 165°F (74°C).

    For more detail, see Can You Cook Chicken Breast From Frozen?

    Where should I place the thermometer in bone-in chicken?

    Insert the thermometer into the thickest part of the meat without touching the bone. For larger poultry cuts or whole birds, check more than one location when necessary to make sure the thickest areas have reached the recommended internal temperature.