Category: Chicken

  • Chicken Breast Seasoning: Easy Blend, Ratios Cooking Tips

    Chicken Breast Seasoning: Easy Blend, Ratios Cooking Tips

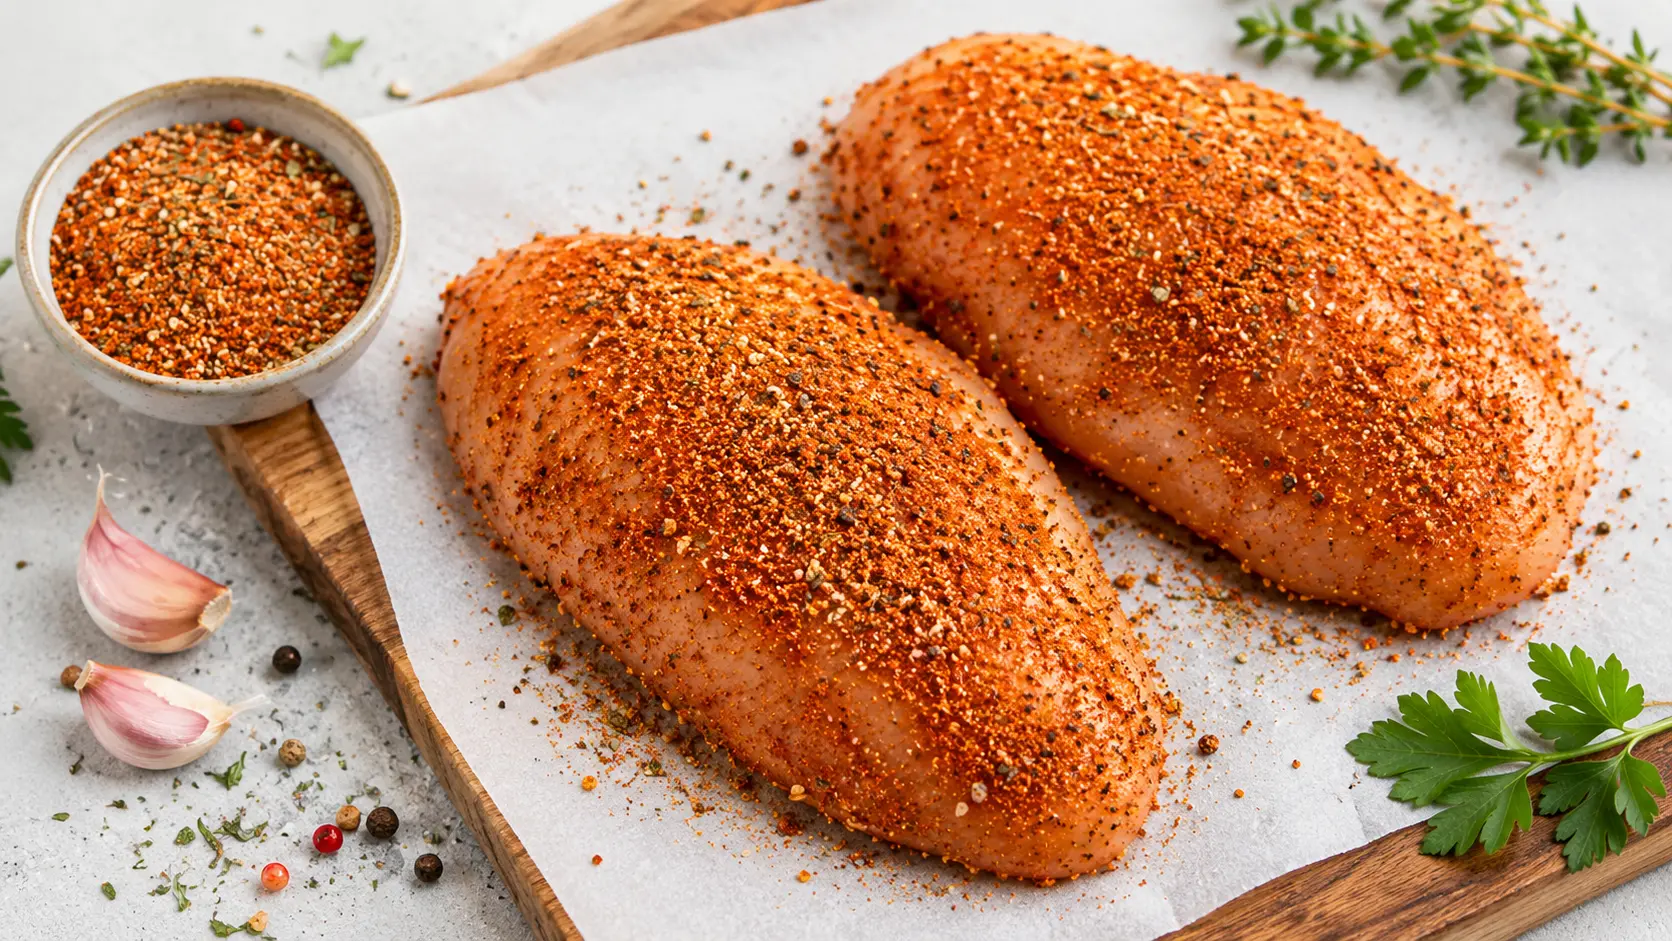
    A good chicken breast seasoning is less about one exact formula and more about balancing salt, spices, optional oil, and timing for the cooking method you plan to use.

    Salt can season farther into the meat than most herbs and spices, while ingredients such as paprika, garlic powder, onion powder, black pepper, and dried herbs mainly build flavor on the surface.

    The goal is simple: season evenly, avoid too much salt, manage surface moisture, and adjust the blend for grilling, baking, pan-searing, or air frying.

    What Makes a Good Chicken Breast Seasoning?

    A balanced chicken seasoning blend usually combines salt with dry spices and optional herbs.

    Salt

    Salt is one of the most important parts of the blend because it seasons the chicken and can penetrate farther into the meat than most spices.

    The exact amount depends on the size of the chicken breasts, the type of salt, and whether other ingredients already contain sodium.

    Aromatics and Spices

    Garlic powder, onion powder, paprika, black pepper, chile, and dried herbs mainly season the surface of the chicken.

    They add aroma, color, and flavor to the exterior as the chicken cooks.

    Sugar

    Sugar is optional.

    Brown sugar, honey powder, or sweet seasoning blends can encourage browning and add flavor, but they may darken or burn faster under direct high heat.

    Basic Chicken Breast Seasoning Blend

    Use this as a flexible starting point for about 2 pounds of boneless, skinless chicken breast:

    • 1 to 1 1/4 teaspoons kosher salt
    • 1 teaspoon paprika
    • 1 teaspoon garlic powder
    • 1/2 teaspoon onion powder
    • 1/2 teaspoon black pepper
    • Optional: 1/2 to 1 teaspoon dried herbs such as oregano or thyme
    • Optional: a small pinch of cayenne or chile flakes

    This is a starting point, not a universal ratio. Adjust the salt and spices based on the amount of chicken, the salt you use, and the cooking method.

    How Much Seasoning Should You Use?

    There is no single seasoning amount that works for every chicken breast.

    A practical approach is to season lightly and evenly across both sides, then adjust according to the total amount of meat and the saltiness of any other ingredients in the recipe.

    Kosher salt, table salt, and fine sea salt do not measure the same by volume, so avoid treating one teaspoon measurement as interchangeable across all salt types.

    When Should You Season Chicken Breast?

    You can season chicken immediately before cooking or ahead of time.

    Both approaches can work, but they produce slightly different results.

    Immediately Before Cooking

    Seasoning just before cooking is simple and convenient.

    This works especially well when you want to keep the surface relatively dry before grilling or pan-searing.

    Seasoning Ahead of Time

    If you season the chicken ahead of time and refrigerate it, the salt has more time to interact with the meat.

    A longer refrigerated rest can help distribute seasoning and may also help the surface dry somewhat, depending on how the chicken is stored.

    There is no need to treat one exact resting window as a universal rule.

    Should You Season Chicken Immediately Before Cooking or Ahead of Time?

    If you are cooking right away, season immediately before the chicken goes into the pan, oven, grill, or air fryer.

    If you are preparing the chicken in advance, you can season it earlier and keep it refrigerated until cooking time.

    The best timing depends on the amount of salt, the cooking method, and your preparation schedule.

    Should You Oil Chicken Before Seasoning?

    Oil is optional.

    A light coating can help spices adhere to the surface and can support browning during cooking.

    You may find it useful for grilling, baking, or air frying.

    If the chicken is being pan-seared in a skillet that already contains enough oil, you may not need to oil the meat itself.

    Dry Seasoning vs. Marinade

    Dry Seasoning

    A dry seasoning blend is made from salt, spices, and optional herbs applied directly to the chicken.

    Because it adds little extra liquid, it can help preserve a relatively dry surface, which generally supports better browning.

    Marinade

    A marinade usually contains liquid ingredients such as oil, acid, or sauces along with salt and flavorings.

    It can change surface flavor and texture, but excess liquid may need to drain before high-heat cooking.

    See Chicken Breast Marinade for more details.

    Dry Seasoning vs. Brining

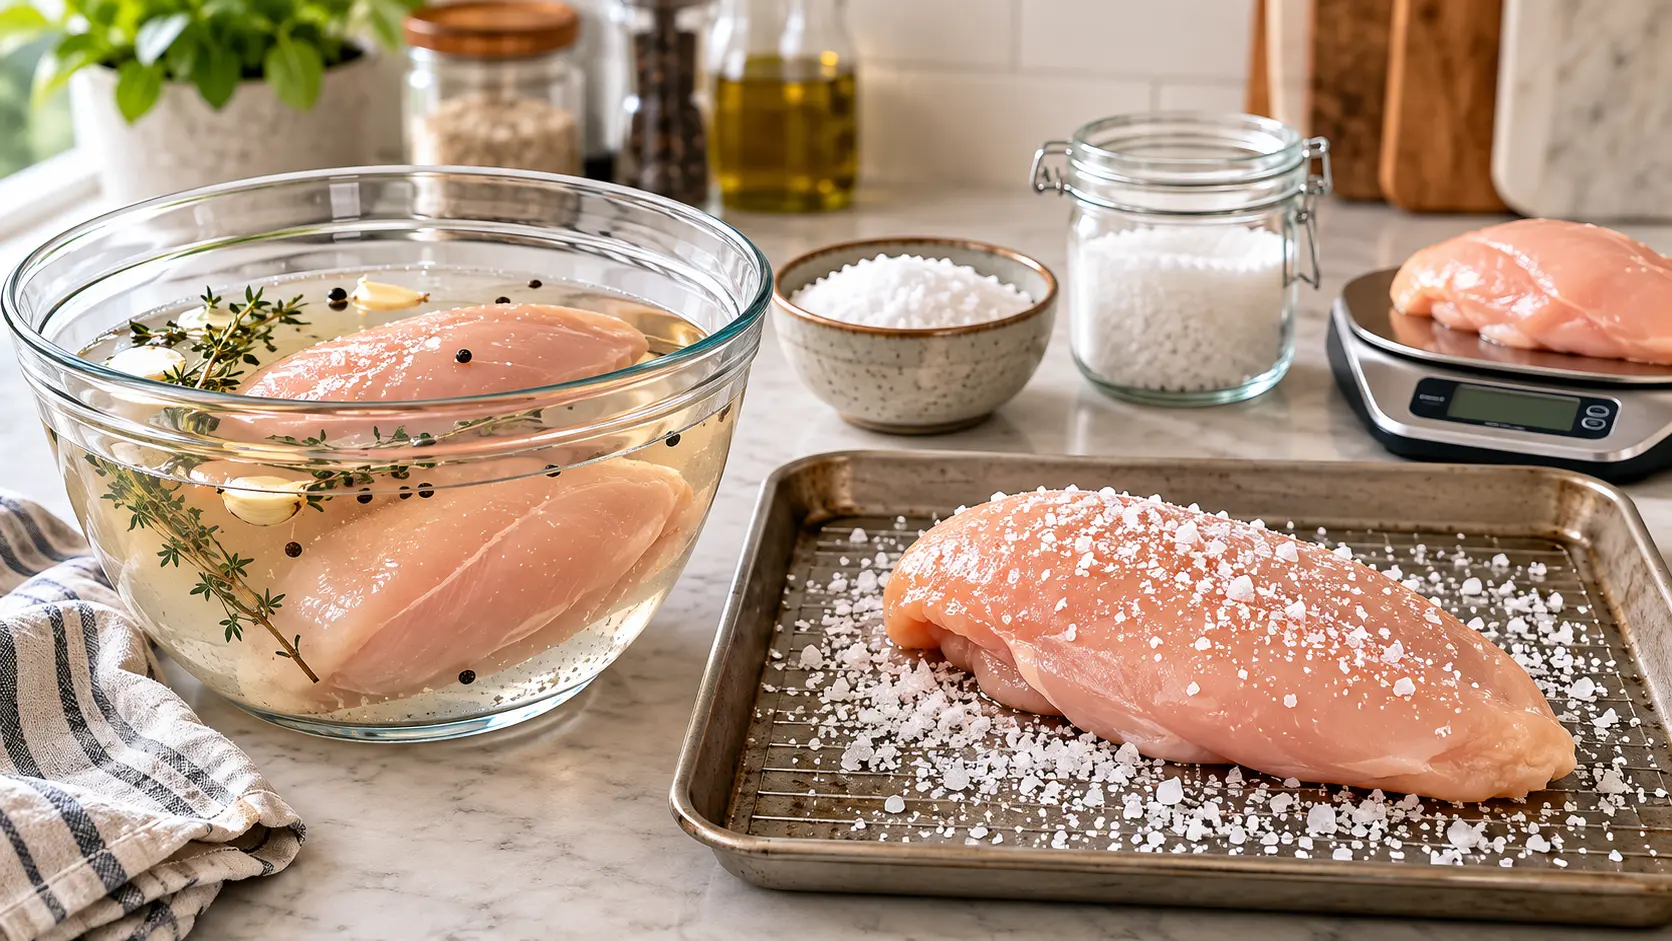
    Dry seasoning adds salt and spices directly to the surface of the chicken.

    Brining uses a saltwater solution to season the meat and affect moisture retention.

    If chicken has already been brined, reduce or omit additional salt in the dry seasoning to avoid making the chicken too salty.

    See How to Brine Chicken Breast for the full method.

    Best Seasoning for Baked Chicken Breast

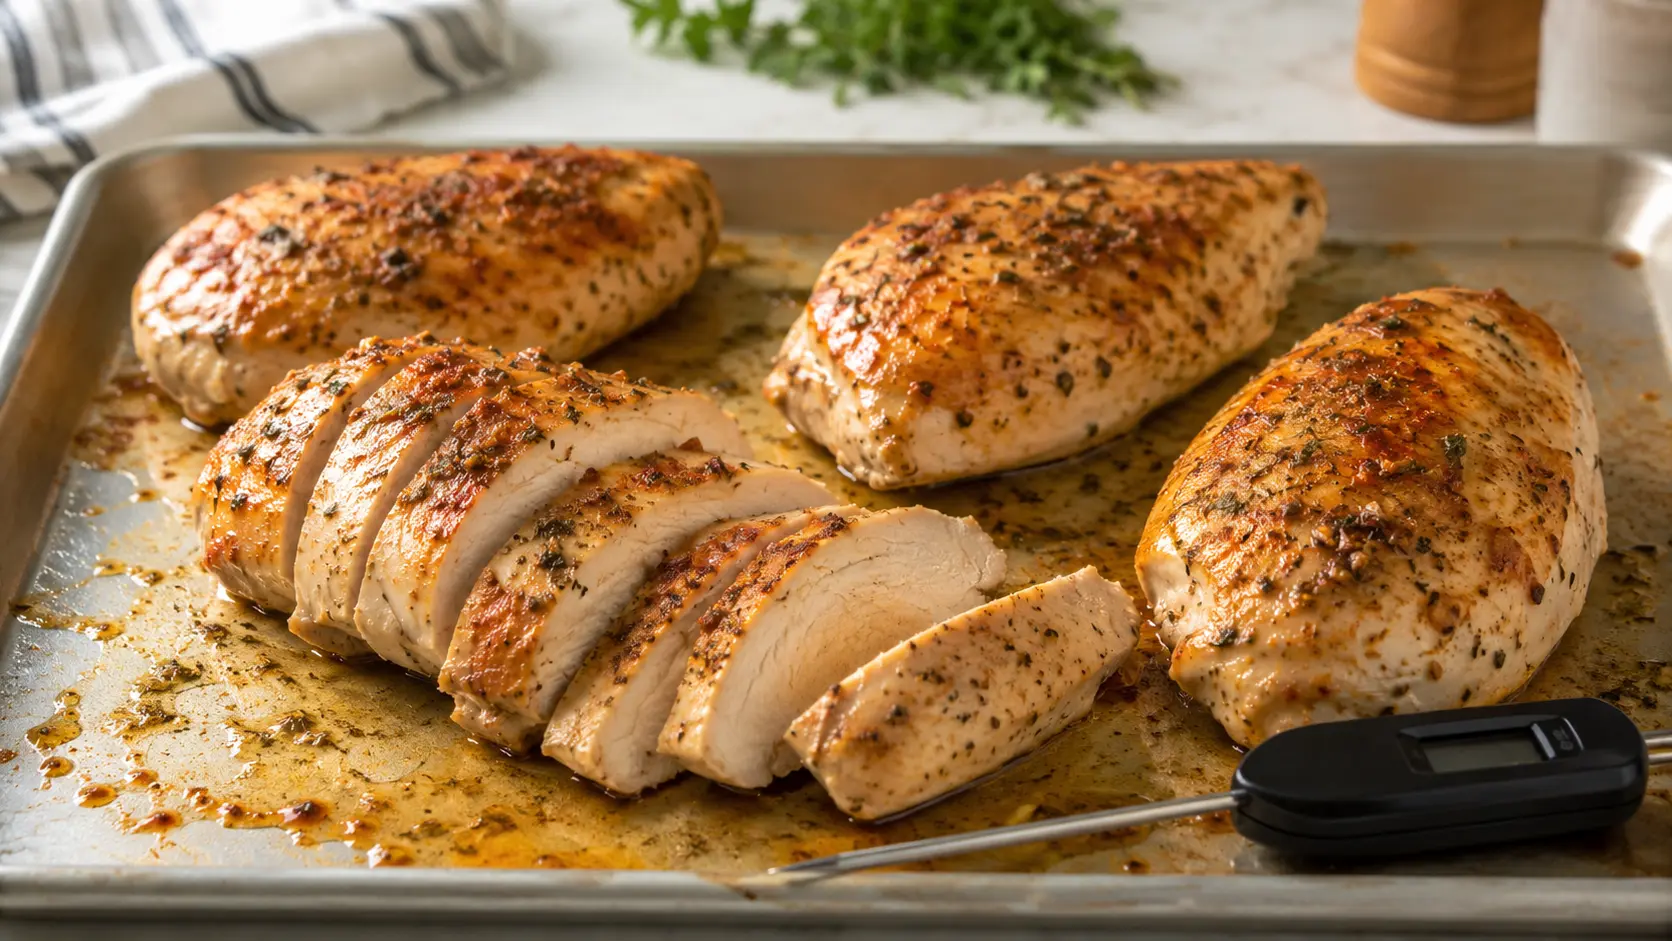
    Baking is flexible and works well with garlic powder, paprika, black pepper, dried herbs, and other simple seasoning blends.

    Slightly sweeter rubs can also work, but sugar may still darken quickly at higher oven temperatures.

    See Baked Chicken Breast for oven timing and temperature guidance.

    Best Seasoning for Grilled Chicken Breast

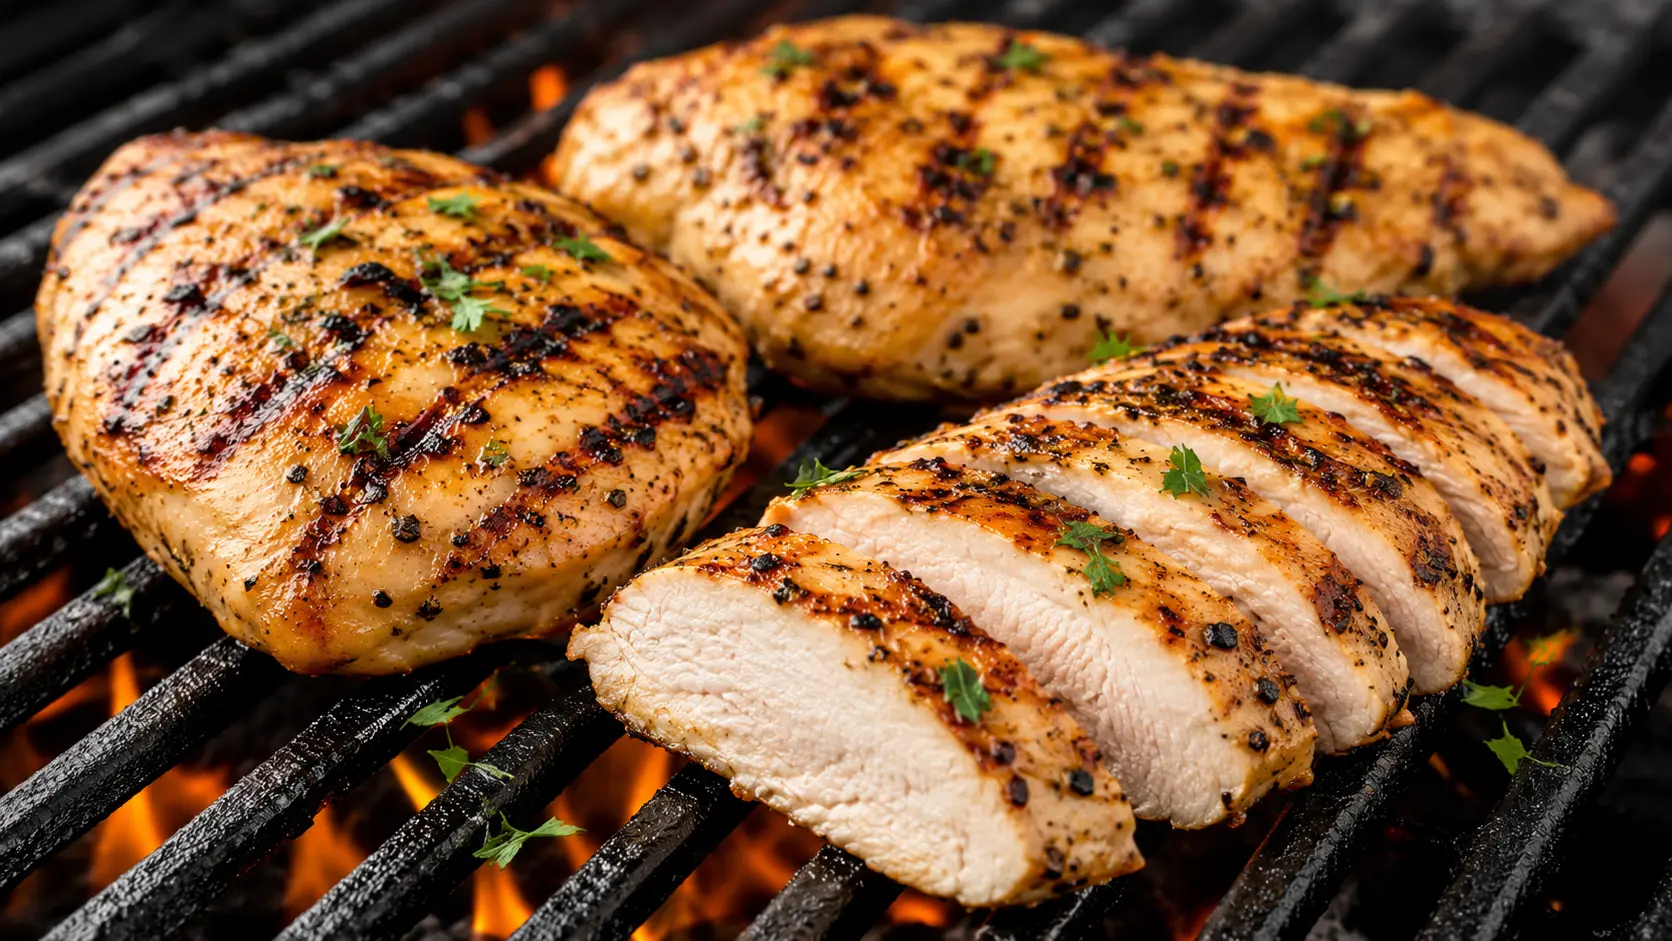
    Grilling uses direct heat, so simple blends with salt, paprika, garlic, pepper, and herbs often work well.

    A light coating of oil can help the seasoning adhere to the chicken and reduce sticking.

    If the seasoning contains sugar, use it carefully and consider adding sweeter glazes later in cooking rather than exposing them to strong heat for the entire cook.

    See Grilled Chicken Breast for the full grilling method.

    Best Seasoning for Pan-Seared Chicken Breast

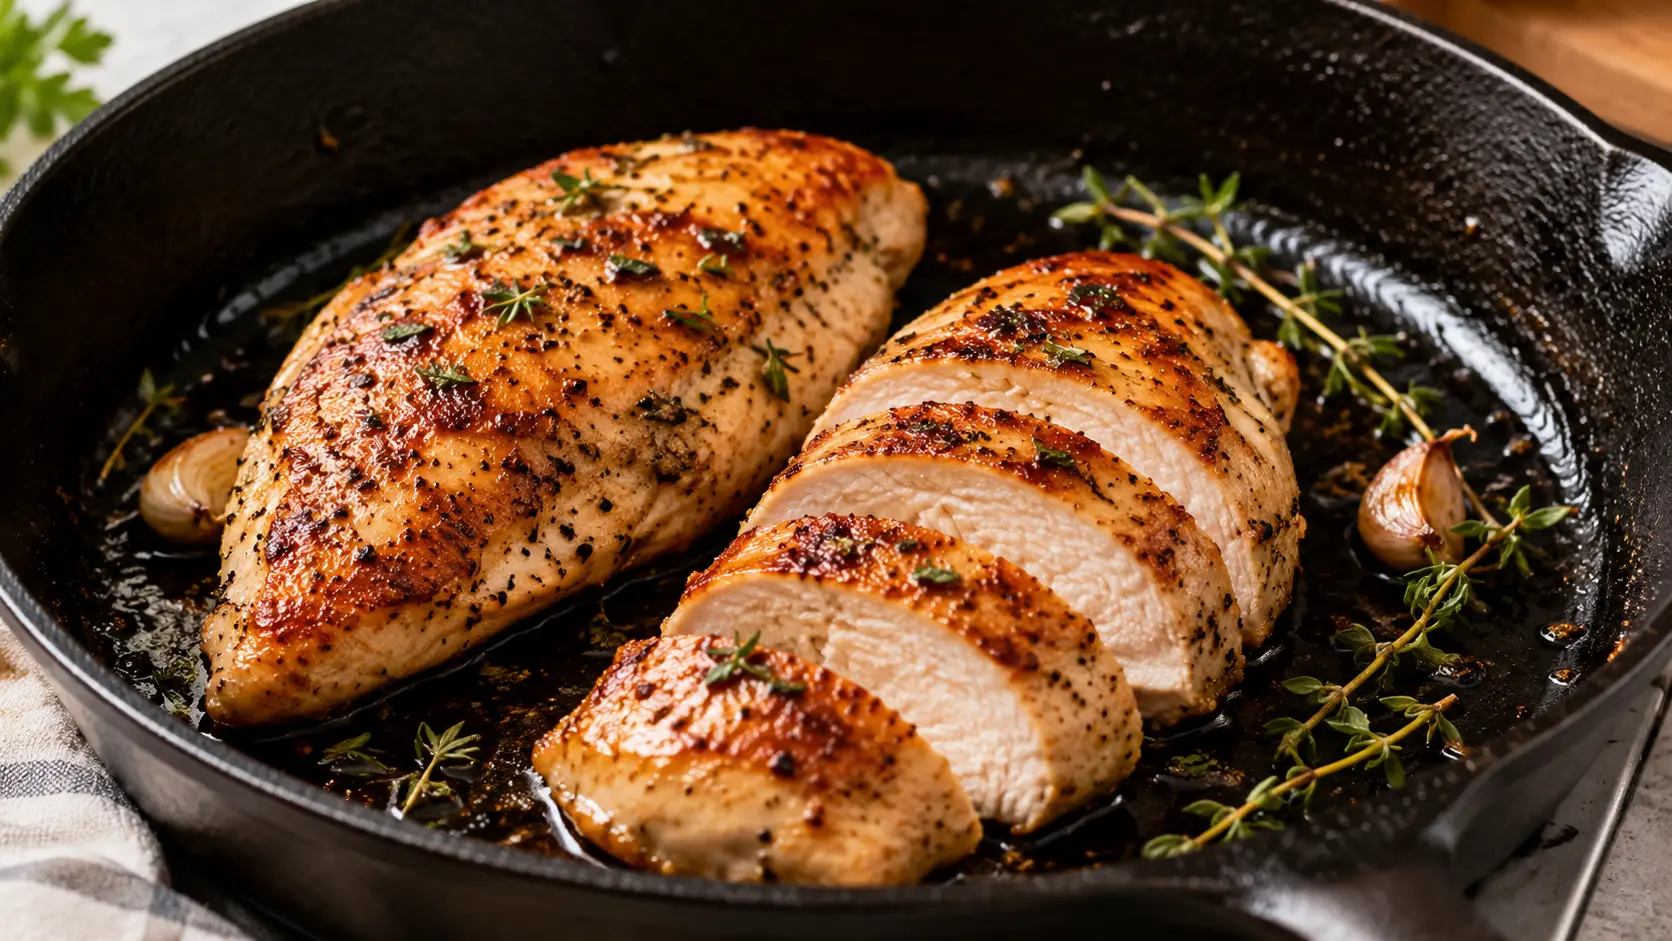
    For pan-searing, avoid applying an excessively thick layer of spices.

    Pat away excess surface moisture before seasoning and use enough oil in the skillet to support even cooking.

    This can improve browning and reduce the chance of garlic powder, paprika, or other spices scorching before the chicken is cooked through.

    See Pan-Seared Chicken Breast for stovetop guidance.

    Best Seasoning for Air Fryer Chicken Breast

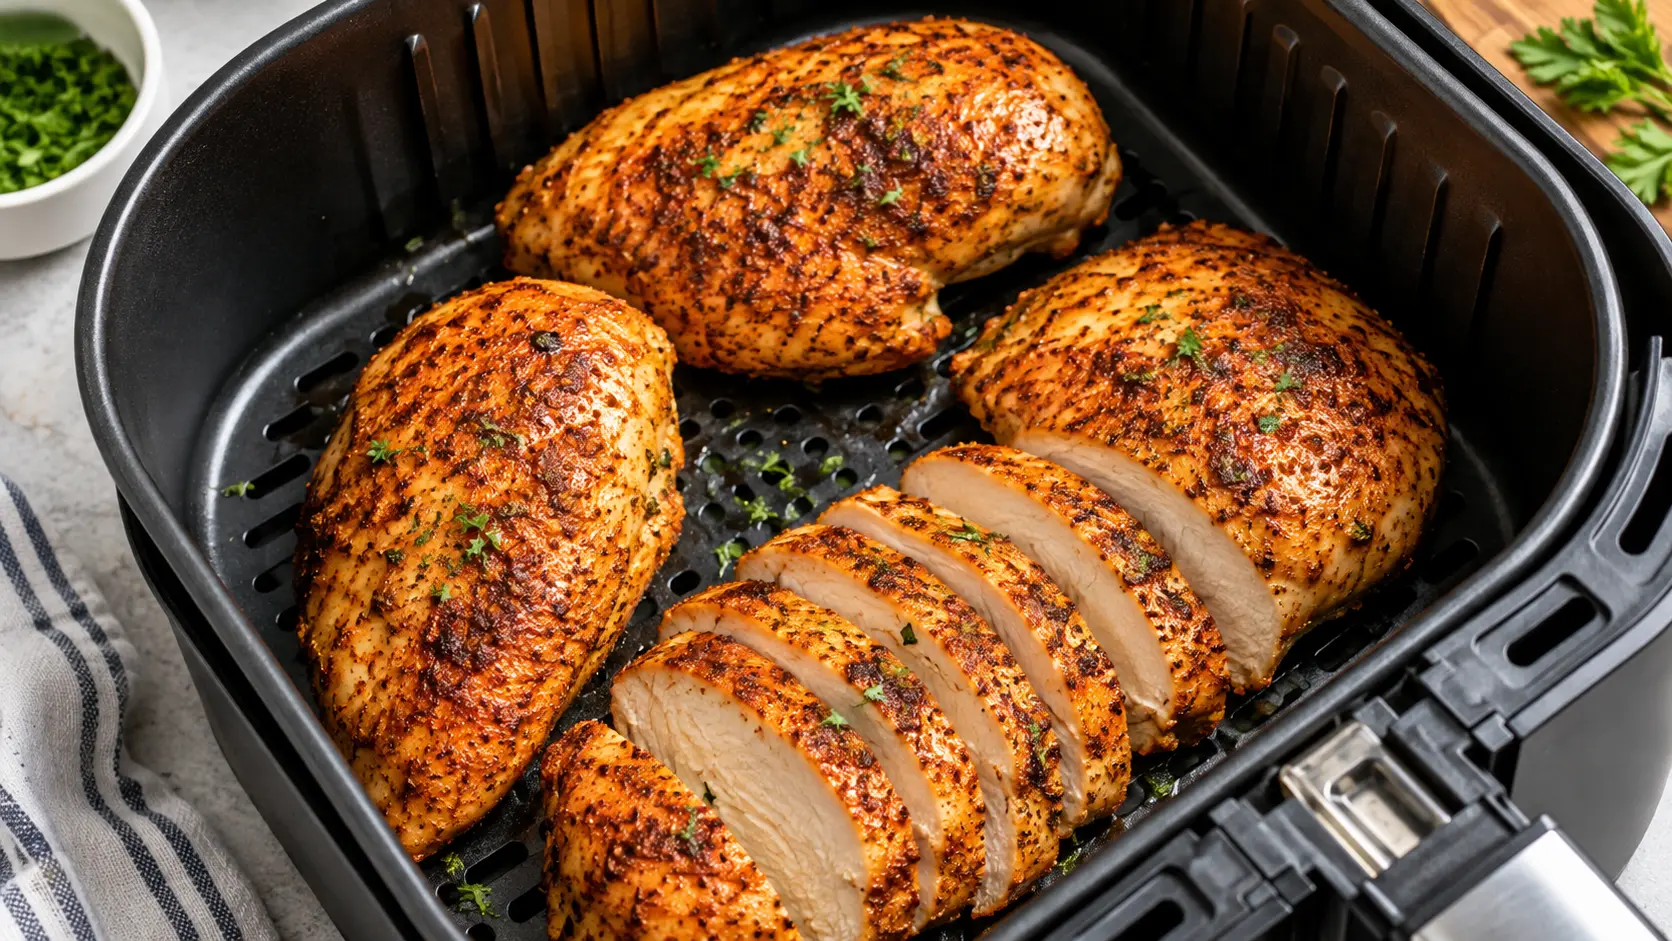
    Air fryer chicken works well with a simple dry spice blend.

    A light coating of oil can help the seasoning adhere more evenly and reduce loose spices in the basket.

    See Air Fryer Chicken Breast for air fryer timing and temperature guidance.

    Should You Season Both Sides?

    Yes, seasoning both sides helps create more even surface flavor.

    Try to distribute the seasoning rather than concentrating most of it on one side.

    Should You Pat Chicken Dry Before Seasoning?

    Removing excess surface moisture can help the seasoning cling more evenly and generally improves browning.

    You do not need the chicken to be completely moisture-free, but avoid seasoning a surface that is dripping wet.

    Can You Season Frozen Chicken Breast?

    You can season chicken that will be cooked from frozen, but seasoning usually adheres less evenly to a frozen surface.

    Thawing first generally makes it easier to season both sides consistently.

    If you are cooking chicken directly from frozen, follow a method designed specifically for frozen chicken.

    See Can You Cook Chicken Breast From Frozen? for more guidance.

    Troubleshooting Chicken Breast Seasoning

    Why Does My Chicken Taste Bland?

    The chicken may not have enough salt or the seasoning may be unevenly distributed.

    Check the overall seasoning balance rather than simply adding more spices.

    Why Is My Chicken Too Salty?

    The chicken may have been heavily seasoned, previously brined, or combined with other high-sodium ingredients.

    If the chicken is already brined, use a low-salt or salt-free spice blend.

    Why Does the Seasoning Fall Off?

    The seasoning may not be adhering well to the surface.

    A small amount of oil can help spices cling, especially for grilling or air frying.

    Why Does the Seasoning Burn?

    Some spices and sugar-containing blends darken quickly under high heat.

    Use a thinner coating, reduce excessive heat if appropriate, and consider adding sweet sauces later in the cooking process.

    Why Isn’t My Chicken Browning?

    The surface may be too wet, the pan may not be hot enough, or the cooking vessel may be overcrowded.

    Remove excess surface moisture and give each piece enough space to cook.

    Why Do My Spices Taste Harsh?

    The seasoning layer may be too heavy, or the spices may not have had enough contact with cooking fat and heat.

    Use a lighter coating and, when appropriate, a small amount of oil to help distribute the seasoning.

    FAQs

    Should I Wash Chicken Before Seasoning It?

    No.

    Do not wash raw chicken under running water.

    Handle raw poultry carefully and keep its juices away from foods that will be eaten without further cooking.

    How Do I Know When Seasoned Chicken Is Done?

    Do not rely on crust color or cooking time alone.

    Cook chicken until an instant-read thermometer inserted into the thickest part reaches 165°F (74°C).

    See Chicken Breast Internal Temperature and How Long to Cook Chicken Breast for more guidance.

    Should I Pound Chicken Before Seasoning?

    It is optional.

    Pounding can help create a more even thickness, which may make cooking more consistent.

    See How to Tenderize Chicken Breast for the full technique.

    Basic Chicken Breast Seasoning Reference Card

    Simple Chicken Breast Seasoning

    Prep Time: 5 minutes
    Yield: Seasons about 4 chicken breasts, approximately 2 lb
    Category: Seasoning / Spice Blend
    Cuisine: American

    Ingredients

    • 1 to 1 1/4 teaspoons kosher salt
    • 1 teaspoon paprika
    • 1 teaspoon garlic powder
    • 1/2 teaspoon onion powder
    • 1/2 teaspoon black pepper
    • Optional: 1/2 to 1 teaspoon dried herbs such as oregano or thyme
    • Optional: a pinch of cayenne or chile flakes
    • Optional: 1 tablespoon olive oil for coating

    Instructions

    1. Pat away excess surface moisture from the chicken breasts with clean paper towels.
    2. If needed, gently pound the chicken to a more even thickness for more consistent cooking.
    3. Mix the kosher salt, paprika, garlic powder, onion powder, black pepper, and any optional herbs or chile.
    4. If desired, lightly coat the chicken with olive oil to help the seasoning adhere.
    5. Sprinkle the seasoning evenly over both sides of the chicken breasts and press it gently onto the surface.
    6. Cook immediately or refrigerate the seasoned chicken until you are ready to cook it.
    7. Cook using your preferred method until the thickest part reaches 165°F (74°C).
    8. Rest the cooked chicken for 5 to 10 minutes before slicing.

    For more ways to prevent dry chicken, see How to Keep Chicken Breast Juicy.

    Notes

    This seasoning blend is a flexible starting point. Adjust the salt and spices according to the amount of chicken, the type of salt, and whether other ingredients in the meal already contain sodium.

    If the chicken has already been brined, reduce or omit the salt in this blend.

  • Chicken Breast Marinade: Easy Formula, Flavors & Marinating Times

    Chicken Breast Marinade: Easy Formula, Flavors & Marinating Times

    A good chicken breast marinade is less about finding one “perfect” recipe and more about balancing salt, oil, aromatics, and optional acidic ingredients for the cooking method you plan to use.

    Marinades mainly season and flavor the exterior of chicken breast. Salt contributes seasoning and can help with moisture retention, oil helps distribute flavors and coat the surface, acids can change surface texture, and sugar can encourage browning but may burn under intense heat.

    The best marinating time depends on the ingredients in the marinade, especially how acidic it is. Always marinate raw chicken in the refrigerator and cook the thickest part to 165°F (74°C).

    What Does a Chicken Marinade Actually Do?

    A marinade can improve flavor, seasoning, and surface texture, but it does not completely transform the inside of a thick chicken breast.

    Adds Surface Flavor

    Herbs, spices, garlic, citrus zest, and other aromatics primarily flavor the exterior and shallow surface layers of the chicken.

    This is why a well-seasoned marinade can make a noticeable difference even when most of its flavor does not penetrate deeply into the meat.

    Helps Season the Chicken

    Salt is one of the most useful ingredients in a marinade. Unlike many aromatics, salt can move farther into the meat and contributes both seasoning and moisture retention during cooking.

    Changes Surface Texture

    Acidic ingredients such as lemon juice, vinegar, yogurt, or buttermilk can affect proteins near the surface of the meat.

    Used in balance, they add flavor and can modify texture. Used too aggressively or for too long, highly acidic marinades may make the exterior soft or mealy.

    Supports Browning

    Oil helps coat the chicken and distribute fat-soluble flavors across the surface.

    Small amounts of sugar can also contribute to browning, but sugary marinades require careful heat management because they can darken or burn quickly.

    The Basic Components of a Good Chicken Marinade

    Salt

    Salt forms the seasoning foundation of many marinades.

    The amount needed depends on the amount of chicken and whether other ingredients, such as soy sauce or bottled sauces, already contain significant sodium.

    Oil

    Oil helps distribute seasonings and coat the surface of the chicken.

    It can also support surface browning during cooking, but it does not “seal in juices,” and adding more oil does not automatically make chicken juicier.

    Aromatics and Spices

    Garlic, onion, paprika, herbs, black pepper, chile, and citrus zest are useful for building flavor.

    Most of their effect remains concentrated near the surface of the chicken.

    Acid

    Acid is optional.

    Lemon juice, vinegar, yogurt, or buttermilk can brighten flavor and change surface texture.

    Stronger acidic marinades generally benefit from shorter marinating periods than mild or non-acidic mixtures.

    Sugar

    Honey, brown sugar, maple syrup, or sweet sauces can add flavor and color.

    Use them carefully when grilling or pan-searing because sugar can darken before the chicken is fully cooked.

    Simple Chicken Breast Marinade Formula

    This formula is a flexible starting point for about 2 pounds of boneless, skinless chicken breast:

    • 3 tablespoons olive oil
    • 1 to 1 1/4 teaspoons kosher salt
    • 1 to 2 tablespoons lemon juice or vinegar, optional
    • 2 garlic cloves, minced
    • 1 teaspoon paprika
    • 1/2 teaspoon black pepper
    • Optional: dried herbs, fresh herbs, chile flakes, or citrus zest

    These ratios are a starting point, not a universal formula. Adjust salt, acidity, and seasonings according to the recipe and cooking method.

    How Long to Marinate Chicken Breast

    There is no single ideal marinating time for every marinade.

    As a practical cooking framework:

    • Quick flavoring: Around 30 minutes can add useful surface seasoning.
    • Many everyday marinades: A few hours is often enough to develop good surface flavor.
    • Mild or non-acidic marinades: May tolerate longer refrigerated marinating, depending on the ingredients.
    • Highly acidic marinades: Generally benefit from shorter periods because prolonged acid exposure can affect texture.

    From a food-safety standpoint, USDA guidance says poultry may be refrigerated in a marinade for up to 2 days. That does not mean every marinade should be used for that long; texture and flavor may deteriorate sooner depending on the ingredients.

    Always marinate raw chicken in the refrigerator, never on the counter.

    Can You Marinate Chicken Too Long?

    Yes.

    Highly acidic ingredients such as citrus juice or vinegar, as well as certain fresh fruit enzymes, can alter the outer texture of the chicken when used for an extended period.

    The exterior may become softer or mushy before the inside changes significantly.

    Follow the timing recommended for the specific marinade rather than treating one maximum time as appropriate for every recipe.

    Does Marinade Tenderize Chicken Breast?

    Marinades can affect surface texture, but they do not deeply tenderize an entire thick chicken breast.

    Most aromatics and acids remain concentrated near the surface, while salt can penetrate farther into the meat.

    If the main goal is more even thickness and easier cooking, physical methods such as pounding or slicing may be more useful.

    See How to Tenderize Chicken Breast for more techniques.

    Acidic vs. Non-Acidic Marinades

    Acidic Marinades

    These may contain lemon juice, lime juice, vinegar, yogurt, or buttermilk.

    They are useful for bright, tangy flavor and can modify surface texture.

    The stronger the acidic component, the more carefully the marinating time should be managed.

    Non-Acidic Marinades

    These often rely on oil, salt, garlic, herbs, and spices.

    They are useful when you want savory flavor without relying on citrus or vinegar and can be more forgiving for longer refrigerated preparation.

    Best Marinades for Grilling

    Grilling exposes the chicken to strong direct heat, so marinades with moderate oil, salt, herbs, and spices often work well.

    If the marinade contains a lot of honey, sugar, or sweet sauce, let excess marinade drain before grilling or apply a sweet glaze later in the cooking process to reduce scorching.

    See Grilled Chicken Breast for complete grilling guidance.

    Best Marinades for Baking

    Baking gives you more flexibility with thicker or slightly sweeter marinades than direct grilling.

    Yogurt, honey, garlic, herbs, citrus, and spice mixtures can all work well in the oven.

    Sugary ingredients can still darken quickly at higher oven temperatures, so watch the surface as the chicken cooks.

    See Baked Chicken Breast for oven timing and temperature guidance.

    Best Marinades for Pan-Searing

    Pan-searing works best when the chicken is not dripping with excess marinade.

    Let extra liquid drain and remove large pieces of garlic or herbs that may scorch in the skillet.

    This gives the chicken a better chance to brown instead of steaming against the pan.

    See Pan-Seared Chicken Breast for the complete stovetop method.

    Best Marinades for Air Frying

    Air fryers work well with lightly coated chicken.

    Very wet marinades can reduce surface browning and may drip into the basket, so let excess liquid drain before air frying.

    Oil-and-spice marinades are convenient for this method, but yogurt, buttermilk, and other marinades can also work when used as part of a suitable air-fryer recipe.

    See Air Fryer Chicken Breast for temperature and timing guidance.

    Should You Poke Holes in Chicken Before Marinating?

    Poking holes is not necessary for most chicken breast marinades.

    It does not guarantee deep flavor penetration.

    USDA notes that a fork may be used to make holes when marinating poultry, but for everyday boneless chicken breast it is optional rather than required.

    For more even cooking, creating a consistent thickness is usually more useful.

    Should You Rinse Marinade Off Before Cooking?

    No. Do not rinse raw chicken under running water.

    If the chicken is covered in excess liquid or large pieces of garlic and herbs that might burn, simply let the extra marinade drip off or gently remove the excess with a clean paper towel.

    Can You Cook Chicken in the Marinade?

    It depends on the cooking method.

    Chicken cooked in a substantial amount of liquid will behave more like braised, simmered, or poached chicken than seared or grilled chicken.

    If your goal is browning, remove the chicken from the marinade and let excess liquid drain before cooking.

    Can You Reuse Chicken Marinade?

    Do not use marinade that has touched raw chicken directly on cooked food without cooking the marinade first.

    USDA recommends either discarding used marinade or bringing it to a boil before using it as a sauce or baste.

    The easiest approach is to reserve a clean portion of the marinade before adding the raw chicken.

    How to Safely Use Leftover Marinade as a Sauce

    If you want a finishing sauce, reserve some clean marinade before it comes into contact with raw chicken.

    If you choose to use marinade that has already touched raw chicken, USDA guidance says it should be brought to a boil before being used as a sauce.

    Do not brush uncooked used marinade directly onto finished chicken.

    Can You Freeze Chicken in Marinade?

    Yes. Raw chicken can be frozen in a freezer-safe bag or container with its marinade.

    Seal and label the package, then freeze it promptly.

    Thaw frozen chicken safely in the refrigerator before cooking.

    Because different marinades can affect texture differently, especially those containing substantial amounts of acid, follow the specific recipe whenever possible rather than assuming every marinade behaves the same after freezing and thawing.

    Troubleshooting Chicken Breast Marinade

    Why Does My Chicken Still Taste Bland?

    The marinade may need better seasoning balance or more refrigerated contact time.

    Check the salt, herbs, spices, and aromatics before simply increasing the amount of acid.

    Why Is the Exterior Mushy or Mealy?

    The marinade may contain a strong acidic or enzymatic ingredient, or the chicken may have marinated too long for that particular mixture.

    Reduce the acid or shorten the marinating period next time.

    Why Is My Marinade Burning?

    High heat combined with honey, sugar, garlic, or other solids can cause the surface to darken quickly.

    Let excess marinade drain before high-heat cooking and consider adding sweet sauces closer to the end.

    Why Isn’t My Chicken Browning?

    The surface may be too wet, the pan may not be properly preheated, or the pan may be overcrowded.

    Let excess marinade drain and leave enough space between pieces.

    Why Does the Marinade Slide Off?

    A very thin or watery mixture may not cling strongly to the meat.

    Use an appropriate amount of oil or another suitable base to help distribute the seasonings, then remove only the excess liquid before cooking.

    Why Is My Chicken Too Salty?

    The marinade may contain several sources of sodium, such as salt, soy sauce, bottled sauces, seasoning blends, or previously brined chicken.

    Avoid stacking multiple heavily salted ingredients without adjusting the recipe.

    If the chicken has already been brined, reduce or omit additional salt as appropriate. See How to Brine Chicken Breast.

    FAQs

    Should I Wash Chicken Before Marinating?

    No.

    Do not wash raw chicken. Handle it carefully and keep raw poultry and its juices away from foods that will be eaten without further cooking.

    Can I Leave Marinating Chicken on the Counter?

    No.

    Raw chicken should be marinated in the refrigerator.

    Can I Use the Same Marinade for Vegetables?

    Only use the same uncooked marinade if you reserved a clean portion before the marinade touched raw chicken.

    Otherwise, treat it as used raw-poultry marinade.

    How Do I Know When Marinated Chicken Is Done?

    Do not rely only on color, juices, or estimated cooking time.

    Cook chicken until an instant-read thermometer inserted into the thickest part reaches 165°F (74°C).

    See Chicken Breast Internal Temperature and How Long to Cook Chicken Breast for more guidance.

    Basic Chicken Breast Marinade Reference Card

    Simple Chicken Breast Marinade

    Prep Time: 5 minutes
    Marinating Time: 30 minutes to 4 hours for this example marinade
    Yield: Enough for about 2 lb chicken breast
    Category: Marinade / Condiment
    Cuisine: American

    Ingredients

    • 3 tablespoons olive oil
    • 1 to 1 1/4 teaspoons kosher salt
    • 1 to 2 tablespoons lemon juice or vinegar, optional
    • 2 garlic cloves, minced
    • 1 teaspoon paprika
    • 1/2 teaspoon black pepper
    • Optional: 1 teaspoon dried herbs such as oregano or thyme

    Instructions

    1. Whisk together the olive oil, kosher salt, optional lemon juice or vinegar, garlic, paprika, black pepper, and herbs.
    2. Add the chicken breasts and turn until evenly coated.
    3. Cover or seal the container and refrigerate. For this specific baseline marinade, 30 minutes to 4 hours is a practical working range.
    4. Remove the chicken and let excess marinade drain away. Discard the used marinade unless you intentionally bring it to a boil before using it as a sauce.
    5. Cook the chicken using your preferred method until the thickest part reaches 165°F (74°C).
    6. Rest the cooked chicken for 5 to 10 minutes before slicing.

    For more ways to prevent dry chicken, see How to Keep Chicken Breast Juicy.

    Notes

    Marinating time depends on the ingredients. Highly acidic marinades generally benefit from shorter periods, while milder marinades may be more flexible.

    Always marinate raw chicken in the refrigerator.

  • Juicy Air Fryer Chicken Breast: Easy Time Temperature Guide

    Juicy Air Fryer Chicken Breast: Easy Time Temperature Guide

    Air frying boneless, skinless chicken breasts is a fast way to make an easy weeknight protein, but lean chicken can dry out quickly if the pieces are uneven or cooked too long.

    The most reliable approach is simple: pound the chicken to an even thickness, coat it lightly with oil and seasoning, arrange the pieces in a single layer, use a practical starting temperature, begin checking early, confirm doneness with an instant-read thermometer, and rest the chicken before slicing.

    For this method, chicken breasts around 3/4 to 1 inch thick work especially well. Air fryer models vary, so treat cooking time as a guide and cook until the thickest part reaches 165°F (74°C).

    Why This Method Works

    An air fryer uses rapidly circulating hot air to cook food from multiple directions. That concentrated airflow can brown chicken quickly, but it can also overcook lean breast meat if the thick and thin sections are very different in size.

    Pounding the chicken to a more uniform thickness helps it cook more evenly from edge to edge.

    A light coating of oil helps the seasonings adhere and supports browning on the surface. Leaving space around the chicken also allows hot air to circulate more effectively.

    The final doneness check should come from an instant-read thermometer rather than the timer alone.

    Ingredients

    • 4 boneless, skinless chicken breasts, about 2 lb total
    • 1 tablespoon olive oil
    • 1 1/4 teaspoons kosher salt
    • 1 teaspoon paprika
    • 1/2 teaspoon garlic powder
    • 1/2 teaspoon onion powder
    • 1/2 teaspoon black pepper
    • Optional: 1/2 teaspoon Italian seasoning
    • Optional: a pinch of cayenne pepper
    • Optional: chopped fresh parsley for serving

    Ingredient Notes

    Chicken Breast

    Try to use chicken breasts that are reasonably similar in size. Very thick pieces benefit from pounding or slicing horizontally into thinner cutlets.

    Olive Oil

    A small amount of olive oil helps the seasoning stick and encourages surface browning.

    Seasoning

    Kosher salt, paprika, garlic powder, onion powder, and black pepper create a simple savory blend that works well with air-fried chicken.

    Italian seasoning or cayenne can be added if you want a different flavor profile.

    Best Chicken Thickness for Air Frying

    For this method, chicken breasts around 3/4 to 1 inch thick work well.

    Chicken breast naturally tapers from a thick end to a thinner tip. If the breast is left very uneven, the thin section can dry out while the thickest part continues cooking.

    Pounding the thickest section creates a more uniform shape and makes timing easier to manage.

    For more guidance, see How to Tenderize Chicken Breast.

    Best Air Fryer Temperature for Chicken Breast

    375°F (190°C) is a practical starting temperature for this method.

    It provides enough heat for browning while giving the center time to cook through.

    However, air fryer models differ in heating element strength, fan speed, basket design, and capacity. Some models may cook faster or slower at the same displayed temperature.

    Use 375°F as a starting point, then rely on internal temperature to determine when the chicken is done.

    Do You Need to Preheat the Air Fryer?

    Preheating depends on your air fryer model.

    Some manufacturers recommend preheating, while others are designed to cook without it.

    If your model benefits from preheating, run it at 375°F for a few minutes before adding the chicken.

    If your air fryer does not require preheating, you can start with a cold basket and begin checking doneness a little earlier or later depending on how your machine performs.

    How to Cook Chicken Breast in the Air Fryer

    1. Pat the Chicken Dry

    Remove the chicken breasts from their packaging and pat all sides dry with clean paper towels.

    Do not wash raw chicken. Drying the surface helps the seasoning adhere and improves browning.

    2. Pound to an Even Thickness

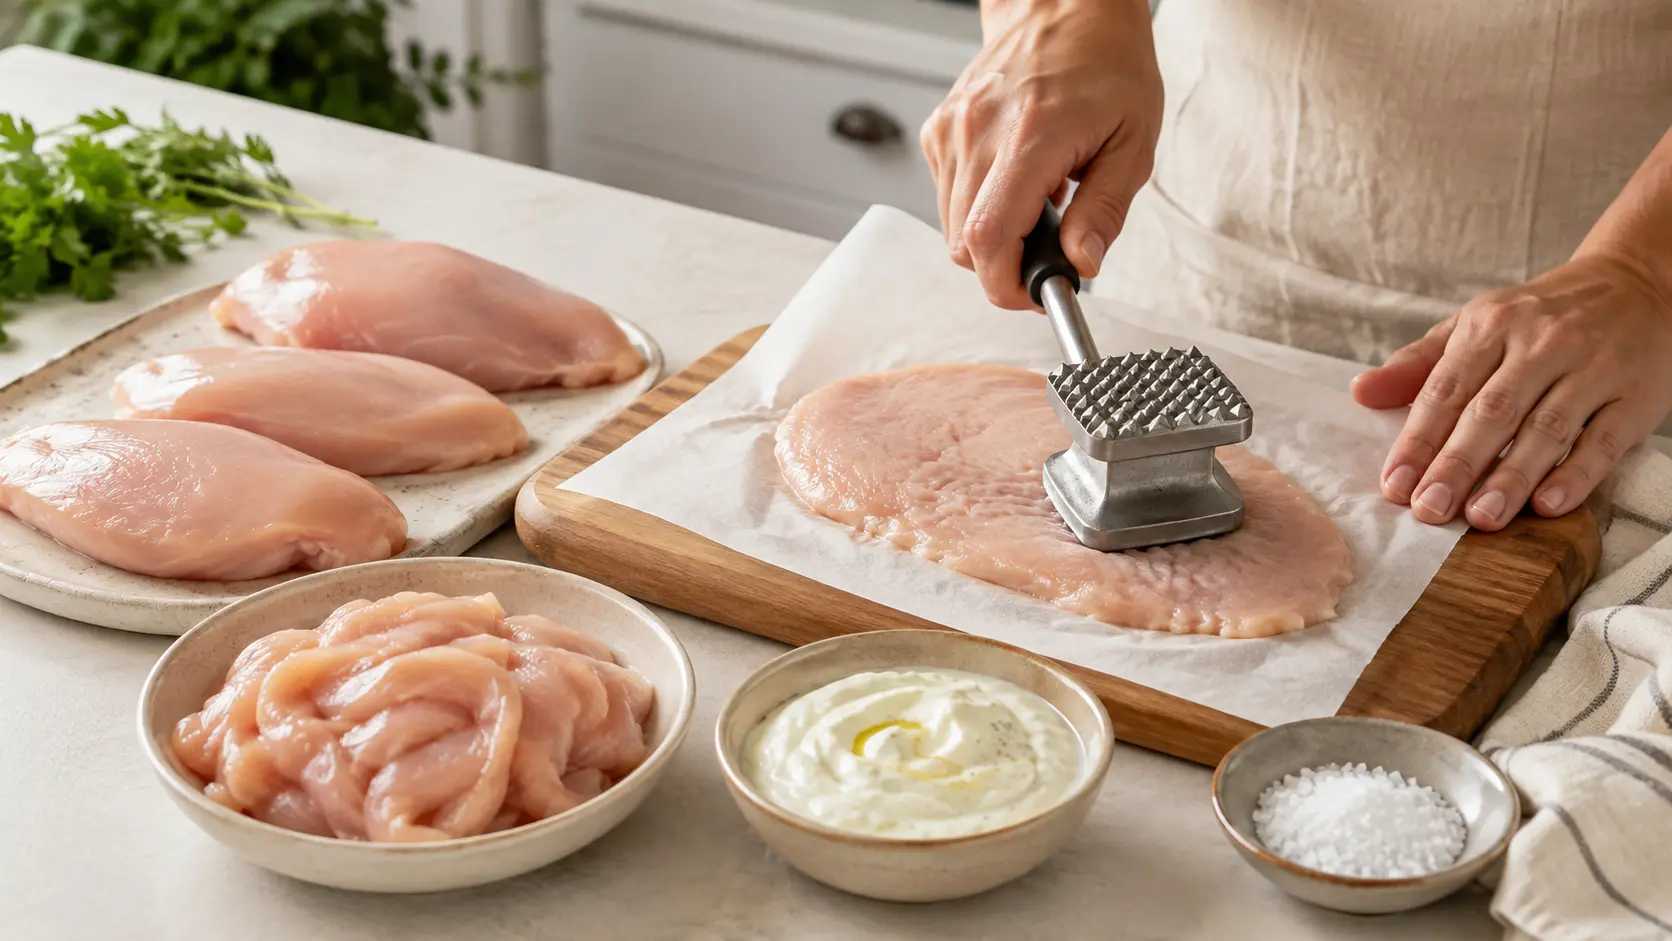
    Place the chicken between sheets of parchment paper or plastic wrap.

    Using the flat side of a meat mallet or a rolling pin, gently pound the thickest sections until the breasts are roughly 3/4 to 1 inch thick.

    3. Oil and Season

    Rub the chicken lightly with olive oil.

    Combine the kosher salt, paprika, garlic powder, onion powder, and black pepper. Season both sides evenly.

    4. Arrange in the Basket

    Preheat the air fryer to 375°F if your model benefits from preheating.

    Arrange the chicken breasts in a single layer with space around each piece.

    Avoid overlapping the chicken. If your basket is small, cook in batches.

    5. Air Fry

    Cook at 375°F.

    For standard breasts around 3/4 to 1 inch thick, start checking after about 10 minutes total.

    If your air fryer browns unevenly, flip the chicken partway through cooking. Some models circulate air evenly enough that flipping may make less of a difference.

    6. Check the Internal Temperature

    Insert an instant-read thermometer into the thickest part of the chicken breast.

    Continue cooking until the thickest part reaches 165°F (74°C).

    7. Rest Before Slicing

    Transfer the chicken to a clean plate or cutting board.

    Let it rest for 5 to 10 minutes before slicing.

    How Long to Air Fry Chicken Breast

    Air fryer cooking times can vary substantially depending on chicken thickness, starting temperature, basket size, and air fryer design.

    Use these estimates only as starting points:

    • Around 1/2 inch thick: Start checking around 7 to 9 minutes total.
    • Around 3/4 to 1 inch thick: Start checking around 10 minutes; many pieces may take roughly 10 to 16 minutes total.
    • Over 1 inch thick: Expect more variation and begin checking with a thermometer rather than relying on a fixed time.

    Do not rely on the timer alone.

    Cook until an instant-read thermometer inserted into the thickest part reaches 165°F (74°C).

    For more timing guidance across different methods, see How Long to Cook Chicken Breast.

    Internal Temperature for Air Fryer Chicken Breast

    The most reliable way to confirm doneness is with an instant-read thermometer.

    Insert the probe into the thickest section of the breast without touching the basket.

    Cook until the thickest part reaches 165°F (74°C).

    Exterior color, clear juices, firmness, and cooking time alone are not reliable enough to confirm doneness.

    See Chicken Breast Internal Temperature for more guidance on thermometer placement and safe doneness.

    Do You Need to Flip Chicken Breast in an Air Fryer?

    Flipping can help produce more even browning, but whether it is necessary depends on the air fryer design.

    Many basket-style air fryers have their main heating element above the food, so flipping can help the underside brown more evenly.

    Other models circulate air effectively enough that flipping may make less of a difference.

    If your chicken is browning unevenly, flip it once partway through cooking.

    How to Keep Air Fryer Chicken Breast Juicy

    Chicken breast is lean, so preventing overcooking is the most important step.

    • Even the thickness: Pound thicker sections so the chicken cooks more evenly.
    • Use a little oil: A light coating supports browning and helps seasonings adhere.
    • Start checking early: Air fryers can cook faster than expected.
    • Use a thermometer: Stop cooking when the thickest part reaches 165°F.
    • Rest before slicing: Give the chicken 5 to 10 minutes before cutting.

    For more techniques, see How to Keep Chicken Breast Juicy.

    You can also use How to Brine Chicken Breast if you want to brine the chicken before air frying.

    How to Get Better Browning

    If the chicken looks pale, focus on a few basics:

    • Pat the chicken dry before seasoning.
    • Use a light coating of oil.
    • Include paprika if you want additional color.
    • Leave space around each piece so hot air can circulate.
    • Flip partway through cooking if your air fryer browns more strongly from the top.

    Can You Stack Chicken Breasts in an Air Fryer?

    Avoid stacking chicken breasts in a standard air fryer basket because overlapping pieces block airflow and can lead to uneven cooking.

    Arrange the chicken in a single layer whenever possible.

    If your air fryer specifically supports multi-level cooking with racks, follow the manufacturer’s instructions and rotate or rearrange the chicken if recommended.

    For a standard basket, cooking in batches is usually the better option.

    Can You Cook Frozen Chicken Breast in an Air Fryer?

    Some air fryers can cook chicken breast from frozen, but timing varies considerably depending on thickness and the appliance.

    Cooking from frozen can also make seasoning and even browning more difficult.

    For the most predictable results with this recipe, thaw the chicken first and season it before air frying.

    If you do cook directly from frozen, begin checking the internal temperature early and continue cooking until the thickest part reaches 165°F (74°C).

    See Can You Cook Chicken Breast From Frozen? for more detailed guidance.

    Storage and Reheating

    Refrigerator

    Store cooked chicken breast in an airtight container in the refrigerator for up to 3 to 4 days.

    Freezer

    Cool the chicken, wrap portions well, and store them in a freezer-safe container or bag.

    Reheating

    You can reheat chicken in the air fryer at a moderate temperature, but timing depends on portion size and your machine.

    Start with a short reheating period and check frequently so the chicken does not dry out.

    A covered skillet with a small splash of water or broth is another gentle option.

    For food-safety purposes, reheated leftovers should reach 165°F.

    Troubleshooting Air Fryer Chicken Breast

    Why Is My Air Fryer Chicken Breast Dry?

    The most common causes are overcooking, uneven thickness, or cooking longer than necessary.

    Pound the chicken evenly, start checking early, and stop cooking when the thickest part reaches 165°F.

    Why Is the Outside Browning Too Fast?

    The air fryer may be running hotter than its displayed temperature, the chicken may be very thick, or the seasoning may contain ingredients that brown quickly.

    Reduce the temperature slightly and continue monitoring the internal temperature.

    For very thick chicken, flatten the breast before cooking.

    Why Isn’t My Chicken Browning?

    Possible causes include excess surface moisture, little or no oil, overcrowding, or differences in air fryer design.

    Pat the chicken dry, coat it lightly with oil, leave space between pieces, and flip if your machine browns mainly from above.

    Why Is My Chicken Cooking Unevenly?

    The breast may be uneven in thickness, pieces may be overlapping, or the air fryer may have hot spots.

    Pound the chicken to a more consistent thickness and arrange the breasts in a single layer.

    Why Is My Chicken Sticking to the Basket?

    Sticking can happen if the basket surface is worn, the chicken has little oil, or the food is moved before the surface begins to brown.

    Lightly oil the chicken and follow your air fryer’s instructions for preparing the basket.

    Why Is My Chicken Taking Longer Than Expected?

    Air fryer size and design, chicken thickness, overcrowding, and starting temperature can all affect cooking time.

    Cook in batches if needed and use a thermometer rather than adding a fixed number of extra minutes.

    FAQs

    Should I Wash Raw Chicken Before Air Frying?

    No.

    Washing raw poultry can spread contaminated droplets around sinks, countertops, and nearby kitchen surfaces.

    Pat the chicken dry with clean paper towels instead.

    Can I Use Parchment Paper or Foil in an Air Fryer?

    It depends on the air fryer model and the manufacturer’s instructions.

    If your model allows parchment or foil, make sure it does not block too much airflow.

    Do not place loose parchment paper in an empty air fryer during preheating because airflow can lift it toward the heating element.

    Why Is My Air Fryer Smoking?

    Smoke can come from food residue, grease, or drippings left in the basket or lower tray.

    Clean the air fryer thoroughly before cooking and follow the manufacturer’s maintenance instructions.

    Recipe Card

    Juicy Air Fryer Chicken Breast

    Prep Time: 10 minutes
    Cook Time: Approximately 10–16 minutes
    Rest Time: 5–10 minutes
    Total Time: Approximately 25–35 minutes
    Servings: 4
    Yield: 4 chicken breasts
    Category: Dinner / Main Course
    Cuisine: American

    Equipment

    • Air fryer
    • Meat mallet or rolling pin
    • Instant-read meat thermometer
    • Kitchen tongs

    Ingredients

    • 4 boneless, skinless chicken breasts, about 2 lb total
    • 1 tablespoon olive oil
    • 1 1/4 teaspoons kosher salt
    • 1 teaspoon paprika
    • 1/2 teaspoon garlic powder
    • 1/2 teaspoon onion powder
    • 1/2 teaspoon black pepper
    • Optional: 1/2 teaspoon Italian seasoning
    • Optional: pinch of cayenne pepper
    • Optional: chopped fresh parsley

    Instructions

    1. Pat the chicken breasts dry with clean paper towels.
    2. Pound the thickest portions until the breasts are roughly 3/4 to 1 inch thick.
    3. Rub the chicken lightly with olive oil. Combine the salt, paprika, garlic powder, onion powder, and black pepper and season both sides.
    4. Preheat the air fryer to 375°F if your model benefits from preheating.
    5. Arrange the chicken in a single layer with space around each piece.
    6. Air fry at 375°F. For breasts around 3/4 to 1 inch thick, start checking around 10 minutes total. Flip partway through cooking if useful for your air fryer.
    7. Continue cooking until an instant-read thermometer inserted into the thickest part reaches 165°F (74°C).
    8. Transfer the chicken to a clean plate or cutting board and rest for 5 to 10 minutes before slicing.

    Recipe Notes

    Cooking time is an estimate and may vary depending on chicken thickness, air fryer design, basket size, and starting temperature.

    Do not rely on time alone. Confirm doneness with an instant-read thermometer in the thickest part of the chicken.

  • Juicy Grilled Chicken Breast: Easy Method, Time Temperature

    Juicy Grilled Chicken Breast: Easy Method, Time Temperature

    Grilling boneless, skinless chicken breasts can be tricky. The outside may brown quickly while the thickest part is still cooking, and lean chicken breast can dry out if it stays over high heat too long.

    The key is a simple sequence: pound the chicken to an even thickness, season or marinate it, preheat the grill, manage the heat after browning begins, check doneness with an instant-read thermometer, and rest the chicken before slicing.

    For this method, chicken breasts around 3/4 to 1 inch thick work especially well. Cooking time will vary, so use the clock as a guide and rely on an internal temperature of 165°F (74°C) to confirm doneness.

    Why This Method Works

    Chicken breasts are naturally uneven. One end is usually thick and rounded while the other is thinner and tapered. If the breast goes onto the grill as-is, the thin end can overcook before the thick center is done.

    Pounding the chicken to a more even thickness helps it cook more evenly from edge to edge.

    A properly preheated grill encourages browning and grill marks, while reducing the heat or moving the chicken to a cooler zone gives thicker pieces time to finish without scorching the exterior.

    The final check is temperature. An instant-read thermometer removes much of the guesswork and helps prevent both undercooking and unnecessary overcooking.

    Ingredients

    • 4 boneless, skinless chicken breasts, about 2 lb total
    • 1 tablespoon olive oil
    • 1 1/4 teaspoons kosher salt
    • 1 teaspoon paprika
    • 1/2 teaspoon garlic powder
    • 1/2 teaspoon onion powder
    • 1/2 teaspoon black pepper
    • Optional: fresh lemon juice or your preferred chicken marinade
    • Optional: chopped parsley, cilantro, or thyme for serving

    Ingredient Notes

    Chicken Breasts

    Try to use chicken breasts that are reasonably similar in size. Very thick or uneven pieces benefit from pounding before they go on the grill.

    If a breast is especially large, you can also slice it horizontally into thinner cutlets.

    Olive Oil

    A light coating of olive oil helps the seasonings adhere, supports browning, and can reduce sticking.

    Seasoning

    Kosher salt, paprika, garlic powder, onion powder, and black pepper create a simple savory seasoning blend that works well for everyday grilled chicken.

    Marinade

    A marinade is optional. It can add extra flavor and give you more variation from one batch of grilled chicken to the next.

    Marinating time depends on the specific recipe and how acidic the marinade is. Highly acidic marinades generally need less time, while milder marinades can be used longer. Follow the timing recommended for the marinade you are using.

    For more ideas, see Chicken Breast Marinade.

    Best Chicken Thickness for Grilling

    For this grilling method, chicken breasts around 3/4 to 1 inch thick work well.

    That thickness is substantial enough to stay juicy but still cooks relatively quickly over direct heat.

    Breasts thicker than 1 inch may brown too quickly on the outside before the center is done. In that case, sear them over direct heat first, then move them to a cooler or indirect zone to finish more gently.

    Very thin cutlets cook much faster, so start checking them early.

    For detailed guidance on flattening chicken evenly, see How to Tenderize Chicken Breast.

    Should You Marinate Chicken Breast Before Grilling?

    You do not have to marinate chicken breast to get good results. A simple dry seasoning works well when you want a fast weeknight method.

    A marinade makes sense when you want additional flavor from ingredients such as citrus, herbs, garlic, vinegar, yogurt, or spices.

    If you use a wet marinade, keep the chicken refrigerated while it marinates. Let excess marinade drip off before placing the chicken on the grill so you do not introduce unnecessary flare-ups.

    Best Grill Temperature for Chicken Breast

    For this direct-grilling method, preheat the grill to roughly 400°F to 450°F (204°C to 232°C).

    Gas Grill

    Preheat the grill thoroughly, then adjust the burners to medium-high heat before adding the chicken.

    If possible, keep one area slightly cooler so you have somewhere to move the chicken if the exterior starts browning too quickly.

    Charcoal Grill

    A two-zone charcoal setup works especially well. Place the hot coals on one side and leave the other side with little or no direct heat.

    You can develop grill marks over the hot zone, then move thicker chicken to the cooler side if it needs more time to finish.

    How to Grill Chicken Breast

    1. Pat the Chicken Dry

    Remove the chicken from its packaging and pat both sides dry with clean paper towels.

    Do not rinse raw chicken. Drying the surface helps the seasoning adhere and improves browning.

    2. Pound to an Even Thickness

    Place the chicken between sheets of parchment paper or plastic wrap.

    Using the flat side of a meat mallet or a rolling pin, gently pound the thickest section until each breast is roughly 3/4 to 1 inch thick.

    3. Season or Marinate

    For the dry-seasoned version, coat the chicken lightly with olive oil.

    Combine the kosher salt, paprika, garlic powder, onion powder, and black pepper, then season both sides evenly.

    If using a marinade, follow the timing specified for that marinade and keep the chicken refrigerated until you are ready to grill.

    4. Preheat and Clean the Grill

    Preheat the grill to approximately 400°F to 450°F.

    Clean the cooking grates thoroughly before adding the chicken. If needed, lightly oil the grates using a grill-safe method.

    5. Grill the First Side

    Place the chicken over direct heat.

    For breasts around 3/4 to 1 inch thick, start checking the first side after about 5 minutes.

    Leave the chicken mostly undisturbed while the grill marks develop. Avoid pressing down on it unnecessarily.

    6. Flip and Manage the Heat

    Flip the chicken with tongs.

    Continue cooking while monitoring the internal temperature.

    If the exterior is browning too quickly, reduce the heat or move the chicken to a cooler or indirect zone of the grill.

    7. Check the Internal Temperature

    Insert an instant-read thermometer into the thickest part of the chicken breast.

    Continue cooking until the thickest part reaches 165°F (74°C).

    8. Rest Before Slicing

    Transfer the chicken to a clean plate or cutting board and let it rest for 5 to 10 minutes before slicing.

    How Long to Grill Chicken Breast

    Cooking time varies with chicken thickness, grill temperature, hot spots, and how often the lid is opened.

    Use these times only as starting estimates:

    • Around 1/2 inch thick: Start checking after about 3 minutes per side.
    • Around 3/4 to 1 inch thick: Start checking after about 5 minutes per side.
    • Over 1 inch thick: Sear over direct heat, then move to a cooler or indirect zone to finish more gently.

    Do not rely on the timer alone.

    Cook until an instant-read thermometer inserted into the thickest part reaches 165°F (74°C).

    For broader timing guidance, see How Long to Cook Chicken Breast.

    Internal Temperature for Grilled Chicken Breast

    The most reliable way to confirm doneness is with an instant-read thermometer.

    Insert the probe into the thickest part of the chicken without touching the grill grate.

    The chicken is ready when the thickest part reaches 165°F (74°C).

    Color, grill marks, and cooking time alone are not reliable enough to confirm doneness.

    See Chicken Breast Internal Temperature for more detail on temperature and thermometer placement.

    How to Keep Grilled Chicken Breast Juicy

    Chicken breast is lean, so controlling thickness, heat, and doneness makes a big difference.

    • Even the thickness: This reduces the chance of one section drying out before the rest is done.
    • Manage the heat: If the exterior browns quickly, move the chicken away from the hottest part of the grill.
    • Use the lid strategically: Closing the lid can help maintain a steadier cooking environment, particularly for thicker chicken breasts.
    • Avoid pressing: Do not press the chicken unnecessarily while it cooks.
    • Use a thermometer: Stop cooking once the thickest part reaches 165°F.
    • Rest before slicing: Give the chicken 5 to 10 minutes before cutting.

    For additional techniques, see How to Keep Chicken Breast Juicy.

    You can also use How to Brine Chicken Breast if you want to brine the chicken before grilling.

    How to Get Good Grill Marks

    Preheat the Grill

    Give the grill enough time to heat before adding the chicken.

    Dry the Chicken Surface

    Excess surface moisture can interfere with browning.

    Do Not Move the Chicken Constantly

    Let the chicken stay in contact with the grate long enough for grill marks to form before moving it.

    Optional Crosshatch Marks

    If you want a crosshatch pattern, rotate the chicken partway through cooking the first side.

    This is mostly for appearance and is not necessary for good flavor or doneness.

    How to Prevent Chicken From Sticking to the Grill

    Chicken may stick when the grill is dirty, insufficiently preheated, or when the meat is moved too early.

    To reduce sticking:

    • Preheat the grill thoroughly.
    • Clean the grates before cooking.
    • Lightly oil the chicken.
    • Avoid trying to flip immediately after placing the chicken on the grill.

    If the chicken resists when you try to lift it, give it a little more time and check again.

    How to Avoid Burning the Outside Before the Inside Is Done

    This usually happens when the grill is too hot for the thickness of the chicken.

    Start with chicken that is an even thickness whenever possible.

    If the exterior develops enough color before the center reaches 165°F, move the chicken to a cooler zone and finish it with gentler heat.

    Sweet barbecue sauces can also burn quickly. If you are using a sugar-heavy sauce, brush it on near the end of grilling rather than at the beginning.

    Can You Grill Frozen Chicken Breast?

    For this method, it is better to thaw the chicken before grilling.

    A completely frozen breast can brown or dry out on the outside while the center is still frozen.

    For best results, thaw chicken in the refrigerator.

    For faster thawing, place the chicken in a leak-proof bag and submerge it in cold water. Change the water every 30 minutes and cook the chicken immediately after thawing.

    See Can You Cook Chicken Breast From Frozen? for methods that are better suited to cooking chicken from frozen.

    Storage and Reheating

    Refrigerator

    Store leftover grilled chicken in an airtight container in the refrigerator for up to 3 to 4 days.

    Freezer

    You can freeze cooled grilled chicken in a freezer-safe container or bag. Wrap portions well to limit freezer exposure.

    Reheating

    Reheat grilled chicken gently to reduce the chance of drying it out.

    You can place it in a covered baking dish with a small splash of broth or water and warm it in a low oven until heated through.

    For food-safety purposes, reheated leftovers should reach 165°F.

    Troubleshooting Grilled Chicken Breast

    Why Is My Chicken Sticking to the Grill?

    Common causes include dirty grates, an underheated grill, insufficient oil, or trying to flip too early.

    Clean and preheat the grill, lightly oil the chicken, and allow the first side time to develop browning before moving it.

    Why Is the Outside Burning Before the Inside Is Done?

    The chicken may be too thick for continuous direct heat, or the grill may be running hotter than expected.

    Move the chicken to a cooler zone and continue cooking until the thickest part reaches 165°F.

    Why Is My Grilled Chicken Dry?

    Overcooking is one of the most common causes.

    Use a thermometer, start checking early, and stop cooking once the thickest part reaches 165°F.

    Let the chicken rest before slicing.

    Why Am I Not Getting Grill Marks?

    The grill may not be hot enough, the chicken surface may be too wet, or the meat may be getting moved too frequently.

    Preheat thoroughly, pat the chicken dry, and leave it mostly undisturbed while the first side browns.

    Why Is My Chicken Cooking Unevenly?

    The natural tapered shape of chicken breast is usually the main reason.

    Pound the thick end to create a more uniform thickness before grilling.

    FAQs

    Should I Wash Raw Chicken Before Grilling?

    No.

    Washing raw chicken can spread contaminated droplets around your sink, countertop, and nearby kitchen surfaces.

    Pat the chicken dry with clean paper towels instead.

    How Often Should I Flip Chicken Breast on the Grill?

    Flipping once works well for this method, but you do not need to treat it as a strict rule.

    If you need to manage flare-ups or move the chicken away from a hot spot, adjusting or turning it again is fine.

    Can I Put Barbecue Sauce on Chicken While Grilling?

    Yes.

    Because many barbecue sauces contain sugar, it is usually better to brush them on near the end of cooking so they do not burn before the chicken is done.

    Recipe Card

    Juicy Grilled Chicken Breast

    Prep Time: 10 minutes
    Cook Time: Approximately 10–16 minutes
    Rest Time: 5–10 minutes
    Total Time: Approximately 25–35 minutes
    Servings: 4
    Yield: 4 chicken breasts
    Category: Dinner / Main Course
    Cuisine: American

    Equipment

    • Outdoor gas or charcoal grill
    • Meat mallet or rolling pin
    • Long grill tongs
    • Grill cleaning brush
    • Instant-read meat thermometer

    Ingredients

    • 4 boneless, skinless chicken breasts, about 2 lb total
    • 1 tablespoon olive oil
    • 1 1/4 teaspoons kosher salt
    • 1 teaspoon paprika
    • 1/2 teaspoon garlic powder
    • 1/2 teaspoon onion powder
    • 1/2 teaspoon black pepper
    • Optional: fresh lemon juice, marinade, or chopped herbs for serving

    Instructions

    1. Pat the chicken breasts dry with clean paper towels.
    2. Pound the thickest portions until the chicken is roughly 3/4 to 1 inch thick.
    3. Rub with olive oil. Combine the salt, paprika, garlic powder, onion powder, and black pepper and season both sides.
    4. Preheat the grill to approximately 400°F to 450°F. Clean the grates thoroughly.
    5. Place the chicken over direct heat. For breasts around 3/4 to 1 inch thick, start checking the first side after about 5 minutes.
    6. Flip with tongs. Reduce the heat or move the chicken to a cooler zone if the exterior is browning too quickly.
    7. Continue cooking until an instant-read thermometer inserted into the thickest part reaches 165°F (74°C).
    8. Transfer the chicken to a clean plate or cutting board and rest for 5 to 10 minutes before slicing.

    Recipe Notes

    Cooking time is an estimate and may vary depending on chicken thickness, grill type, heat level, and hot spots.

    Do not rely on cooking time alone. Confirm doneness with an instant-read thermometer in the thickest part of the chicken.

  • Juicy Pan-Seared Chicken Breast: Easy Stovetop Method

    Juicy Pan-Seared Chicken Breast: Easy Stovetop Method

    Pan-seared chicken breast is one of the quickest ways to turn a simple package of boneless chicken into a flavorful weeknight dinner. The challenge is getting a golden exterior without drying out the center.

    The key is straightforward: start with evenly thick chicken breasts, dry the surface well, preheat the skillet, control the heat after the first side browns, and use a meat thermometer instead of relying only on cooking time.

    This method gives you a well-browned exterior and tender chicken without complicated ingredients or equipment.

    Why This Method Works

    Chicken breasts are naturally uneven. One end is usually much thicker than the other, which means the thin section can overcook before the thickest part is finished.

    Pounding the chicken to an even thickness helps it cook more evenly from edge to edge.

    Starting with a properly preheated skillet encourages browning, while lowering the heat after the first side develops color gives the center more time to cook without burning the exterior.

    Most importantly, checking the thickest part with an instant-read thermometer removes much of the guesswork.


    Ingredients

    • 4 boneless, skinless chicken breasts, about 2 lb total
    • 1 tablespoon olive oil
    • 1 1/4 teaspoons kosher salt
    • 1 teaspoon paprika
    • 1/2 teaspoon garlic powder
    • 1/2 teaspoon onion powder
    • 1/2 teaspoon black pepper
    • 1 tablespoon unsalted butter, optional
    • 1–2 garlic cloves, lightly crushed, optional
    • 2–3 sprigs fresh thyme or rosemary, optional

    Ingredient Notes

    Chicken Breast

    Boneless, skinless chicken breasts work best when they are relatively similar in size. Very thick or uneven breasts should be pounded before cooking.

    If a breast is especially large, you can also slice it horizontally into thinner cutlets.

    Olive Oil

    Olive oil works well for everyday pan searing. Add it after the skillet has heated and avoid letting the oil smoke heavily.

    Seasonings

    Paprika, garlic powder, onion powder, salt, and black pepper create a simple savory coating without overpowering the chicken.

    Butter, Garlic, and Herbs

    These are optional but useful for adding extra flavor near the end of cooking.

    Add butter late in the process rather than at the beginning so the milk solids are less likely to burn.


    Best Pan for Pan-Seared Chicken Breast

    A heavy skillet makes heat management easier.

    Cast-Iron Skillet

    Cast iron retains heat well and can produce strong browning. It works particularly well when cooking several pieces of chicken.

    Stainless Steel Skillet

    Stainless steel is another excellent option. It develops good browning and leaves flavorful browned bits in the pan that can later be used for a sauce.

    Nonstick Skillet

    A heavy nonstick skillet also works and can make cleanup easier, although the crust may be lighter than what you get from cast iron or stainless steel.


    How to Pan-Sear Chicken Breast

    1. Pat the Chicken Dry

    Remove the chicken from its packaging and pat both sides thoroughly with paper towels.

    A dry surface browns better because excess moisture creates steam in the skillet.

    Do not rinse raw chicken before cooking.

    2. Pound to an Even Thickness

    Place the chicken between sheets of parchment paper or plastic wrap.

    Using the flat side of a meat mallet, rolling pin, or heavy skillet, gently pound the thickest sections until the breasts are roughly 3/4 to 1 inch thick.

    For more detail on flattening and other techniques, see How to Tenderize Chicken Breast.

    3. Season

    Combine the kosher salt, paprika, garlic powder, onion powder, and black pepper.

    Season both sides of the chicken evenly.

    4. Preheat the Skillet

    Place a heavy skillet over medium-high heat and allow it to heat thoroughly.

    Add the olive oil and swirl it across the surface.

    The oil should look fluid and shimmering, but it should not be heavily smoking.

    5. Sear the First Side

    Place the chicken breasts in the skillet in a single layer.

    Avoid overcrowding the pan. If necessary, cook in batches.

    Let the chicken cook without constantly moving or pressing it. For chicken around 3/4 to 1 inch thick, start checking the first side after about 5 minutes.

    Flip once a good golden-brown surface develops.

    6. Flip and Reduce the Heat

    Turn the chicken with tongs.

    Reduce the heat to medium or medium-low if the exterior is browning faster than the center is cooking.

    Continue cooking until the thickest part of the chicken reaches 165°F (74°C).

    7. Optional Garlic-Butter Baste

    During the final couple of minutes, reduce the heat and add the butter, garlic, and fresh herbs.

    Once the butter melts and foams, tilt the skillet slightly and spoon the butter over the chicken.

    8. Rest Before Slicing

    Transfer the cooked chicken to a clean cutting board or plate.

    Rest for 5 to 10 minutes before slicing.


    How Long to Pan-Sear Chicken Breast

    Cooking time depends heavily on thickness, starting temperature, skillet material, and stove strength.

    Use these as starting estimates rather than guarantees:

    Chicken ThicknessApproximate Cooking Time
    About 1/2 inchAbout 4–5 minutes per side
    About 3/4–1 inchAbout 5–8 minutes per side
    More than 1 inchSear first, then lower the heat and cook more gently

    Start thicker breasts over medium-high heat to build color, then reduce the heat as needed after flipping.

    Do not use time alone to determine doneness.

    The thickest part should reach 165°F (74°C).

    For more timing guidance, see How Long to Cook Chicken Breast.


    Internal Temperature for Pan-Seared Chicken Breast

    The most reliable way to confirm that chicken breast is cooked is with an instant-read thermometer.

    Insert the thermometer into the thickest part of the breast, avoiding contact with the skillet.

    Cook the chicken until the thickest part reaches:

    165°F / 74°C

    Color, clear juices, and cooking time alone are not reliable enough to confirm doneness.

    See Chicken Breast Internal Temperature for a more detailed temperature guide.


    How to Get a Good Golden Crust

    Several small details make a noticeable difference.

    Dry the Surface

    Surface moisture creates steam and slows browning. Pat the chicken dry before seasoning.

    Preheat the Pan

    Adding chicken to a cold skillet makes it harder to develop an even sear.

    Avoid Crowding

    Give each breast enough space. Crowding traps steam around the chicken.

    If your skillet is too small, cook in batches.

    Don’t Move the Chicken Constantly

    Let the chicken remain in contact with the skillet long enough for browning to develop before trying to flip it.

    If chicken is sticking badly to stainless steel, it may simply need a little more time before it releases more easily.


    How to Keep Pan-Seared Chicken Breast Juicy

    Chicken breast is lean, so it can become dry quickly when overcooked.

    A few techniques help:

    • Pound the breasts to an even thickness.
    • Use moderate heat after the initial sear.
    • Start checking temperature early.
    • Cook to 165°F rather than relying only on a timer.
    • Rest for 5–10 minutes before slicing.
    • Slice across the grain when serving.

    See How to Keep Chicken Breast Juicy for more practical tips.


    Should You Brine Chicken Breast First?

    Brining is optional, but it can give you an additional buffer against dryness.

    If you want to brine the chicken before searing, use the method and salt ratio from our How to Brine Chicken Breast guide.

    After brining, remove the chicken from the brine and pat the surface thoroughly dry with paper towels.

    Do not rinse raw chicken.

    Because brined chicken already contains added salt, reduce the seasoning salt as needed.


    Garlic Butter Pan-Seared Chicken Breast

    For a simple garlic-butter variation, cook the chicken normally until it is approaching doneness.

    Reduce the heat to low or medium-low, then add:

    • 1 tablespoon unsalted butter
    • 1–2 lightly crushed garlic cloves
    • 2–3 sprigs thyme or rosemary

    Allow the butter to melt and foam.

    Tilt the skillet carefully and spoon the flavored butter over the chicken for the final minute or two of cooking.

    Continue until the thickest part reaches 165°F.


    Can You Pan-Sear Frozen Chicken Breast?

    For this particular method, thawed chicken is much easier to cook evenly.

    A completely frozen chicken breast can brown or overcook on the outside while the center is still frozen.

    For best results, thaw chicken in the refrigerator.

    For faster thawing, place the chicken in a leak-proof bag and submerge it in cold water. Change the water every 30 minutes and cook the chicken immediately after thawing.

    See Can You Cook Chicken Breast From Frozen? for cooking methods that are better suited to frozen chicken.


    Storage and Reheating

    Refrigerator

    Store cooked chicken breast in an airtight container in the refrigerator for up to 3–4 days.

    Freezer

    Cooked chicken breast can also be frozen in a freezer-safe container or bag.

    For best quality, wrap individual portions well to reduce freezer exposure.

    Reheating

    Chicken breast can dry out when reheated aggressively.

    For stovetop reheating, place sliced or whole chicken in a skillet over low to medium-low heat with a small splash of water or chicken broth.

    Cover and heat gently until warmed through.

    For food-safety purposes, reheated leftovers should reach 165°F.


    Troubleshooting Pan-Seared Chicken Breast

    Why Is My Chicken Sticking to the Pan?

    Possible causes include:

    • the pan was not fully preheated
    • there was not enough cooking fat
    • you tried to flip the chicken before a crust formed

    Let the first side develop good browning before trying to move it.


    Why Is the Outside Burning Before the Inside Is Done?

    The skillet is probably too hot, or the breast is too thick.

    Pound the chicken to an even thickness before cooking.

    After the first side develops color, lower the heat so the center has time to reach 165°F without scorching the exterior.


    Why Isn’t My Chicken Browning?

    Common causes include:

    • wet chicken
    • an underheated skillet
    • overcrowding
    • moving the meat too frequently

    Pat the chicken dry, preheat the skillet properly, and cook in batches if necessary.


    Why Is My Pan-Seared Chicken Dry?

    The most common cause is overcooking.

    Use an instant-read thermometer and start checking before you expect the chicken to be finished.

    Remove the chicken once the thickest part reaches 165°F, then rest it for 5–10 minutes before slicing.


    FAQs

    Should I Cover the Skillet While Cooking Chicken Breast?

    Avoid covering the skillet during the initial sear because trapped steam can soften the browned exterior.

    For unusually thick chicken, reducing the heat after flipping is generally preferable to continuing over high heat.


    Should You Wash Raw Chicken Before Cooking?

    No.

    Washing raw chicken can spread contaminated droplets around the sink, countertop, and nearby kitchen surfaces.

    Pat the surface dry with clean paper towels instead.


    Can I Use Chicken Cutlets?

    Yes.

    Thin chicken cutlets cook much faster than whole breasts.

    Depending on thickness, they may need only a few minutes per side.

    Start checking their temperature early to avoid overcooking.


    Recipe Card

    Juicy Pan-Seared Chicken Breast

    Prep Time: 10 minutes
    Cook Time: Approximately 12–18 minutes
    Rest Time: 5–10 minutes
    Total Time: Approximately 30–35 minutes
    Servings: 4
    Yield: 4 chicken breasts
    Category: Dinner / Main Course
    Cuisine: American

    Equipment

    • Heavy 10- or 12-inch skillet
    • Meat mallet or rolling pin
    • Instant-read meat thermometer
    • Tongs

    Ingredients

    • 4 boneless, skinless chicken breasts, about 2 lb total
    • 1 tablespoon olive oil
    • 1 1/4 teaspoons kosher salt
    • 1 teaspoon paprika
    • 1/2 teaspoon garlic powder
    • 1/2 teaspoon onion powder
    • 1/2 teaspoon black pepper
    • 1 tablespoon unsalted butter, optional
    • 1–2 garlic cloves, lightly crushed, optional
    • 2–3 sprigs fresh thyme or rosemary, optional

    Instructions

    1. Pat the chicken breasts dry with paper towels.
    2. Pound the thickest portions until the breasts are roughly 3/4–1 inch thick.
    3. Combine salt, paprika, garlic powder, onion powder, and black pepper. Season both sides evenly.
    4. Heat a heavy skillet over medium-high heat.
    5. Add olive oil and swirl to coat the pan.
    6. Place the chicken in a single layer. Cook undisturbed for about 5–7 minutes, or until the first side develops good browning.
    7. Flip the chicken and reduce the heat to medium or medium-low as needed.
    8. Continue cooking until an instant-read thermometer inserted into the thickest portion reaches 165°F (74°C).
    9. During the final 1–2 minutes, optionally add butter, garlic, and herbs and spoon the melted butter over the chicken.
    10. Transfer to a clean plate or cutting board and rest for 5–10 minutes before slicing.

    Recipe Notes

    Cooking time is an estimate and varies with chicken thickness, skillet material, and stove output.

    Always use the internal temperature—not the timer alone—to determine when the chicken is done.

  • Juicy Baked Chicken Breast: Simple Oven Method

    Juicy Baked Chicken Breast: Simple Oven Method

    How to Prepare Chicken Breast for Baking

    Chicken breasts are naturally uneven.

    If one end is much thicker than the other, gently pound the thickest portion until the breast is more uniform.

    You do not need to flatten every breast aggressively. The goal is simply to reduce large differences in thickness.

    This helps the thin end avoid unnecessary overcooking while the center finishes.

    Simple Seasoning for Baked Chicken Breast

    This base seasoning uses:

    • Kosher salt for seasoning
    • Paprika for mild flavor and color
    • Garlic powder
    • Onion powder
    • Black pepper
    • Optional oregano or Italian seasoning

    Olive oil helps coat the surface and distribute the seasoning.

    You can change the seasoning profile without changing the basic oven method.

    How Long to Bake Chicken Breast at 400°F

    Cooking time depends mainly on thickness.

    Chicken Breast ThicknessApproximate Time at 400°F
    Thin, about 1/2–3/4 inch15–18 minutes
    Average, about 1 inch18–22 minutes
    Thick, about 1 1/2 inches22–28+ minutes

    These are estimates, not guarantees.

    Ovens, starting temperature, and chicken size vary.

    For a broader guide, link to:

    How Long to Cook Chicken Breast

    What Temperature Is Baked Chicken Breast Done?

    Check the thickest part with a food thermometer.

    Chicken breast should reach 165°F (74°C).

    Do not rely only on:

    • Cooking time
    • Exterior color
    • Clear juices
    • Whether the center looks white

    For more detail, link to:

    Chicken Breast Internal Temperature

    How to Keep Baked Chicken Breast Juicy

    A few steps make the biggest difference:

    Use even thickness

    Uneven chicken cooks unevenly.

    Avoid unnecessary extra cooking

    Start checking near the lower end of the estimated time range.

    Use a thermometer

    This removes much of the guesswork.

    Rest before slicing

    Let the cooked chicken rest for several minutes before cutting it.

    Brine if desired

    Brining is optional, but it can improve seasoning and moisture retention.

    Internal links:

    How to Keep Chicken Breast Juicy

    How to Brine Chicken Breast

    Do You Need to Brine Chicken Before Baking?

    No.

    You can make baked chicken breast without brining.

    Brining is an optional preparation step that can improve seasoning and moisture retention.

    If you brine the chicken, remember that it already contains salt, so reduce additional seasoning salt accordingly.

    Baked Chicken Breast Seasoning Variations

    Lemon Garlic

    Use garlic powder plus lemon zest and herbs.

    Italian Herb

    Use oregano, basil, thyme, or an Italian seasoning blend.

    Smoky Paprika

    Swap some regular paprika for smoked paprika.

    Mexican-Inspired

    Use cumin, chili powder, garlic, and paprika.

    BBQ-Style

    Use a low-salt BBQ seasoning or brush with sauce near the end of cooking.

    Can You Bake Chicken Breast From Frozen?

    Yes, chicken breast can be baked from frozen, but it will take longer and may cook less evenly.

    For the full method, link to:

    Can You Cook Chicken Breast From Frozen?

    Do not use the thawed-chicken timing table as a guarantee for frozen chicken.

    Should You Cover Chicken Breast While Baking?

    You usually do not need to cover boneless chicken breast for this method.

    Leaving it uncovered allows the surface to brown more easily.

    If the exterior is browning too quickly while the center still needs time, loosely covering the chicken can help manage the remaining cooking time.

    Do You Need to Flip Chicken Breast in the Oven?

    Usually, no.

    With a standard oven-baked chicken breast recipe, the chicken can generally bake without flipping.

    If you are using a specific pan, broiler setup, or unusually thick pieces, your method may differ.

    Storage

    Refrigerate cooked chicken promptly.

    Store it in an airtight container in the refrigerator and generally use it within 3–4 days.

    For meal prep, keeping the breast whole until needed can sometimes reduce exposed cut surfaces.

    Reheating

    Reheat only the portion you need.

    Gentler methods can help reduce additional drying.

    You can add a small splash of broth, water, or sauce when appropriate.

    Reheated leftovers should reach 165°F.

    Serving Ideas

    Serve baked chicken breast with:

    • Rice
    • Roasted vegetables
    • Potatoes
    • Pasta
    • Salad
    • Quinoa
    • Sandwiches
    • Wraps
    • Meal-prep bowls

    Frequently Asked Questions

    How long do you bake chicken breast at 400°F?

    An average 1-inch-thick breast often takes about 18–22 minutes, but thickness and oven performance affect the timing.

    Is 400°F or 425°F better for chicken breast?

    Both can work. This recipe uses 400°F because it provides a practical balance between cooking speed and control.

    How do you stop baked chicken breast from drying out?

    Use even-sized pieces, avoid cooking far beyond doneness, check with a thermometer, and rest before slicing.

    Should chicken breast be covered while baking?

    Not necessarily. Uncovered baking works well for this method.

    Do you need to flip chicken breast while baking?

    Usually not.

    Can you bake frozen chicken breast?

    Yes, but it needs additional cooking time and different handling.

    How do you know baked chicken breast is done?

    Check the thickest part with a food thermometer for 165°F (74°C).

    Should chicken breast rest after baking?

    Yes. Let it rest for about 5–10 minutes before slicing.

    Can I use chicken thighs instead?

    You can bake thighs, but they have different cooking characteristics and this recipe is specifically designed for chicken breast.

    How long does baked chicken last in the fridge?

    Properly refrigerated cooked chicken generally keeps for 3–4 days.

    Final Takeaway

    For a straightforward baked chicken breast:

    1. Preheat to 400°F
    2. Make the breasts reasonably even in thickness
    3. Season both sides
    4. Bake using time only as an estimate
    5. Verify 165°F (74°C) in the thickest part
    6. Rest before slicing

    That gives you a reliable base recipe you can adapt with different seasonings and serving styles.

  • How to Thaw Chicken Breast Safely: Fridge, Cold Water Microwave

    How to Thaw Chicken Breast Safely: Fridge, Cold Water Microwave

    The safest way to thaw chicken breast depends on how much time you have.

    The refrigerator is the easiest method when you can plan ahead. Cold-water thawing is faster for same-day cooking, and microwave thawing is the quickest option when you can cook the chicken immediately afterward.

    Avoid thawing chicken on the counter or in hot water.

    Safe Thawing Methods Compared

    MethodApprox. SpeedBest ForMain Rule
    RefrigeratorSlowPlanning aheadKeep chicken refrigerated
    Cold waterFasterSame-day cookingLeak-proof bag + cold water
    MicrowaveFastestImmediate cookingCook right away
    CounterAvoid—Do not thaw at room temperature
    Hot waterAvoid—Use cold water instead

    Why Safe Thawing Matters

    Raw chicken can contain harmful bacteria.

    The main concern with unsafe thawing is that the outside of the chicken can warm up while the center is still frozen.

    That is why controlled thawing methods are better than leaving chicken at room temperature.

    Safe thawing also helps make cooking more predictable because the chicken thaws more evenly.

    How to Thaw Chicken Breast in the Refrigerator

    Refrigerator thawing is the simplest method when you have enough time.

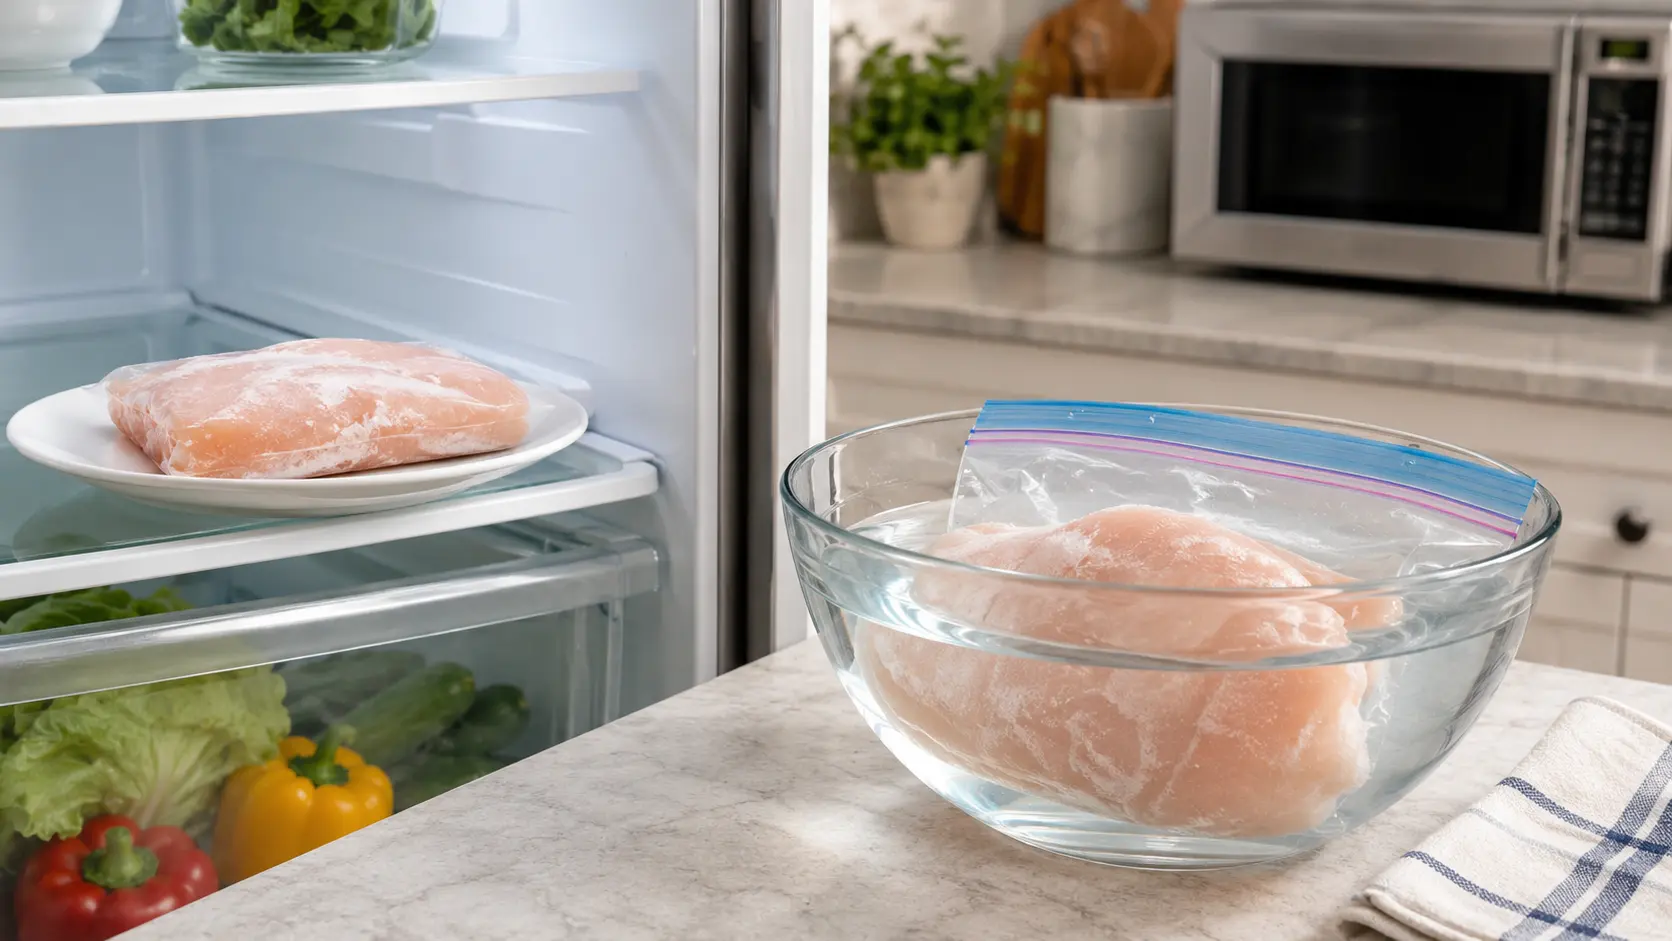
    1. Keep the chicken in its packaging or place it in a covered container.
    2. Put it on a plate or tray to catch any drips.
    3. Store it on a lower refrigerator shelf to reduce cross-contamination risk.
    4. Let it thaw gradually under refrigeration.

    Individual chicken breasts or a small package often need about a day to thaw, while larger packages can take longer.

    Exact timing depends on:

    • Package size
    • Breast thickness
    • Whether the pieces are frozen together
    • Refrigerator temperature

    How Long Does Chicken Breast Take to Thaw in the Fridge?

    A small package may thaw in roughly 24 hours.

    Large packages or tightly frozen-together breasts can take longer.

    Instead of relying only on time, check whether:

    • The chicken is flexible
    • The pieces separate easily
    • The thickest part no longer has a hard frozen center

    Chicken thawed in the refrigerator can generally remain refrigerated for another 1 to 2 days before cooking.

    How to Thaw Chicken Breast in Cold Water

    Cold-water thawing is useful when you need chicken the same day.

    1. Place the chicken in a leak-proof bag.
    2. Submerge the bag in cold water.
    3. Change the water about every 30 minutes.
    4. Continue until the chicken is fully thawed.
    5. Cook the chicken promptly after thawing.

    The leak-proof bag helps keep the chicken separated from the water and reduces contamination risk.

    How Long Does Chicken Take to Thaw in Cold Water?

    Timing depends on the size of the package and the thickness of the chicken.

    A small package of chicken breasts may thaw in around 1 hour or less, while larger packages may take longer.

    Check the chicken rather than relying on a single fixed time.

    The chicken should be flexible with no hard frozen center before cooking.

    How to Defrost Chicken Breast in the Microwave

    Microwave thawing is the fastest method.

    Use the microwave’s defrost setting if available.

    1. Place the chicken on a microwave-safe plate.
    2. Use the defrost setting or low power.
    3. Turn and separate pieces as they begin to thaw.
    4. Check frequently because some areas may start to warm or cook.
    5. Cook the chicken immediately after thawing.

    Microwave thawing can create warm spots, so it is important not to leave the chicken sitting afterward.

    Can You Thaw Chicken on the Counter?

    No.

    Do not thaw chicken breast at room temperature.

    The outside of the chicken can warm up while the inside remains frozen.

    This creates conditions where bacteria can multiply on the surface before the chicken is fully thawed.

    Use refrigerator, cold-water, or microwave thawing instead.

    Can You Thaw Chicken in Hot Water?

    Hot-water thawing is not recommended as a standard home method.

    Hot water can warm the outside of the chicken too quickly while the center remains frozen.

    It can also partially cook the surface, which makes later cooking less even.

    Use cold water instead.

    How Do You Know Chicken Is Fully Thawed?

    Chicken breast is usually fully thawed when:

    • It bends easily
    • The thickest part is no longer hard
    • The pieces separate without force
    • There are no solid ice crystals in the center

    If the center is still firm and frozen, it needs more thawing time unless you plan to cook it from frozen using a suitable method.

    How Long Can Thawed Chicken Stay in the Fridge?

    Chicken thawed in the refrigerator can generally remain refrigerated for 1 to 2 days before cooking.

    Keep it cold and contained to prevent drips from contacting other foods.

    Chicken thawed using the cold-water method should be cooked promptly.

    Chicken thawed in the microwave should be cooked immediately.

    Can You Refreeze Thawed Chicken Breast?

    It depends on how the chicken was thawed.

    Refrigerator-thawed chicken

    Raw chicken thawed in the refrigerator can generally be refrozen if it has been handled safely and kept cold.

    Quality may decline slightly after another freeze-thaw cycle.

    Cold-water thawed chicken

    Cook it before refreezing.

    Microwave-thawed chicken

    Cook it immediately, then refreeze the cooked chicken if needed.

    Do You Have to Thaw Chicken Before Cooking?

    No, not always.

    Chicken breast can be cooked directly from frozen using suitable methods, although it will take longer.

    For more detail, see:

    Can You Cook Chicken Breast From Frozen?

    Thawing first is still useful when you want:

    • More even cooking
    • Better browning
    • Easier seasoning
    • Easier pounding or butterflying
    • More predictable cooking time

    Food-Safety Checklist After Thawing

    After handling raw chicken:

    • Wash your hands with soap and water
    • Keep raw chicken separate from ready-to-eat foods
    • Clean utensils and surfaces that touched raw chicken
    • Do not rinse raw poultry
    • Cook the chicken until the thickest part reaches 165°F (74°C)

    For more detail, see:

    Chicken Breast Internal Temperature

    and

    How Long to Cook Chicken Breast

    Frequently Asked Questions

    What is the safest way to thaw chicken breast?

    Refrigerator thawing is the easiest and most controlled method when you have enough time.

    What is the fastest safe way to defrost chicken?

    Microwave thawing is the fastest, but the chicken should be cooked immediately afterward.

    Cold-water thawing is a good faster option when you do not want to use the microwave.

    How long does chicken breast take to thaw in the fridge?

    A small package often needs about a day, while larger packages may take longer.

    How long does chicken take to thaw in cold water?

    A small package may thaw in about an hour or less, but larger or thicker packages take longer.

    Can you thaw chicken on the counter?

    No. Use the refrigerator, cold water, or microwave instead.

    Can you thaw chicken in hot water?

    Hot-water thawing is not recommended. Use cold water.

    Can you defrost chicken in the microwave?

    Yes, but cook it immediately afterward.

    How long can thawed chicken stay in the fridge?

    Chicken thawed in the refrigerator can generally stay refrigerated for 1 to 2 days before cooking.

    Can you refreeze thawed chicken breast?

    Raw chicken thawed in the refrigerator can generally be refrozen if it was handled safely. Chicken thawed in cold water or the microwave should be cooked before refreezing.

    Do you have to thaw chicken before cooking?

    No. Some methods allow chicken breast to be cooked directly from frozen.

    How do you know chicken is completely thawed?

    The thickest part should be flexible with no hard frozen center.

    Final Takeaway

    The three practical safe thawing methods are:

    1. Refrigerator for planning ahead
    2. Cold water for faster same-day thawing
    3. Microwave when you will cook immediately

    Avoid countertop and hot-water thawing.

    After thawing, handle raw chicken carefully and cook the thickest part to 165°F (74°C).

  • Can You Cook Chicken Breast From Frozen? Safe Methods Timing

    Can You Cook Chicken Breast From Frozen? Safe Methods Timing

    Yes, you can cook chicken breast directly from frozen with suitable cooking methods. The main differences are that frozen chicken takes longer to cook, browns less easily at first, and can cook less evenly if the pieces are very thick or frozen together.

    The most important rule is simple: cook the chicken until the thickest part reaches 165°F (74°C), verified with a food thermometer.

    Is It Safe to Cook Chicken Breast From Frozen?

    Yes, chicken breast can be cooked from frozen if you use a method that heats it safely and evenly.

    Freezing does not make raw chicken sterile. Bacteria can still be present, so the chicken still needs to reach a safe internal temperature during cooking.

    Use a food thermometer and check the thickest part of the breast.

    Do not rely only on:

    • Cooking time
    • Color
    • Clear juices
    • Exterior browning

    Frozen vs. Thawed Chicken: What Changes?

    Frozen chicken usually takes longer to cook than thawed chicken.

    Other differences include:

    • Seasoning may not stick well at first
    • Browning can be slower
    • Thick pieces can cook less evenly
    • Frozen-together pieces should be separated when possible
    • Cooking time becomes more variable

    A general rule is to expect roughly 50% more cooking time than for thawed chicken, but this is only an estimate.

    For detailed timing guidance, see:

    How Long to Cook Chicken Breast

    Best Methods for Cooking Frozen Chicken Breast

    MethodCook From Frozen?Main Note
    OvenYesReliable for whole breasts; allow extra time
    Air fryerOften yesBest when pieces are separate
    Instant PotYesUseful for thick frozen breasts
    StovetopPossibleEasier with thinner or smaller pieces
    PoachingPossibleUse gentle heat and verify center temperature
    GrillLess idealThick frozen breasts may cook unevenly
    Slow cookerAvoidThaw first before slow cooking

    How to Bake Frozen Chicken Breast

    The oven is one of the easiest ways to cook frozen chicken breast.

    A practical approach:

    1. Preheat the oven.
    2. Place frozen chicken breasts in a baking dish or on a sheet pan.
    3. Separate pieces if they are stuck together.
    4. Add a small amount of oil if desired.
    5. Season once the surface has softened enough for seasoning to stick.
    6. Continue cooking until the thickest part reaches 165°F (74°C).

    Frozen chicken may take roughly 50% longer than thawed chicken, depending on thickness and oven temperature.

    Do not use time alone to determine doneness.

    How to Air Fry Frozen Chicken Breast

    Air fryers can work well for frozen chicken breast, especially when the pieces are frozen separately.

    For best results:

    • Avoid stacking frozen breasts
    • Leave space for air circulation
    • Check earlier if the breasts are thin
    • Turn or flip if your air fryer benefits from it
    • Verify doneness with a thermometer

    Cooking time varies by breast size and air-fryer model.

    How to Cook Frozen Chicken Breast in an Instant Pot

    Pressure cooking is a convenient option for frozen chicken breast.

    Add the amount of liquid required by your pressure cooker and arrange the frozen breasts so they can cook as evenly as possible.

    Thick breasts may need more pressure-cooking time than small ones.

    Remember that total time includes:

    • Time to come to pressure
    • Programmed cook time
    • Pressure release

    Do not treat one exact time as universal.

    Check the thickest part of the chicken after cooking and make sure it has reached 165°F (74°C).

    Can You Cook Frozen Chicken Breast on the Stove?

    Yes, but whole thick frozen breasts are harder to cook evenly on the stovetop.

    A gentler approach works better than trying to sear the outside aggressively from the start.

    You can:

    • Use moderate heat
    • Add a small amount of liquid
    • Cover the pan
    • Turn the chicken as needed
    • Finish cooking until the center reaches 165°F

    For very thick frozen breasts, another method such as baking or pressure cooking may be easier to control.

    Can You Boil or Poach Frozen Chicken Breast?

    Yes.

    Poaching frozen chicken breast in gently simmering liquid can work, although it will take longer than poaching thawed chicken.

    Avoid an aggressive rolling boil if you want a better texture.

    Check the thickest part with a food thermometer before serving.

    Can You Grill Frozen Chicken Breast?

    You can, but it is usually not the best option for thick frozen chicken breasts.

    The outside may cook or char before the center has heated through.

    For better control and more even cooking, thawing chicken before grilling is usually preferable.

    If you do grill from frozen, use careful heat management and verify the center temperature.

    Can You Put Frozen Chicken Breast in a Slow Cooker?

    It is better to thaw chicken before putting it in a slow cooker.

    Slow cookers heat food gradually, and starting with frozen poultry can make safe heat-up times harder to control.

    For slow-cooker recipes, thaw the chicken safely first.

    How Much Longer Does Frozen Chicken Take?

    A common rule of thumb is to allow about 50% more cooking time for frozen chicken than for thawed chicken.

    For example:

    If thawed chicken normally takes 20 minutes, frozen chicken may take around 30 minutes.

    But this is only a starting estimate.

    Actual timing depends on:

    • Breast thickness
    • Weight
    • Cooking method
    • Oven or appliance performance
    • Whether pieces are frozen together
    • Starting temperature

    Always use a food thermometer as the final check.

    How Do You Know Frozen Chicken Is Fully Cooked?

    Insert a food thermometer into the thickest part of the breast.

    The chicken should reach 165°F (74°C).

    Check more than one area if the breast is very large or irregularly shaped.

    For more detail, see:

    Chicken Breast Internal Temperature

    Visual signs can be useful, but they should not replace temperature verification.

    How to Keep Frozen Chicken Breast From Drying Out

    Frozen chicken can dry out if you cook it far past doneness while waiting for the center to heat through.

    To reduce that risk:

    • Use a method suited to frozen chicken
    • Avoid excessively high heat
    • Check temperature before you think it is done
    • Avoid cooking far beyond 165°F
    • Rest the chicken briefly before slicing
    • Use sauce or cooking liquid where appropriate

    For more detail, see:

    How to Keep Chicken Breast Juicy

    How to Season Frozen Chicken Breast

    Seasoning a frozen surface can be difficult because spices may not stick well.

    A simple option is:

    1. Start cooking the chicken.
    2. Wait until the outer surface has thawed and softened.
    3. Add oil or seasoning.
    4. Continue cooking.

    For pressure cooking or poaching, you can also use flavorful cooking liquid, herbs, spices, or aromatics from the beginning.

    Do not partially cook chicken, remove it for a long marinade, and then return it to finish cooking.

    Should You Thaw Chicken Breast First?

    You do not always need to thaw chicken before cooking.

    Cooking from frozen is useful when you are short on time.

    However, thawing first often gives you:

    • Better seasoning
    • Better browning
    • More even cooking
    • More predictable cooking time
    • Easier pounding or butterflying

    For methods such as grilling and slow cooking, thawing first is generally the better choice.

    Frequently Asked Questions

    Can you cook chicken breast straight from frozen?

    Yes, with suitable methods such as baking, pressure cooking, air frying, or careful stovetop cooking.

    Is it safe to bake frozen chicken breast?

    Yes. Cook until the thickest part reaches 165°F (74°C).

    How much longer does frozen chicken take?

    A useful starting estimate is roughly 50% longer than thawed chicken, but thickness and method matter.

    Can you air fry frozen chicken breast?

    Yes, especially when the breasts are frozen separately rather than stuck together.

    Can you cook frozen chicken breast in an Instant Pot?

    Yes. Pressure cooking is a practical method for frozen chicken breast.

    Can you pan-fry frozen chicken breast?

    It is possible, but thick frozen breasts are harder to cook evenly. Gentle covered cooking is easier to control than aggressive searing.

    Can you boil frozen chicken breast?

    Yes. Gentle poaching is usually preferable to hard boiling for texture.

    Can you grill frozen chicken breast?

    Possible, but not ideal for thick breasts because the exterior can overcook before the center is ready.

    Can you slow cook frozen chicken breast?

    It is better to thaw chicken first before slow cooking.

    Do you need to thaw chicken before cooking?

    Not for every method. Oven baking, air frying, pressure cooking, and some stovetop methods can work from frozen.

    How do you know frozen chicken is done?

    Check the thickest part with a food thermometer and confirm 165°F (74°C).

    Final Takeaway

    Chicken breast can be cooked from frozen, but the method matters.

    For the easiest results:

    1. Choose a method suited to frozen chicken
    2. Allow extra cooking time
    3. Separate frozen pieces when possible
    4. Do not rely only on appearance or time
    5. Verify the thickest part reaches 165°F (74°C)

    Cooking from frozen is convenient, but thawing first can still give better browning, seasoning, and control for some methods.

  • How to Tenderize Chicken Breast: 6 Methods and When to Use Each

    How to Tenderize Chicken Breast: 6 Methods and When to Use Each

    Tenderizing chicken breast is not one single technique. Different methods solve different problems: pounding helps chicken cook evenly, brining improves moisture retention, baking soda changes surface texture, dairy marinades can soften the exterior, and slicing against the grain improves perceived tenderness.

    The best method depends on what you are cooking and how much time you have.

    Why Chicken Breast Can Feel Tough

    Chicken breast is lean and can become tough when:

    • It is overcooked
    • The breast is very uneven in thickness
    • High heat is used for too long
    • It is sliced with the grain
    • The cooking method does not match the size of the chicken

    Tenderizing methods can help, but none of them can fully compensate for severe overcooking.

    Tenderizing Methods Compared

    MethodBest ForTime NeededMain Effect
    PoundingCutlets, stovetop, grillingMinutesMore even cooking
    BriningGeneral cooking30 min–hoursMoisture retention and seasoning
    Baking soda / velvetingStir-friesShortSofter surface texture
    Yogurt / buttermilkMarinadesHoursGentle texture change + flavor
    Acidic marinadeFlavor-forward dishesShort/moderateSurface texture change
    Slicing against the grainFinished chickenImmediateEasier chewing / perceived tenderness

    1. Pound Chicken Breast to an Even Thickness

    Pounding is useful when one end of the chicken breast is much thicker than the other.

    Place the chicken between sheets of parchment or plastic wrap and gently pound the thickest area until the breast is more even.

    For many quick-cooking methods, around 1/2 to 3/4 inch thick works well.

    Pounding mainly improves even cooking. It can also slightly alter the meat structure, but its biggest benefit is preventing the thin end from drying out before the thick end is done.

    This method works well for:

    • Cutlets
    • Pan-searing
    • Grilling
    • Schnitzel-style dishes
    • Chicken sandwiches

    2. Brine Chicken Breast

    Brining uses salt to help season the chicken and improve moisture retention during cooking.

    A wet brine uses salt dissolved in water, while a dry brine applies salt directly to the chicken.

    Brining can make chicken feel more tender and juicy, but it does not make chicken impossible to overcook.

    For a full guide, see:

    How to Brine Chicken Breast

    Keep chicken refrigerated during brining and follow appropriate timing for the salt concentration you use.

    3. Use Baking Soda for Velveting

    Baking soda is commonly used in some stir-fry preparations because it raises the pH on the surface of the chicken.

    This can reduce how tightly surface proteins contract during quick cooking, giving sliced chicken a softer texture.

    A small amount is enough.

    A practical approach is:

    1. Slice the chicken into thin pieces.
    2. Use a small amount of baking soda.
    3. Let it sit briefly, typically around 15–20 minutes.
    4. Remove excess baking soda carefully according to your recipe method.
    5. Pat dry as needed before cooking.

    Avoid long contact times or heavy amounts because baking soda can affect flavor and texture.

    This technique is best for:

    • Stir-fries
    • Noodle dishes
    • Quick wok cooking
    • Thin chicken strips

    It is less useful for whole chicken breasts.

    4. Use Yogurt or Buttermilk Marinades

    Yogurt and buttermilk contain mild acids that can change proteins near the surface of the chicken.

    They are useful when you want both flavor and a gentler texture.

    Keep the chicken refrigerated while marinating.

    Several hours can work well, but longer is not automatically better. Follow the recipe and avoid unnecessary extended marinating.

    This method works well for:

    • Grilled chicken
    • Baked chicken
    • Spiced chicken
    • Skewers

    5. Use Acidic Marinades Carefully

    Ingredients such as:

    • Lemon juice
    • Lime juice
    • Vinegar

    can affect the surface proteins of chicken.

    Acidic marinades are useful mainly for flavor and a limited surface texture change.

    Too much acid or too much time can make the outside of the chicken unpleasantly soft, chalky, or mushy.

    For strong acidic marinades, shorter marinating periods are usually easier to control.

    Acid does not deeply tenderize the center of a thick chicken breast.

    6. Slice Against the Grain

    Slicing against the grain does not change how much moisture is inside the chicken.

    Instead, it shortens the muscle fibers, making each bite easier to chew.

    Look for the direction the fibers run through the cooked breast, then cut across them rather than parallel to them.

    This is especially useful for:

    • Grilled chicken
    • Roasted chicken
    • Salads
    • Sandwiches
    • Meal prep

    Don’t Overcook the Chicken

    Avoiding overcooking is one of the most important parts of tender chicken.

    Cooking time should only tell you when to start checking doneness.

    For more detail, see:

    How Long to Cook Chicken Breast

    Check the thickest part of the chicken with a food thermometer and cook chicken breast to 165°F (74°C).

    For more detail, see:

    Chicken Breast Internal Temperature

    Even the best tenderizing method cannot fully prevent dryness if chicken is cooked far beyond its safe doneness point.

    Tenderizing vs. Keeping Chicken Juicy

    Tenderness and juiciness are related, but they are not exactly the same thing.

    For example:

    • Pounding improves even cooking
    • Brining helps moisture retention
    • Baking soda changes surface texture
    • Slicing against the grain changes how tender the meat feels
    • Proper temperature control helps prevent dryness

    For a broader guide, see:

    How to Keep Chicken Breast Juicy

    Best Tenderizing Method by Cooking Style

    Stir-fry

    Use baking soda velveting for thinly sliced chicken.

    Pan-seared chicken

    Use pounding to create even thickness.

    Grilled chicken

    Use pounding or brining, depending on the recipe.

    Baked chicken

    Use brining and even thickness for more predictable cooking.

    Meal prep

    Use brining plus careful temperature control, then reheat gently.

    Can You Combine Tenderizing Methods?

    Yes, but more is not always better.

    Simple combinations usually make the most sense.

    Examples:

    • Pound + brine
    • Brine + slice against the grain
    • Yogurt marinade + even thickness

    Avoid stacking multiple aggressive techniques such as strong acid, long marination, and baking soda unless the recipe is specifically designed for it.

    Common Mistakes When Tenderizing Chicken Breast

    Pounding too aggressively

    Flatten gradually instead of smashing the meat very thin.

    Leaving chicken in acidic marinade too long

    Strong acid can damage the surface texture.

    Using too much baking soda

    A small amount is enough.

    Assuming brining prevents overcooking

    Brining helps moisture retention, but temperature control still matters.

    Cutting with the grain

    Long fibers can make cooked chicken feel tougher.

    Ignoring thickness

    Uneven breasts cook unevenly.

    Frequently Asked Questions

    What is the best way to tenderize chicken breast?

    It depends on the dish. Pounding works well for cutlets, brining for general cooking, and baking soda velveting for stir-fries.

    Can you tenderize chicken without a mallet?

    Yes. You can use the bottom of a heavy skillet or rolling pin, or butterfly the breast to make it thinner and more even.

    Does baking soda tenderize chicken?

    Yes. Baking soda raises the surface pH and can make thin chicken pieces softer during quick cooking.

    How long should baking soda stay on chicken?

    A short contact time, often around 15–20 minutes, is practical for thin sliced chicken. Follow the specific recipe you are using.

    Does brining tenderize chicken breast?

    Brining can improve moisture retention and can make the finished chicken feel more tender.

    Does yogurt tenderize chicken?

    Yogurt contains mild acidity that can affect surface proteins and improve texture while adding flavor.

    Does lemon juice tenderize chicken?

    Lemon juice can change surface texture, but too much or too long can make the exterior unpleasant.

    Can you tenderize chicken too long?

    Yes. Long exposure to strong acids or other tenderizing treatments can damage texture.

    Why is my chicken breast still tough?

    Common causes include overcooking, uneven thickness, aggressive heat, and slicing with the grain.

    Should you slice chicken against the grain?

    Yes. Slicing across the muscle fibers generally makes cooked chicken easier to chew.

    Final Takeaway

    The best way to tenderize chicken breast depends on your cooking method.

    Use:

    1. Pounding for even cooking
    2. Brining for moisture retention
    3. Baking soda for stir-fry texture
    4. Yogurt or buttermilk for mild tenderizing and flavor
    5. Acidic marinades carefully and briefly
    6. Slicing against the grain for better eating texture

    Most importantly, avoid overcooking and verify doneness at 165°F (74°C).

  • How to Brine Chicken Breast: Wet Brine, Dry Brine, Ratios Timing

    How to Brine Chicken Breast: Wet Brine, Dry Brine, Ratios Timing

    Brining chicken breast is a simple way to improve seasoning and help the meat retain moisture during cooking. The two main methods are wet brining, which uses salt dissolved in water, and dry brining, which applies salt directly to the chicken.

    The most important variables are salt concentration, brining time, chicken size, and refrigeration. Longer is not always better.

    What Does Brining Do to Chicken Breast?

    Salt changes the way muscle proteins behave during cooking.

    When chicken is brined, salt can help the meat retain more moisture as it cooks and season it more evenly below the surface.

    Brining can also improve tenderness, but it does not make chicken impossible to overcook.

    Brining is only one part of keeping chicken breast moist; thickness, heat control, internal temperature, resting, and reheating also matter. See our guide on How to Keep Chicken Breast Juicy for the full process.

    You still need to control cooking time and verify doneness with a food thermometer.

    Wet Brine vs. Dry Brine

    MethodWhat It UsesBest ForMain Advantage
    Wet brineSalt dissolved in waterQuick, forgiving prepAdds seasoning and moisture
    Dry brineSalt applied directlyBetter surface drying and browningDeep seasoning with less mess

    Both methods can work well. The better choice depends on how much time you have and how you plan to cook the chicken.

    Basic Wet Brine Ratio

    For the most consistent results, it is better to measure salt by weight rather than by volume.

    A practical starting point is a brine around 5% salt by weight relative to the water.

    For example:

    • 1,000 g water
    • 50 g salt

    This is only a starting point. Brine strength and brining time work together, so stronger brines generally need shorter soaking times.

    Salt volume can vary a lot depending on whether you use table salt, Diamond Crystal kosher salt, Morton kosher salt, or another brand. That is why weight is more reliable than tablespoons or cups.

    How to Wet Brine Chicken Breast

    1. Measure the water and salt.
    2. Dissolve the salt completely.
    3. If you warmed any of the water to dissolve the salt, cool the brine completely before adding chicken.
    4. Place the chicken breast in the brine.
    5. Make sure the chicken is fully submerged.
    6. Cover and refrigerate.
    7. Remove the chicken after the appropriate brining time.
    8. Let excess brine drip off and pat the chicken dry with paper towels.
    9. Cook using your preferred method.

    Always brine raw chicken in the refrigerator, not at room temperature.

    How Long to Brine Chicken Breast

    Brining time depends on the size of the chicken breast and the strength of the brine.

    As a practical guide for a moderate wet brine:

    • Thin or small breasts: about 30 minutes to 1 hour
    • Average breasts: about 1 to 2 hours
    • Thick or large breasts: about 2 to 4 hours

    These ranges are not universal. A stronger brine can season chicken faster, while a weaker brine can be used for longer periods.

    If you are unsure, a shorter brining time is usually easier to control.

    Can You Brine Chicken Breast Overnight?

    Yes, but overnight wet brining is usually unnecessary for boneless chicken breasts unless the brine is relatively weak.

    A strong brine combined with a long soaking time can make chicken too salty and may give it an unpleasant texture.

    Dry brining is often better suited to longer refrigerator rest times.

    If you plan to brine overnight, use a lower salt concentration and keep the chicken refrigerated the entire time.

    How to Dry Brine Chicken Breast

    Dry brining is simpler because it does not require water.

    1. Pat the chicken dry.
    2. Season the surface evenly with salt.
    3. Place the chicken on a plate, tray, or rack.
    4. Refrigerate it.
    5. Cook after the desired resting time.

    Dry brining helps season the meat and allows the surface to dry, which can improve browning.

    For boneless chicken breast, a few hours in the refrigerator can be enough to make a noticeable difference.

    How Much Salt Should You Use for a Dry Brine?

    A practical starting point is roughly 0.75% to 1% salt by weight relative to the chicken.

    For example, for 500 g of chicken breast:

    • 0.75% = about 3.75 g salt
    • 1% = about 5 g salt

    Using weight is more reliable than teaspoons because different salts have different crystal sizes and densities.

    If you already use salty seasoning blends or sauces, use less salt in the dry brine.

    Should You Rinse Chicken After Brining?

    No. Rinsing raw chicken is not recommended because splashing water can spread bacteria around the sink and nearby surfaces.

    After wet brining:

    • Remove the chicken from the brine
    • Let excess liquid drip off
    • Pat it dry with paper towels

    Then continue with your recipe.

    For dry-brined chicken, there is normally no need to rinse. If the surface looks too heavily salted, adjust the amount of salt next time rather than rinsing the raw chicken.

    Should You Add Sugar to Chicken Brine?

    Sugar is optional.

    It is not required for brining to work.

    Sugar can:

    • Add mild sweetness
    • Balance salty flavor
    • Encourage faster browning

    Because sugar can brown quickly, be careful with very high-heat methods such as grilling or pan-searing.

    Can You Add Herbs, Garlic, Spices, or Citrus?

    Yes.

    Common additions include:

    • Garlic
    • Peppercorns
    • Bay leaves
    • Rosemary
    • Thyme
    • Citrus peel
    • Spices

    These ingredients mainly contribute flavor.

    Do not assume every aromatic will penetrate deeply into the center of the chicken. Salt is the most important ingredient in the brining process.

    Brining Chicken Breast for Grilling

    Brining can be useful for grilled chicken breast because grilling exposes the surface to strong heat.

    After wet brining, pat the chicken thoroughly dry before grilling.

    Dry surfaces brown better and are less likely to steam.

    Because the chicken is already salted, use less additional salt in your seasoning.

    Brining Chicken Breast for Baking

    Wet-brined or dry-brined chicken can both work well in the oven.

    For wet-brined chicken:

    • Pat it dry first
    • Season carefully
    • Avoid adding too much extra salt

    For dry-brined chicken, the surface is often already well seasoned and ready for other herbs or spices.

    Brining Chicken Breast for Pan-Searing

    For pan-searing, surface dryness is especially important.

    After wet brining, pat the chicken dry very well before adding it to the skillet.

    A dry surface helps browning and reduces splattering.

    Brining Chicken Breast for the Air Fryer

    Brining can also work well with an air fryer.

    Again, dry the surface well after wet brining.

    Because air fryers cook quickly, check the chicken early and verify doneness with a thermometer.

    Brining Does Not Change the Safe Internal Temperature

    Brining affects seasoning and moisture retention, but it does not change the food-safety target.

    Cook chicken breast until the thickest part reaches 165°F (74°C).

    Do not rely only on appearance or cooking time.

    For more detail, see:

    Chicken Breast Internal Temperature

    and

    How Long to Cook Chicken Breast

    Brining vs. Marinating

    Brining and marinating are related but not identical.

    Brining

    The main purpose is salt-based seasoning and moisture retention.

    A wet brine usually contains:

    • Water
    • Salt
    • Optional sugar or aromatics

    A dry brine uses salt directly on the meat.

    Marinating

    A marinade is mainly used to add flavor.

    It may contain:

    • Oil
    • Acid
    • Herbs
    • Spices
    • Garlic
    • Other flavorings

    Some marinades contain enough salt to have a brining effect, so there can be overlap between the two techniques.

    Should You Season Chicken Again After Brining?

    Usually, yes, but use less salt.

    After brining, you can still add:

    • Black pepper
    • Garlic powder
    • Paprika
    • Herbs
    • Other salt-free or low-salt seasonings

    Taste balance matters. Because brined chicken already contains salt, heavy additional salting can make it too salty.

    Common Brining Mistakes

    Using too much salt

    A very strong brine can make chicken overly salty.

    Brining too long

    Long brining times can change the texture and make the chicken taste too salty.

    Brining at room temperature

    Always keep raw chicken refrigerated while brining.

    Rinsing raw chicken

    Avoid rinsing because splashing can spread bacteria.

    Adding lots of salt after brining

    Remember that the chicken has already absorbed salt.

    Cooking without checking temperature

    Brining does not replace thermometer use.

    Frequently Asked Questions

    How long should you brine chicken breast?

    For a moderate wet brine, about 30 minutes to 4 hours is a useful range depending on thickness and brine strength.

    Can you brine chicken breast overnight?

    Yes, but use a weaker brine. Strong wet brines are usually better for shorter soaking times.

    What is the best salt-to-water ratio for chicken brine?

    A practical starting point is around 5% salt by weight relative to the water.

    Can you brine chicken breast too long?

    Yes. Over-brining can make chicken too salty and can negatively affect texture.

    Do you rinse chicken after brining?

    No. Remove it from the brine and pat it dry instead.

    Should you pat chicken dry after brining?

    Yes, especially before grilling, baking, pan-searing, or air frying.

    Can you dry brine chicken breast?

    Yes. Dry brining is an effective way to season chicken and improve surface browning.

    Is sugar necessary in chicken brine?

    No. Sugar is optional and is mainly used for flavor and browning.

    Can you brine frozen chicken breast?

    It is better to thaw chicken safely before brining so the salt can contact the meat evenly and the brining time is easier to control.

    Does brining make chicken breast more tender?

    It can improve tenderness and moisture retention by changing how muscle proteins behave during cooking.

    Should you season chicken again after brining?

    Yes, but reduce or avoid extra salt and focus on herbs and spices.

    Final Takeaway

    Brining chicken breast works best when you control four things:

    1. Salt concentration
    2. Brining time
    3. Refrigeration
    4. Cooking temperature

    Use weight-based measurements when possible, keep raw chicken refrigerated, do not rinse it after brining, and cook the thickest part to 165°F (74°C).