Category: Chicken

  • How to Keep Chicken Breast Juicy: 8 Practical Tips That Work

    How to Keep Chicken Breast Juicy: 8 Practical Tips That Work

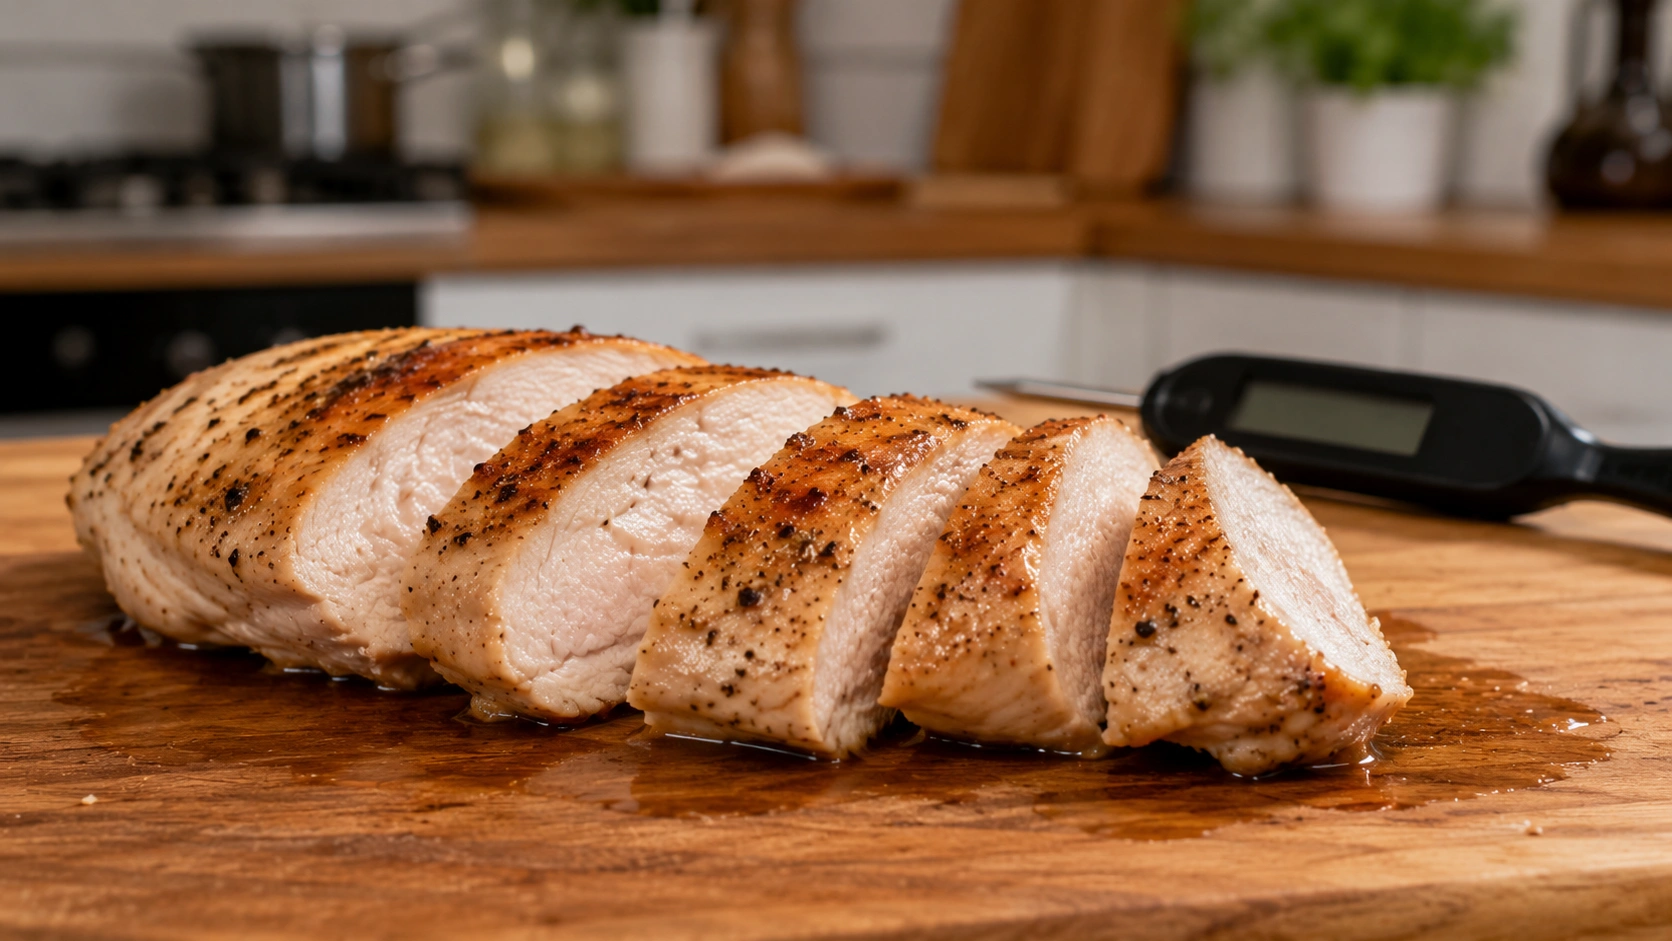
    Keeping chicken breast juicy comes down to controlling thickness, seasoning, heat, internal temperature, resting, and reheating. Because chicken breast is lean, it can dry out quickly if it cooks unevenly or stays on the heat too long. These practical techniques help reduce moisture loss without relying on guesswork.

    Why Chicken Breast Dries Out

    Chicken breast contains less fat than darker cuts such as thighs and drumsticks, so it has less built-in protection against drying out.

    As chicken cooks, its proteins tighten and push out moisture. The longer the meat is exposed to heat, especially after it is fully cooked, the more moisture it can lose.

    Dry chicken is usually caused by one or more of these problems:

    • Uneven thickness
    • Overcooking
    • Excessively aggressive heat
    • Skipping basic prep
    • Poor reheating

    1. Pound Chicken to an Even Thickness

    Chicken breasts are naturally thicker at one end than the other. If you cook them without adjusting the thickness, the thin end can dry out before the thickest part is fully cooked.

    Pounding the breast to a more even thickness helps it cook at a similar rate from edge to center.

    For many quick cooking methods, a thickness of about 1/2 to 3/4 inch works well.

    Another option is to butterfly very large chicken breasts before cooking.

    Even thickness does not guarantee perfectly juicy chicken, but it makes cooking much more predictable.

    2. Salt or Brine Before Cooking

    Salt can improve both flavor and moisture retention.

    Dry brining

    Dry brining simply means salting the chicken in advance and letting it rest in the refrigerator.

    Salt initially draws a small amount of moisture to the surface. Over time, that moisture dissolves the salt and some of it is reabsorbed into the meat.

    The salt also affects muscle proteins in ways that can help the meat retain more moisture during cooking.

    Wet brining

    Wet brining involves soaking chicken in a salt-and-water solution.

    It can also help chicken stay moist, but it requires more preparation and should be done under refrigeration.

    Both dry and wet brining can be useful, but they are not substitutes for proper cooking temperature control.

    3. Don’t Rely on Marinade Alone

    Marinades are useful for adding flavor, but they do not automatically prevent chicken breast from drying out.

    Many marinades contain oil, salt, herbs, spices, citrus, or vinegar. These ingredients mainly affect flavor and the surface of the meat.

    Acidic marinades can change texture if chicken sits in them for too long.

    For juicy chicken, marinade works best as one part of the process, not as the only technique.

    Even thickness, proper heat, and avoiding overcooking matter more.

    4. Use the Right Heat for the Cooking Method

    Different methods need different heat levels.

    Baking

    Moderate to moderately high oven temperatures, often around 375–425°F, can cook chicken breast efficiently without requiring extremely long cooking times.

    Stovetop

    For pan-searing, start with enough heat to brown the surface, then adjust the heat if needed so the center can finish without burning the outside.

    Grilling

    Medium-high heat works well for many chicken breasts, especially when the pieces are relatively even in thickness.

    Thicker breasts may benefit from moving between direct and indirect heat.

    Air fryer

    Air fryers cook quickly because hot air circulates around the food. Check chicken early because small or thin breasts can overcook quickly.

    The exact cooking time depends on thickness, equipment, and starting temperature.

    5. Don’t Overcook Chicken Breast

    Overcooking is one of the most common reasons chicken breast becomes dry.

    Cooking time is useful for estimating when to start checking the chicken, but it should not be treated as proof of doneness.

    Two chicken breasts can take different amounts of time even if they weigh the same, especially if their thicknesses are different.

    For detailed timing guidance, see:

    How Long to Cook Chicken Breast

    6. Check the Thickest Part With a Food Thermometer

    The safest way to verify doneness is with a food thermometer.

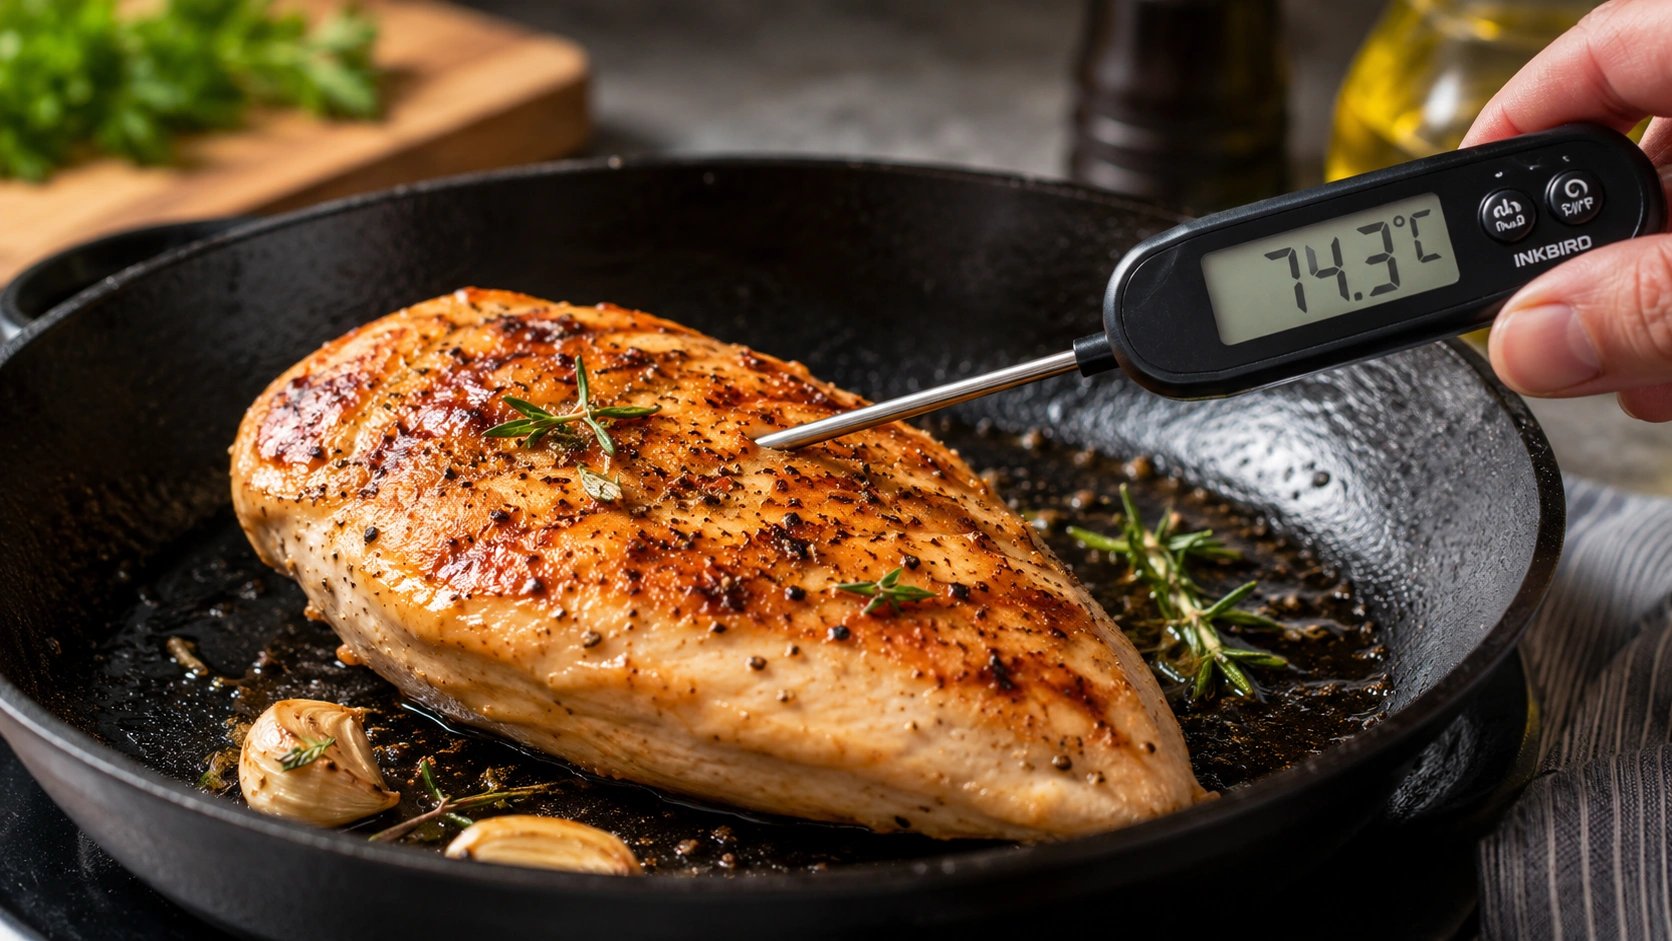
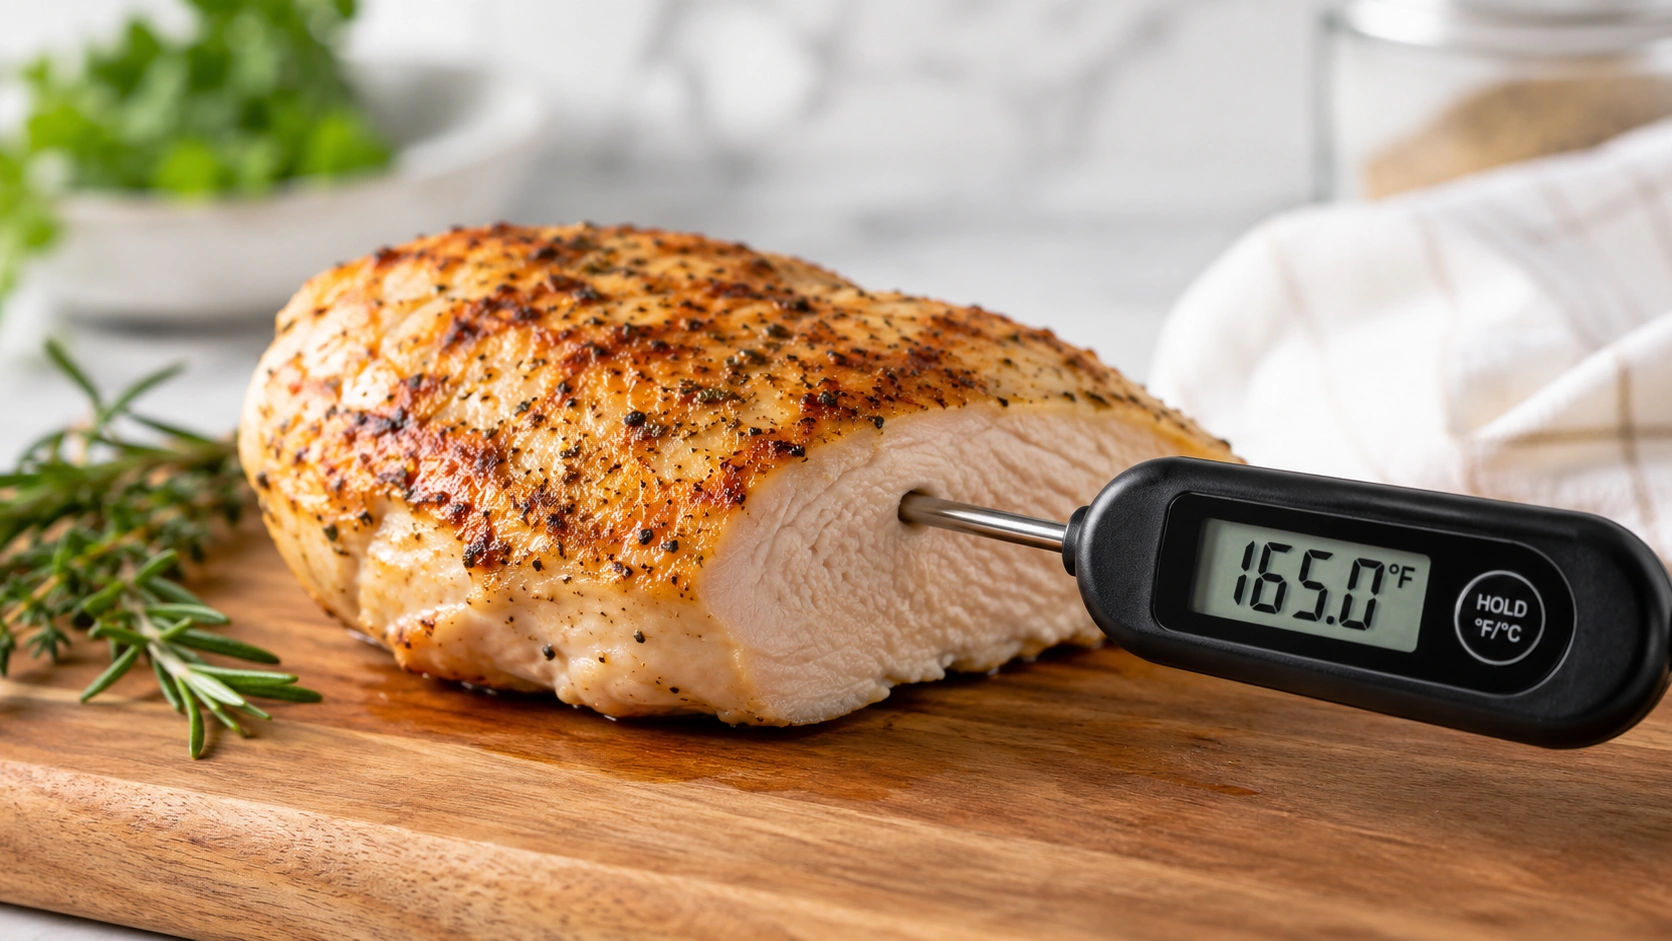
    Insert the thermometer into the thickest part of the chicken breast.

    Cook chicken breast until the thickest part reaches 165°F (74°C).

    Do not rely only on:

    • Cooking time
    • Exterior browning
    • Clear juices
    • Meat color

    Chicken can sometimes remain slightly pink even when safely cooked, while chicken that looks fully white can still require temperature verification.

    For more detail, see:

    Chicken Breast Internal Temperature

    Resting after cooking can improve quality, but do not rely on carryover cooking to bring undercooked chicken to a safe temperature.

    7. Rest Chicken Before Slicing

    Once the chicken has reached a safe internal temperature, remove it from the heat and let it rest for several minutes before slicing.

    Resting can help reduce the amount of moisture that runs out immediately when the chicken is cut.

    A rest of roughly 5 to 10 minutes is practical for many chicken breasts, depending on size and thickness.

    Resting is a quality step, not a substitute for safe cooking.

    8. Slice Against the Grain

    The grain refers to the direction the muscle fibers run through the meat.

    Slicing across those fibers shortens them, which can make chicken feel more tender when you chew it.

    This does not add moisture back into the meat, but it can improve the perceived tenderness of the finished chicken.

    Use a sharp knife and slice only after the chicken has rested.

    How to Keep Chicken Breast Juicy for Meal Prep

    Meal-prep chicken can dry out twice: once during the initial cooking and again during reheating.

    To reduce that problem:

    • Avoid overcooking it the first time
    • Refrigerate cooked chicken promptly
    • Store it in an airtight container
    • Keep a small amount of cooking juice or sauce with it when appropriate
    • Reheat only the portion you need
    • Use gentler reheating methods

    Cooked chicken should generally be refrigerated within 2 hours of cooking, or within 1 hour if the surrounding temperature is above 90°F.

    Properly refrigerated cooked chicken is generally best used within 3 to 4 days.

    How to Reheat Chicken Breast Without Drying It Out

    Gentler reheating methods help reduce additional moisture loss.

    Oven

    Place chicken in an oven-safe dish with a small splash of broth or water.

    Cover it and warm it gently.

    Stovetop

    For sliced chicken, use a covered skillet over low to medium-low heat with a small amount of liquid if needed.

    Microwave

    Use shorter heating intervals rather than one long burst.

    Covering the chicken and adding a small amount of moisture can help.

    When reheating leftovers, heat the chicken thoroughly to 165°F.

    Common Mistakes That Make Chicken Breast Dry

    Cooking breasts of very different thicknesses together

    Thin pieces can overcook while thick pieces are still cooking.

    Guessing doneness from time alone

    Cooking time is only an estimate.

    Using very high heat for too long

    Strong heat can brown the outside quickly while the center still needs time to cook.

    Cutting immediately after cooking

    Allow the chicken to rest for several minutes first.

    Assuming marinade guarantees moisture

    Marinade adds flavor but cannot prevent overcooking.

    Reheating repeatedly

    Each heating cycle can cause additional moisture loss.

    Frequently Asked Questions

    Why is my chicken breast always dry?

    The most common causes are overcooking and uneven thickness. Use a thermometer and make the breast more uniform before cooking.

    How do restaurants keep chicken breast juicy?

    Common techniques include even portioning, salting or brining, careful temperature control, and avoiding unnecessary overcooking.

    Does brining make chicken breast juicier?

    Brining can help chicken retain moisture during cooking and also improves seasoning.

    Does marinating chicken keep it moist?

    A marinade can contribute flavor and sometimes affect texture, but it does not guarantee juicy chicken.

    Should you cover chicken breast while baking?

    It depends on the recipe and desired surface texture. Covering can reduce surface drying, while uncovered cooking can promote browning.

    Is it better to cook chicken breast fast or slow?

    There is no single best speed. The right approach depends on thickness and method. The goal is to cook the center safely without exposing the meat to more heat than necessary.

    How do you keep chicken breast moist in the oven?

    Use even-sized pieces, avoid overcooking, check the thickest part with a thermometer, and rest the chicken before slicing.

    How do you keep grilled chicken breast juicy?

    Even thickness, controlled grill heat, and careful temperature checking are the most important steps.

    How do you keep chicken breast juicy for meal prep?

    Avoid overcooking it initially, store it properly, and reheat gently with a little moisture when needed.

    Should chicken breast rest before slicing?

    Yes. Resting for several minutes can help reduce moisture loss when the chicken is cut.

    Final Takeaway

    Juicy chicken breast is not the result of one trick.

    The most reliable process is:

    1. Make the chicken an even thickness
    2. Salt or brine when appropriate
    3. Use suitable heat
    4. Avoid unnecessary overcooking
    5. Check the thickest part with a thermometer
    6. Reach 165°F (74°C)
    7. Rest before slicing
    8. Reheat gently

    When these steps work together, chicken breast is much easier to cook consistently without becoming dry or tough.
  • How Long to Cook Chicken Breast: Times by Method and Thickness

    How Long to Cook Chicken Breast: Times by Method and Thickness

    Chicken breast cooking time depends on its thickness, cooking method, and whether it starts fresh, thawed, or frozen. The times below are practical estimates, but cooking time alone cannot confirm doneness. Always check the thickest part of the chicken with a food thermometer and cook poultry to 165°F (74°C).

    Quick Chicken Breast Cooking Times Chart

    MethodThickness / SizeHeat / TemperatureApprox. Time
    Baking1-inch breast375–400°F20–25 minutes
    Baking1.5-inch breast375–400°F25–30 minutes
    Pan-searing1/2-inch, poundedMedium-high4–5 minutes per side
    Pan-searing1-inch breastMedium7–8 minutes per side
    Grilling1-inch breastMedium-high, about 400–450°F10–14 minutes total
    Grilling1.5-inch breastMedium-high, about 400–450°F14–18 minutes total
    Air fryerSmall to medium breast375–400°FAbout 8–14 minutes
    PoachingAverage boneless breastGentle simmerAbout 10–15 minutes after liquid reaches a gentle simmer
    Instant PotFresh boneless breastHigh pressureAbout 8–10 minutes, plus pressure release
    Instant PotFrozen boneless breastHigh pressureAbout 10–15 minutes, depending on thickness

    Important: These times are estimates, not doneness guarantees. Equipment, breast size, starting temperature, and thickness can all change the actual cooking time.

    How Thickness Changes Cooking Time

    Thickness is one of the biggest factors affecting how long chicken breast takes to cook.

    A thin breast cooks much faster than a thick one because heat reaches the center more quickly. Thick chicken breasts can develop dry edges before the center is fully cooked if the thickness is very uneven.

    For more even cooking, pound the breast to a consistent thickness before cooking. A thickness of roughly 1/2 to 3/4 inch is useful for many stovetop and quick-cooking methods.

    Very large chicken breasts can also be butterflied or cut into smaller pieces to help them cook more evenly.

    How Long to Bake Chicken Breast

    Baking time depends heavily on thickness and oven temperature.

    As a general guide:

    • At 350°F, chicken breast usually cooks more slowly and may need roughly 25–35 minutes depending on thickness.
    • At 375°F, many average boneless breasts take around 20–30 minutes.
    • At 400°F, an average 1-inch breast may take around 20–25 minutes.
    • At 425°F, thinner or average breasts may cook in roughly 18–22 minutes.
    • Always check the internal temperature rather than relying on oven time alone.

    A dedicated baked chicken breast guide can go deeper into seasoning, oven setup, browning, and moisture retention.

    How Long to Cook Chicken Breast on the Stove

    Thin or evenly pounded chicken breasts are easiest to cook on the stovetop.

    A breast around 1/2 inch thick may take about 4–5 minutes per side over medium-high heat.

    A breast closer to 1 inch thick may need roughly 7–8 minutes per side, usually with the heat reduced slightly after browning.

    Pan temperature, skillet material, and breast thickness can all affect the timing.

    How Long to Grill Chicken Breast

    For boneless, skinless chicken breasts, medium-high grill heat works well.

    An average breast around 1 inch thick often takes about 10–14 minutes total, turning during cooking.

    A thicker breast around 1.5 inches may need closer to 14–18 minutes.

    Two-zone grilling can help with thick breasts: brown them over direct heat, then move them to indirect heat to finish more gently.

    Do not remove chicken early and rely on carryover cooking to make it safe. Confirm that the thickest part has reached 165°F (74°C) before removing it from the grill.

    How Long to Air Fry Chicken Breast

    Air fryer cooking time varies by breast size and thickness.

    A rough guide:

    • Small breasts: about 7–10 minutes
    • Medium breasts: about 10–12 minutes
    • Large breasts: about 12–16 minutes

    Many air fryers cook chicken breast well around 375–400°F.


    Because air fryer models vary, check early and confirm doneness with a thermometer.

    How Long to Poach Chicken Breast

    For poaching, place chicken in liquid and bring it to a gentle simmer rather than a hard boil.

    Average boneless chicken breasts often need around 10–15 minutes once the liquid is gently simmering, but thick pieces may take longer.

    Check the center with a thermometer before serving.

    How Long to Cook Chicken Breast in the Instant Pot

    Pressure-cooking time depends on whether the chicken is fresh or frozen and how thick the pieces are.

    Fresh boneless breasts often need roughly 8–10 minutes at high pressure.

    Frozen breasts may need around 10–15 minutes, depending on thickness and whether they are frozen together or separately.

    Remember that total time is longer than the programmed cook time because the cooker also needs time to build and release pressure.

    How Long to Cook Chicken Breast From Frozen

    Chicken can be cooked from frozen using suitable methods such as the oven or stovetop, although it generally takes longer than thawed chicken.

    A common guideline is to allow roughly 50% more cooking time than you would for thawed chicken.

    For example, if a thawed breast normally takes around 20 minutes in the oven, a frozen one may need closer to 30 minutes.

    Avoid relying on cooking time alone. Check the thickest part and make sure it reaches 165°F (74°C).

    Cooking Time vs. Internal Temperature

    Cooking time tells you approximately when to start checking the chicken.

    Internal temperature tells you whether it is actually done.

    Chicken breasts of the same weight can still cook at different speeds because of differences in thickness, starting temperature, cookware, oven calibration, grill heat, and appliance performance.

    For the safest and most reliable result,Chicken Breast Internal Temperature insert a food thermometer into the thickest part of the breast and confirm a temperature of 165°F (74°C).

    Your existing internal-temperature guide should be the main internal link from this section.

    Should You Rest Chicken Breast After Cooking?

    Yes. Resting is useful for texture and moisture retention.

    Once chicken has reached a safe internal temperature, remove it from the heat and let it rest for several minutes before slicing.

    Resting can help reduce moisture loss when the meat is cut.

    It should be treated as a quality step, not as a substitute for reaching a safe cooking temperature.

    Frequently Asked Questions

    How long does chicken breast take to cook?

    Most boneless chicken breasts take somewhere between about 10 and 30 minutes, depending on thickness and cooking method.

    How long do thin chicken breasts take?

    Thin or pounded chicken breasts can cook in under 10 minutes on the stovetop and often cook faster in the oven or air fryer than full-thickness breasts.

    How long do thick chicken breasts take?

    Thick breasts can take 25–30 minutes or longer in the oven and usually need more careful heat management on the grill or stovetop.

    How long do you bake chicken breast at 350°F?

    A typical boneless chicken breast may need around 25–35 minutes, depending on thickness.

    How long do you bake chicken breast at 375°F?

    Many average boneless breasts take roughly 20–30 minutes.

    How long do you bake chicken breast at 400°F?

    A roughly 1-inch-thick breast often takes around 20–25 minutes.

    How long do you bake chicken breast at 425°F?

    Average boneless breasts may take roughly 18–22 minutes, though thick pieces can need longer.

    Does boneless chicken cook faster than bone-in chicken?

    Usually, yes. Bone-in pieces generally take longer because they are often larger and heat moves through them differently.

    Does frozen chicken breast take longer to cook?

    Yes. Frozen chicken generally needs more cooking time than thawed chicken.

    Can you tell when chicken is done by time alone?

    No. Cooking times are only estimates. Use a food thermometer and check the thickest part for 165°F (74°C).

    Final Takeaway

    There is no single universal cooking time for chicken breast. Thickness, cooking method, starting temperature, and equipment all matter.

    Use cooking-time ranges to know when to start checking, then confirm doneness with a food thermometer. For poultry, the practical consumer target is 165°F (74°C) in the thickest part.

  • Chicken Breast Internal Temperature: When Is It Safe and Done?

    Chicken Breast Internal Temperature: When Is It Safe and Done?

    Cooking chicken breast safely comes down to one reliable check: internal temperature. Appearance and cooking time can be useful clues, but a food thermometer gives you the clearest way to confirm doneness. This guide explains the safe temperature for chicken breast, where to place the thermometer, and how to avoid overcooking while getting reliable results.

    When you get these principles right, you can cook chicken breast with more confidence while improving both texture and consistency.

    The Golden Rule: USDA Safe Minimum Temperature

    The United States Department of Agriculture (USDA) recommends a safe minimum internal temperature of 165°F (74°C) for poultry. This applies whether you’re cooking a whole bird, individual pieces such as chicken breasts, or ground poultry.

    Raw chicken can contain harmful bacteria such as Salmonella and Campylobacter. Cooking chicken breast to the recommended internal temperature helps reduce the risk from harmful foodborne bacteria when proper food-safety practices are followed.

    Looking at the chicken or relying only on cooking time is not enough to confirm doneness. A properly functioning food thermometer gives you a more reliable way to check that the thickest part of the chicken has reached the recommended temperature.

    Mastering Your Meat Thermometer for Accuracy

    When checking chicken breast, insert the thermometer probe into the thickest part of the meat, positioning the tip near the center. Avoid touching bone, if present, because it can affect the reading.

    An instant-read digital thermometer works particularly well for chicken breast because it provides a reading quickly. This allows you to check the temperature without keeping the oven door open or leaving the chicken over direct heat longer than necessary.

    Check your thermometer periodically to make sure it is reading accurately. One common method is the ice-water test: fill a glass with plenty of ice, add cold water, stir, and insert the probe without touching the sides or bottom. The reading should be close to 32°F (0°C). Follow the manufacturer’s instructions if calibration is needed.

    Beyond Color and Time: True Doneness Indicators

    Color alone is not a reliable way to determine whether chicken is safely cooked. Chicken can sometimes retain a pink color even after reaching the recommended internal temperature, while chicken that appears fully cooked may still be unsafe if it has not reached the proper temperature.

    Cooking time is also only a guideline. Breast thickness, starting temperature, cooking method, and the actual temperature of your oven, grill, or pan can all affect how quickly chicken cooks.

    The thermometer should therefore be your primary tool for confirming doneness.

    Carryover Cooking: What Happens After Chicken Leaves the Heat

    Carryover cooking means that chicken can continue to warm slightly after it is removed from the heat. The amount of temperature rise is not fixed; it can vary depending on the size and thickness of the chicken breast, the cooking method, and how hot the exterior is when cooking stops.

    For straightforward home food-safety guidance, use a food thermometer to verify that the thickest part of the chicken breast reaches 165°F (74°C). Do not rely on carryover cooking alone to bring undercooked chicken up to a safe temperature.

    Resting the chicken for a few minutes before slicing can still be useful because it gives the meat time to settle and may help reduce moisture loss when it is cut. Resting should be treated as a quality step, not as a substitute for confirming the final internal temperature with a thermometer.

    How to Keep Chicken Breast Juicy

    Chicken breasts are often thicker on one end than the other. That uneven shape can cause the thinner portion to overcook before the thickest part reaches the recommended internal temperature.

    Pounding the chicken breast to a more even thickness can help it cook more consistently. If you need a detailed walkthrough, see How to Pound Chicken Breast Evenly.

    To avoid overcooking, start checking the chicken’s temperature before you expect it to be finished. Insert an instant-read thermometer into the thickest part of the breast and confirm that it reaches 165°F (74°C). Once it reaches that temperature, remove the chicken from the heat and let it rest briefly before slicing.

    Brining can also help chicken retain moisture and improve seasoning. For a complete guide, see How to Brine Chicken Breast.

    Marinades can add flavor as well, although their effect on texture depends on the ingredients and how long the chicken is marinated.

    Chicken Breast Internal Temperature FAQs

    Is slightly pink chicken breast safe?

    Color alone cannot tell you whether chicken is safe. Chicken can sometimes remain slightly pink after cooking, while chicken that looks fully white may still be undercooked. The most reliable way to confirm doneness is to use a food thermometer and check that the thickest part has reached 165°F (74°C).

    Does thickness or cooking method change the target temperature?

    No. The recommended safe minimum internal temperature remains 165°F (74°C). Thickness and cooking method affect how long the chicken takes to reach that temperature, not the final target itself.

    How do I check chicken breast cooked from frozen?

    Chicken breast can be cooked from frozen using appropriate cooking methods, although it will generally take longer than thawed chicken. Check the thickest part with a food thermometer and confirm that it reaches 165°F (74°C).

    For more detail, see Can You Cook Chicken Breast From Frozen?

    Where should I place the thermometer in bone-in chicken?

    Insert the thermometer into the thickest part of the meat without touching the bone. For larger poultry cuts or whole birds, check more than one location when necessary to make sure the thickest areas have reached the recommended internal temperature.